Navigation
Install the app
How to install the app on iOS
Follow along with the video below to see how to install our site as a web app on your home screen.
Note: This feature may not be available in some browsers.
More options
You are using an out of date browser. It may not display this or other websites correctly.
You should upgrade or use an alternative browser.
You should upgrade or use an alternative browser.
88 Blazer Trike
- Thread starter Fowler
- Start date
vwbug72501
700+ Posts
The other thing to remember when using any kind of hole saw is to use a drill press (or mill drill) with a stout quill assembly and position your work so the quill has to move out of the head as little as possible to do the job. The rigidity is in the head support. I've even had success with the Milwaukee hole saw (designed for metal applications) for the occasional one-off hole.
You might look at seal like my 07 Vulcan uses in the stem.It basically gets tightened between the bearing and top plate.The rotation is between the seal and neck.The seal lips are on the outside of the seal.
Fowler
◇BUILD IT BOB◇
- Thread starter
- #365
Bob,
I've been following this thread and had an idea that I thought I'd throw out there.
View attachment 52274
You could add an oil seal to the top and bottom Triple Tree plates by welding on a piece of tubing with an ID equal to the OD of the seal you would use and turn and polish the OD of the neck piece equal to the ID of the seal. The picture is a little blurry, sorry.
Looks like this would seal up the whole neck bearing area.
Never tried this. Just a thought.
Looking back I like this ides the most (with some modifications)
I would actually have the bottom ring welded to the neck with the opening at the bottom
Fowler
◇BUILD IT BOB◇
- Thread starter
- #366
Tomorrow I get to work on the trike in the morning but have to paint in the afternoon.
Will start with my plates
I need to drill holes through the top plate at the X, no problem as long as I get them in the correct place
I also need to take a 2" square notch out of each side of the bottom plate
Cutting the sides of the notch will not be an issue. Its the inside cut that will be a pain.

Question????
On the neck itself do I put a grease fitting? I did not do that on my last 2 trikes.
Will start with my plates
I need to drill holes through the top plate at the X, no problem as long as I get them in the correct place
I also need to take a 2" square notch out of each side of the bottom plate
Cutting the sides of the notch will not be an issue. Its the inside cut that will be a pain.
Question????
On the neck itself do I put a grease fitting? I did not do that on my last 2 trikes.
LarryA
500+ Posts
I did not. actually never gave it a thought....just saying you wanted to...would you need 2 internal seals ,stem bolt to neck id? otherwise filling entire area with grease seems wasteful?
Fowler
◇BUILD IT BOB◇
- Thread starter
- #368
I did not. actually never gave it a thought....just saying you wanted to...would you need 2 internal seals ,stem bolt to neck id? otherwise filling entire area with grease seems wasteful?
right without those seals it would leak out the bottom on hot days
Not sure on the type of seals I will use if any yet
Fowler
◇BUILD IT BOB◇
- Thread starter
- #369
it was easy to cut

tacked in place, Need to mark the location for the pivot holes. Then take the down tubes back off and cut the holes.
Will go 1 inch below the axle height as you guys recommended
Both tubes are at 35 degrees same as the neck
the outside width on top and bottom measures 14"
Now that I made it wider I am not sure my axle bolt will be long enough. If I need to I will buy a new one.
Fowler
◇BUILD IT BOB◇
- Thread starter
- #370
I know I ask a lot of questions
Next question.....
I plan to split my down tubes like this guys did.
I was planning on putting a bronze bushing on the bolts for the rockers to ride on so to stop the steel and steel wear
But what about the sides. Wont the rockers wear on the sides of the tubes?

Next question.....
I plan to split my down tubes like this guys did.
I was planning on putting a bronze bushing on the bolts for the rockers to ride on so to stop the steel and steel wear
But what about the sides. Wont the rockers wear on the sides of the tubes?
LarryA
500+ Posts
maybe use bronze/ nylon/ teflon/etc. shouldered bushings...or shouldered spacers? to keep from steel to steel interference.
or plastic /bronze flat washers that fit over the pivot bushings to take up the side clearance.
or plastic /bronze flat washers that fit over the pivot bushings to take up the side clearance.
Fowler
◇BUILD IT BOB◇
- Thread starter
- #372
maybe use bronze/ nylon/ teflon/etc. shouldered bushings...or shouldered spacers? to keep from steel to steel interference.
or plastic /bronze flat washers that fit over the pivot bushings to take up the side clearance.
That was what I was thinking but I see forks built without them (like the one in the pitcher) and was wondering if they are needed.
LarryA
500+ Posts
All I had for washers was a dab of grease......probably long gone....LOL
vwbug72501
700+ Posts
Here's the question: How many hundreds of thousands of miles do you plan to ride? Thrust washers will add longevity.
I'm assuming that you are planning to plug the bottom of the tubes where the rockers will pivot. What are the expected maximum angles of deflection for the rockers? Probably won't translate to too much metal to metal movement at the rocker / down tube junction. Actually the rocker bushings and bolts should take the side loads and minimize the side deflection. You can probably go back after the assembly is completed and clearance the slots slightly to minimize the contact with no loss of strength.
Google bronze thrust washers and see what's available. You could incorporate the additional thickness of 2 washers in your design and fabrication if you're really concerned.
Fowler
◇BUILD IT BOB◇
- Thread starter
- #375
I was just looking at a few designs and not a lot of them do not use bushings. (some do)
1 I seen has no bushings but does have a grease fitting on each rocker at the pivot point.
I am kind of torn between what I want to do. I don't mind putting in bronze bushings but if they are not needed I would rather not. I want to keep it as simple as I can and still have a reliable front end.
I need to do some more research before I move foward on that
I was just looking at a few designs and not a lot of them do not use bushings. (some do)
1 I seen has no bushings but does have a grease fitting on each rocker at the pivot point.
I am kind of torn between what I want to do. I don't mind putting in bronze bushings but if they are not needed I would rather not. I want to keep it as simple as I can and still have a reliable front end.
I need to do some more research before I move foward on that
for me the bushing worth the effort...steel on steel something will wear.. bronze or similar will wear before the steel... an can be replaced
peteg59
Meme Master
My $.02 Bob:
The advantage of having a front end with bushings is that the "parent" metal in theory won't suffer any wear coming from the natural shocks/normal travel from the road. (provided you monitor it occasionally, and don't push it too far after the bushings wear points)
Without bushings the rocker and/or whatever component that the rockers are mounted to could also both wear unevenly, (egg shaping the mount holes), depending on how often you ride it.
You could build it without bushings and see how it wears after a season or so depending how often and miles you ride?
If you plan on riding the trike other than taking out out to show on occasion, and want to reduce the maintenance downtime in having to "rebuild" the parts you made, bite the bullet now and go bronze bushings with zerk fittings for occasional lubrication...
LarryA
500+ Posts
every time the front end hits tar strips, rumble strips, washboards if on gravel roads, I wonder.....how are my bushings holding up....glad I have them. got a bunch of extras in the drawer too.
Fowler
◇BUILD IT BOB◇
- Thread starter
- #381
I received the package that should have been my thrust washers but they sent me the wrong things. They sent me oil seals by mistake
Did some more work on the forks.
Here I welded the top part of the bottom plate, drilled the holes for the pivot point and cut the down tubes to the right length. (am I saying that correctly are they called down tubes?)

First pass with the cutoff wheel making the rockers

Cut in half now need to weld in the 1 side

welded the side plate on. 1/4" thick. Notice the discoloration. They both warped when I welded them. I had to heat them and flatten them back out again

Side View

Need to drill the hols for the pivot point and the axle and weld in the inserts.
To Hot to work out there anymore today.
Did some more work on the forks.
Here I welded the top part of the bottom plate, drilled the holes for the pivot point and cut the down tubes to the right length. (am I saying that correctly are they called down tubes?)
First pass with the cutoff wheel making the rockers
Cut in half now need to weld in the 1 side
welded the side plate on. 1/4" thick. Notice the discoloration. They both warped when I welded them. I had to heat them and flatten them back out again
Side View
Need to drill the hols for the pivot point and the axle and weld in the inserts.
To Hot to work out there anymore today.
LarryA
500+ Posts
making headway....looking good!......I just call them fork tubes. I have heard the term down tubes used to describe the 2 tubes running from the neck tube down and bending rearward to make the engine cradle on a motorcycle. There may be other names for the so called fork tubes?
I received the package that should have been my thrust washers but they sent me the wrong things. They sent me oil seals by mistake
Did some more work on the forks.
Here I welded the top part of the bottom plate, drilled the holes for the pivot point and cut the down tubes to the right length. (am I saying that correctly are they called down tubes?)
View attachment 61256
First pass with the cutoff wheel making the rockers
View attachment 61257
Cut in half now need to weld in the 1 side
View attachment 61258
welded the side plate on. 1/4" thick. Notice the discoloration. They both warped when I welded them. I had to heat them and flatten them back out again
View attachment 61259
Side View
View attachment 61260
Need to drill the hols for the pivot point and the axle and weld in the inserts.
To Hot to work out there anymore today.
silly question...why cut tubing in 1/2 an weld bar ??
Fowler
◇BUILD IT BOB◇
- Thread starter
- #384
The 1/2 tubes are for my Rockers. They will go all the way back behind the tire and around the back.
I do not know the correct name for them but we have been calling them wrap arounds
I did not want to use use the complete 2x2 bar
I could have used something smaller like the 1/2 inch stuff I have but I do not have enough to make the complete wrap around and someone said they used 1/2 for that and it twisted some .
I do plan to weld in some inserts for the Pivot point and axle
I know its a little more heavy duty than I need but I like how its turning out so far.
This coming weekend I hope to have the inserts welded in and the bars mounted with the tires on.
Then I will need to finish the wraparound part and make brackets for the shocks
The 1/2 tubes are for my Rockers. They will go all the way back behind the tire and around the back.
I do not know the correct name for them but we have been calling them wrap arounds
I did not want to use use the complete 2x2 bar
I could have used something smaller like the 1/2 inch stuff I have but I do not have enough to make the complete wrap around and someone said they used 1/2 for that and it twisted some .
I do plan to weld in some inserts for the Pivot point and axle
I know its a little more heavy duty than I need but I like how its turning out so far.
This coming weekend I hope to have the inserts welded in and the bars mounted with the tires on.
Then I will need to finish the wraparound part and make brackets for the shocks
ah.... actually the most "twist resistant" is a pcs of pipe or tubing .. square or rectangle.. a pc of 1" 1/8 wall tube would be plenty strong for a connector.... a pcs of tube cut in 1/2 (channel) is pretty week as is a pc of bar stock but the way u welded then u should be ok basically u made a pc of tubing just not big in on direction
Fowler
◇BUILD IT BOB◇
- Thread starter
- #386
Started cutting the notches

Notches cut and reinforced. I welded 1/4 flat bar inside each side of each leg. It goes up 2 inches from the cutout. I welded all the way down the cutout and I reached up and welded inside as best I could. I am thinking of drilling holes in the tubes then weld the inside flat bar to the tube. (If I would have thought of it before hand I would have drilled the holes first)
That makes 7/16 on each side of each leg. If needed I can weld another 1/4 on the outside of each side of each leg.
Once I know I have the notches high enough I will weld up the top holes (sealing off the legs).

Fitted in place but only using PVC as axle spacers for now. I only have enough of the steel spacer left to make them once. So I have to get them right the first time So I am trying to get it correct in PVC first then will cut the steel spacers
The rockers are riding on a bronze Oilite bushing and has a bronze Oilite thrush washer on each side of each rocker
The bolt at the pivot point is a 5/8 grade 8 bolt. Had to buy extra long for the shoulder of the bolt would come all the way through and no threads are in the bushings. I will cut them down later

Do not have it centered yet. Once I have everything in place correctly I will shape the wrap around in back of the tire

Dropped something, bent down picked it up but when I came back up I hit my head on hot steel

Notches cut and reinforced. I welded 1/4 flat bar inside each side of each leg. It goes up 2 inches from the cutout. I welded all the way down the cutout and I reached up and welded inside as best I could. I am thinking of drilling holes in the tubes then weld the inside flat bar to the tube. (If I would have thought of it before hand I would have drilled the holes first)
That makes 7/16 on each side of each leg. If needed I can weld another 1/4 on the outside of each side of each leg.
Once I know I have the notches high enough I will weld up the top holes (sealing off the legs).
Fitted in place but only using PVC as axle spacers for now. I only have enough of the steel spacer left to make them once. So I have to get them right the first time So I am trying to get it correct in PVC first then will cut the steel spacers
The rockers are riding on a bronze Oilite bushing and has a bronze Oilite thrush washer on each side of each rocker
The bolt at the pivot point is a 5/8 grade 8 bolt. Had to buy extra long for the shoulder of the bolt would come all the way through and no threads are in the bushings. I will cut them down later
Do not have it centered yet. Once I have everything in place correctly I will shape the wrap around in back of the tire
Dropped something, bent down picked it up but when I came back up I hit my head on hot steel
LarryA
500+ Posts
Coming along nicely...... bummer about the burn. Can't remember all the cuts/bruises/scrapes and burns a person accumulates on these projects but its part of the business. I quess you got some skin in the game already!

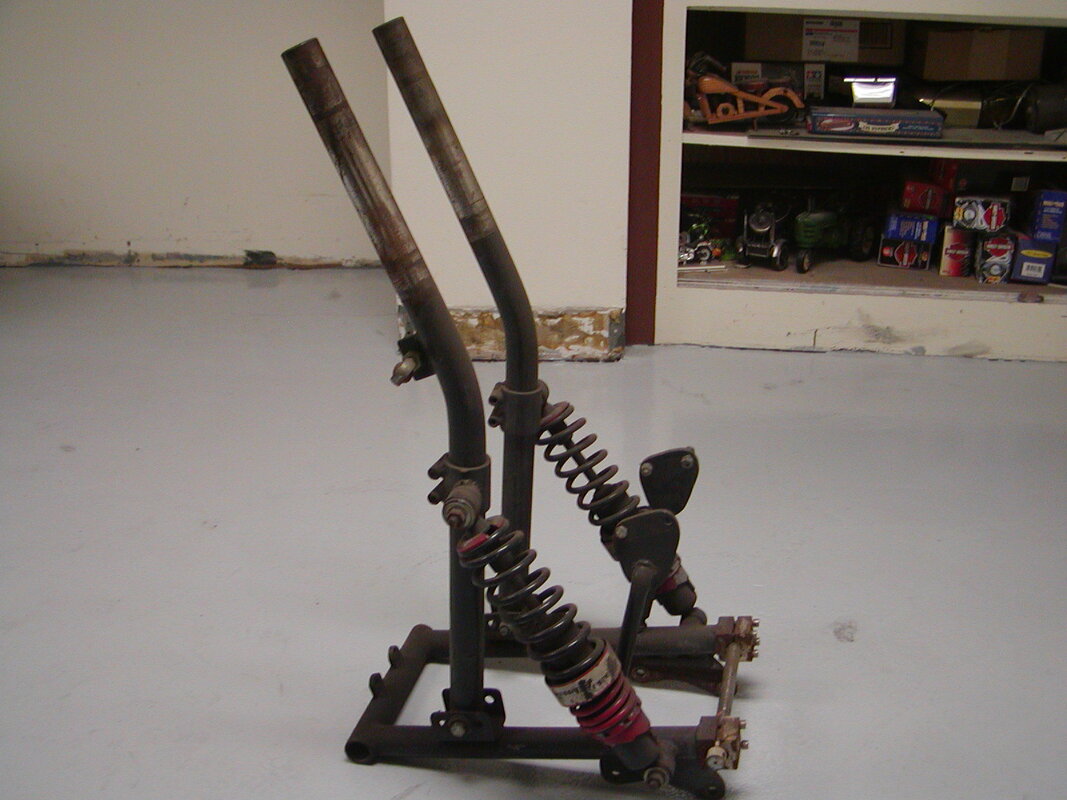
Steel spacers made to replace the PVC ones
Now need to mount shocks.
Bottom mount will be 1 inch behind axle as you guys suggested
This will be a next weekend job (if I have time)
View attachment 61861
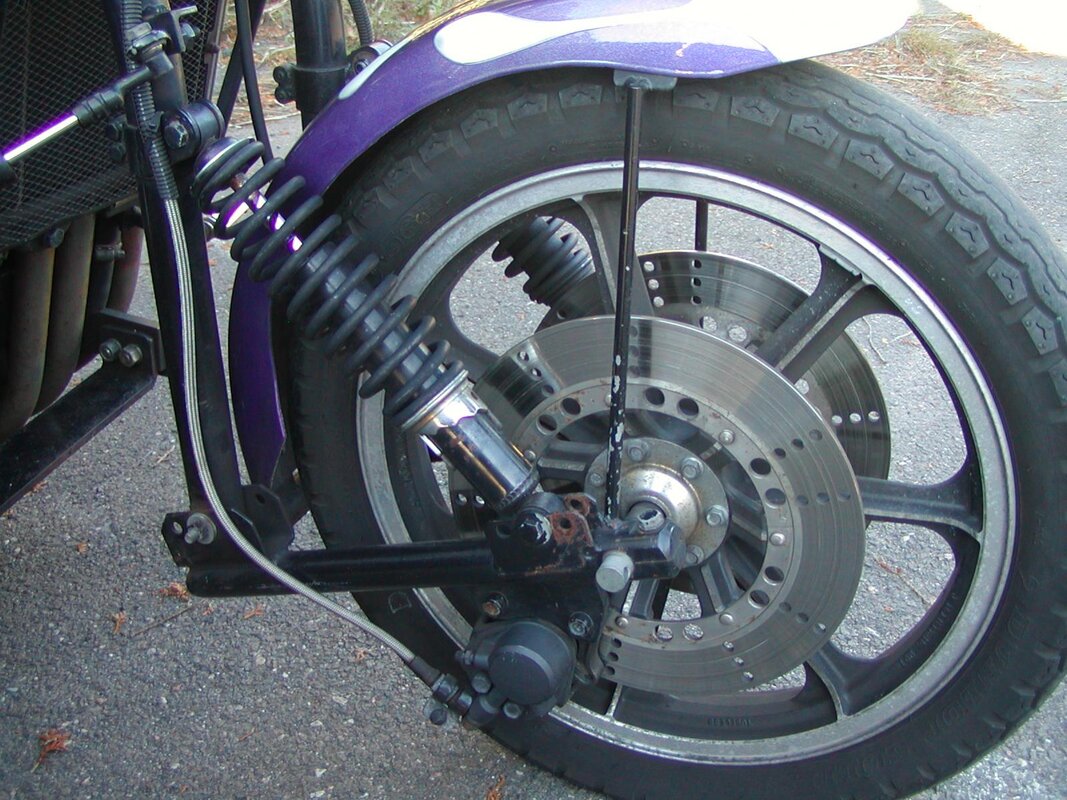
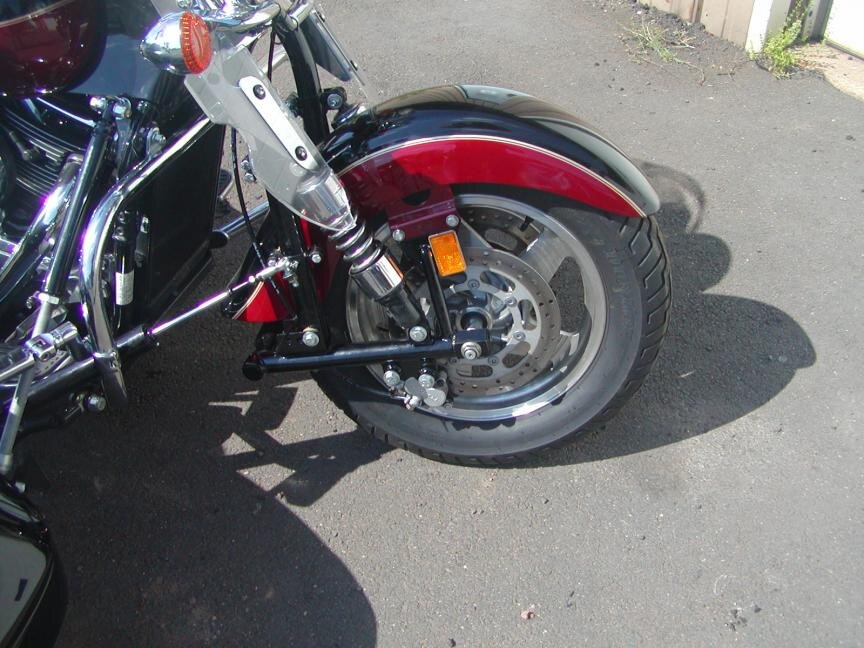
i have found with the weight on the front end the pivot wants to be about an inch below the axle.. i usually make the top and bottom shock mount adjustable top is a pinch clamp bottom several holes.... ironically dont think i have ever changed them from the 1st set up on the purple bike i had used the extra set of holes for a tow bar
Attachments
Similar threads
- Sticky
- Replies
- 1
- Views
- 593
- Replies
- 3
- Views
- 5,634


