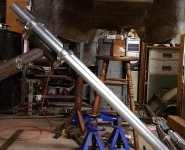
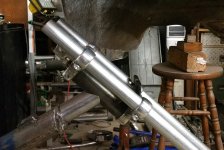
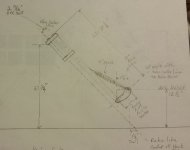
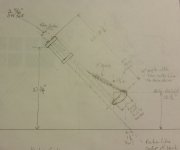
My Trike

Good morning to everyone, well I did get a lot done and she is back together. My first setting of +1-1 on the spring plates was not bad, but not perfect either as I still had some negative camber.

So I thought to myself and the charts, we decided we need a minimum amount of torque, this would be achieved at 2 inner splines to the left, an than countered with 2 outer splines to the right. I originally thought of 3 on the outside, it was 1 to much, so +2-2 is what it is. Air shocks are used to carry the load and help add some tension to rear suspension.

Am I correct at how I just said it ????

Right side needs to get button up, than I can roll it out for pic's and check out and see how all really looks. Working in a tight garage has it draw backs for sure.

Everyone have a great day today, may the sun shine on all our faces.
 
where am I ?

So I have been doing this and that, mainly wanting it to run right, and for some reason I keep thinking to much fuel was getting down into the oil, plus it was just disappearing to fast from the tank.

So If I have to remove the body, well that meant the gas tank first, so I did up 2 gallons of gas in the portable can, I do like to hear it run, plus still fine tuning carbs.

I put a piece of tape on the can, my start level, and I mark the level after I stopped the engine, plus dated it. I want to see how fast it really goes, and yes I did another oil change, cheap stuff right now until I know I am not ruining it with to much fuel.

Okay so I do have a older pic, before I cut off the side lights, and when you look at the front end and body it does not look right.

20180416_105534 (1).jpg

and the side view in that same position.

20180416_105508.jpg

The negative camber on the rear right is bad, looks to be a bent trailing arm at the bearing hub. I have been told a few ways to try to straighten them, because the left has the bend starting also. Could see if a nice used pair are at the junk yard or some VW yard. Means I will have to weld new fender mounting flanges, maybe lower shock mounts, so this does raise the question of changing the drums, go back to the short stub axle and newer hub. I think it can wait until after I figure out the front end and riding height.

Pics with out the body

20180502_063648.jpg

A look at the rear, do not ask why, but I went +10 inner and than -10 on outer splines on the torsion/spring plate. I like the tension of the spring plates, maybe just a littler stronger, but air shocks match up nice at his point and I like the level is sits at, especially when I raise the front end 3.5 inchs. Pics without the body.

20180506_051016.jpg

This has a 45 degree rack at the neck with the rear set as stated above.

20180506_051044 (1).jpg

20180506_051107 (1).jpg

20180506_051116 (1).jpg

I do not see any crack in the welds or signs of bending at the neck area.

20180506_051124.jpg

This area is a bit questionable, just looks bad as no real clean up when the welding was done, and could be attached in another fashion I am sure.

20180506_051137.jpg

20180506_051206.jpg

Now these top trees just do not look straight to me, but than again I thing the top tree is bent on the left side. More pics, need to take care of house chores.
 
more pic's

Good morning to everyone, I am not sure what pic is worth seeing, so trying to just put up what I think others need to see to help me figure out what I can do.

That top tree does not look right, that section of tree bent, or the top got jammed up on that side, either way I do not think it makes for a stable front end, or an aligned front axle. I always came up about 1/16th of an inch different from left side to right side when measuring axle height on the front tire, could be why.

20180506_051211 (1).jpg

20180506_051230.jpg

20180506_051230 (1).jpg

sizing them to fit sometimes takes away from them, but I am trying.

This is the right tube bolt at the top tree.

20180506_113601.jpg

left fork tube bolt at the top of the tree.

20180506_113615.jpg

20180506_113624.jpg

this lower pic is of the tubes near the rocker arm, about 2 inchs up from the bolt hole on the lower tube I can see a ripple or maybe just a blemish in the chrome.

20180506_113550.jpg

20180506_113629.jpg

now a pic of the left side fork area, it kind a has the same ripple look to it, good chance where work straightening was done.

20180506_113836.jpg

next post will be frame and some angle readings, also notice the 4/4 block, on is underneath the tire with to attached to the side, holds front end in place for one and second it gives me that 3.5 inch's of lift I want.

more to come.
 
Last edited:
the frame exsposed

Now some where taken as it rests, than I had moved the front end up on the block and took more pics. The battery box will lean forward with current forks, with them raised 3.5 inch's all looks real close to level.

even with the rear low as it is raising the front end gives the frame more road clearance.

20180506_105235_001.jpg

20180506_105239.jpg

20180506_105314.jpg

20180506_113709.jpg

20180506_113930.jpg

Now it was 45 degrees rake with front tire on the ground, with it raised 3.5" the rake has increased.

20180506_113927_001.jpg

I just think the forks are wrong for the rake and to short.

20180506_113845.jpg

20180506_113809.jpg

20180506_113821.jpg

So reached the file limit, next up is the angles on the center beam.
 

Attachments

  • 20180506_113542.jpg
    20180506_113542.jpg
    593.1 KB · Views: 91
Last edited:
so my editing of the last reply messed the end of it up, I mean I did, sorry.

so did not get to really lay all down on the T square yet, but the right side spring plate has to slots and one hole drilled so that bolt is what pretty much fix's how much toe in/out can be played with, also the movement of position of the axle to center line. The left side spring plate is 3 slotted holes, has lots of movement, and also has notched plate that seems to align with welded beads on the hub mount plate. Got side tracked sorry.

20180506_113720.jpg

Look at rear when front is raised 3.5" and torsion/spring plate is set at +10 -10

Now below is the angle finder setting at were the IRS beam and center beam meet.

20180506_115113.jpg

And now I moved up to the bend area.

20180506_115207.jpg

and now I moved up to near mid of the center beam, brake line a little in the way so I had to hold angle finder on beam.

20180506_115054.jpg

I have never built a trike, nor have I been apart of such a project before, so my point is I am new to all of this and I am trying to figure out what things should be compared to what is in front of me, than trying to see about fixing it.

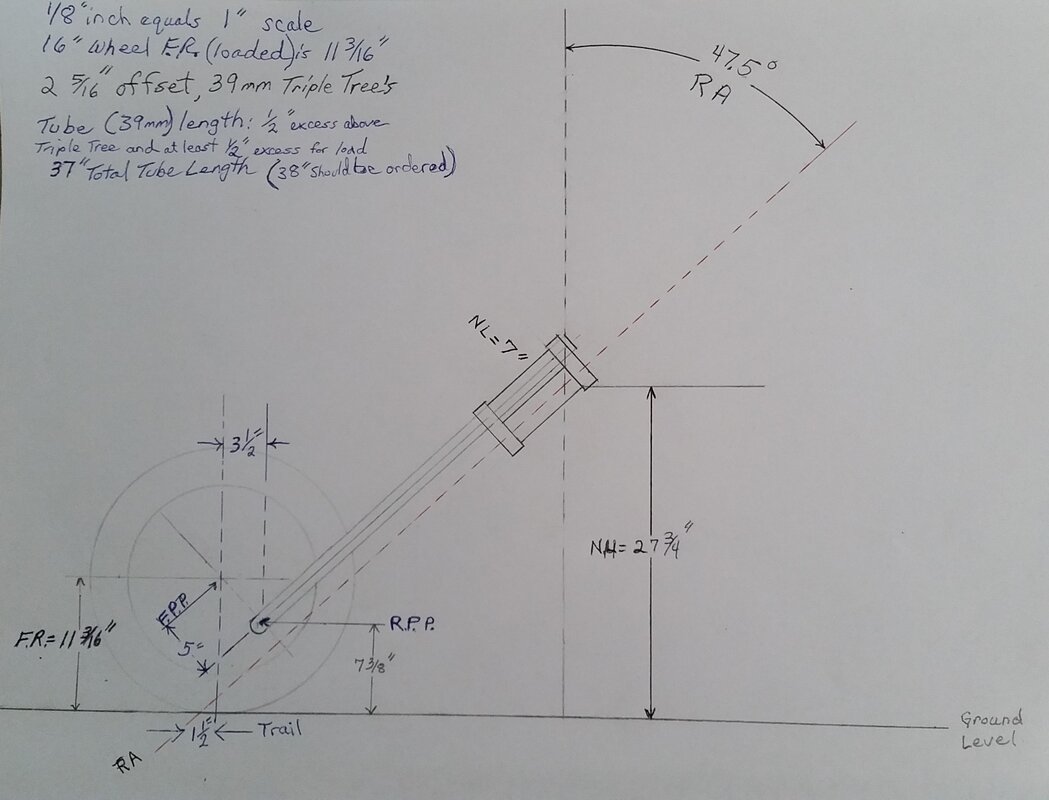
Not that I like spending money, but I think new forks are in order because I need them a bit longer and I do think offset trees are in order so the forks are more at 40 degrees rake, regardless the trail is the secret, so the offset angle depends on what is needed to get 0 trail if possible.
 
maybe a gas tank location

now that the body is off the frame, or should I say as I was taking it off I started looking at an area for a gas tank.

The rear cross beam that supports the body would be the mounting support for the tank.

At first I thought a 6" dia. tube would fit, but it is just to tight, so how does one maximize this area, a rectangular tank.

So I have a 4" height limitation issue, could go a little more if I indent the center of the tank because of transmission, but 4" clearance does exist. Now if I cut the fiberglass storage area under the driver seat, which I can, I can put a 7 or 8 inch wide x 4" deep tank across the 38" distance. A few angled pieces and a baffle and one can direct flow to outlet nipple, may cost a little more for that, but the tank would be lower than carb's up out of the way and should hold over 4 gallons of fuel, 4.5 or more if I go 8" wide, need to cut fiber glass out first to see exactly what will fit.

Now one can go off the top of tank near fender with filler neck, put a filler gas cap on the fender, or just have the filler emerge out of one end piece and have it a few inch's above tank level.

A look at the space.

20180506_105357.jpg

20180506_105341.jpg

20180506_051030.jpg

The cross brace is 40 inch's long, and it is 38 inch's long between the supporting uprights used to attach it to the frame, so I think a 38inch long tank is good for the fit.
 
You might be getting away from yourself. Looking at too many trees at once will obscure the forest and overwhelm. It sure looks like something is tweeked in the pictures but pictures can be deceiving as they are a single perspective view at a specific point in time. It looks like you have one of the early Roth clones because it very closely copies the dipped round tube for the main frame that Roth used. Many other clones used a square tube that came straight out of the torsion bar assembly level to the ground.

As I understand it, Roth's original (first) frame had an even more pronounced dip as it left the torsion bar assembly and went forward. I read in an article that he found that there was a problem with the low seating in that he was virtually invisible when riding to the right side of most cars! Apparently he had some "exciting" moments. His subsequent frames had less dip and a higher seating arrangement. Here is a copy of the figures for his patent application.

RothPatent.jpg

If something is tweeked, it is probably not the main tube as that should be 1/4" thick tubing.

My money would be on the springer. The only way I know to check the springer is to remove it, disassemble it, and lay it out, piece by piece, on a good straight surface and take careful measurements. This will allow you to take comparative measurements between the fork tubes and the neck tube. If you use a small lazer level you will be able to project the lines out farther to reveal any runout or tweeks. Springers are notorious for bending/breaking just below the bottom triple tree especially when installed with large rakes. Beyond its crash history, a few hard wheelie landings will also take their toll on the springer.

When you have the front end off you can also check the frame neck alignment. There is a good discussion of how to check it over in Fowler's 88 Blazer trike thread in Home Built Trikes forum.

You might not want to do any more in the rear until you can verify that the front isn't tweeked. If the front end checks out, you might be able to get the ride height and trail you want by going to a larger diameter front wheel and redesigned rockers. Cheaper than a whole new front end!
 
Get your layout lines drawn on the floor.

Square up the torsion tube and see if the neck and/or backbone is in the middle/square with torsion.

Maybe the neck pushed over off center?

The fork dont look straight but it dont look bad enough to account for all.

You dont want zero trail. Well.....unless you have mega drop pivot like a sugar bear.

I am under 1 inch but I have significant pivot drop. I did not have the room for enough drop to go closer to zero trail.

I would shoot for around 2 inches if doing a normal front end like a leading link.

Raked trees are hard to figure. Effective rake won't change as that is to the neck bearings. But axle position and trail will change. If you de-rake it with the trees that will make the trail larger.

Do the math.

Where ever you put the neck and angle it is then figure where the front axle has to be. Style of front end dont matter at all but that relationship of axle to neck bearings does.
 
Thank you both for replying. It is so awesome you found that vwbug, wow, I finally know what I have, thank you so much.

I do get lost in most all that I do, so I have to regroup and get my plan of attack back in order at times.

Lifting that body off the frame, should have been my first step, at least repairing the brake master cylinder would have been easier and I would have seen the mess better, so have been redoing harness some and getting it in order some.

Okay I will get things finished up so I can do as suggested by DeathbySnuSnu, and to be sure what is bent I will check out the forks as suggested.

The idea of being to low and "not seen" by the car on the right of you, not cool, need to think about safety also, but first things first, square it up and see what we have, I can do this.

Again thank you so much for taking the time to help me get on track as what I should be doing, have to get the priorities in order so you do not chase your tail all over the place, which I seem to do to much, a lot of help here in many ways.

:clapping:
 
got it done

I was doing it hours ago when the net crashed on me, my hook up.

I am back, and I rechecked my measurements of the front end, and rechecked them before doing the trail calculation.

So as she sits she has a 4" positive trail with a 45 degree rack at the neck.

The T square on the floor and alignment of the torsion bars revealed something is tweaked, could even be me, LOL

Left torsion bar aligned to the line on the floor using a plum bob.

20180508_111651.jpg

and the torsion bar on the right lined up the same, after moving the front end to the left until both torsion bars hit the mark.

20180508_112121.jpg

Once that was set I checked the plum bob just above the shifter mounting on the backbone.

20180508_114125.jpg

camera angle off some, but it was on the center line and I was happy. Next I moved up as close as I could to the neck.

20180508_112921.jpg

tried to keep the string on the center mark of the backbone. This is how the plum bob settled.

20180508_113259.jpg

which measured to be 3/16" off the center line.

20180508_113646_001.jpg

and than I looked at the front tire.

20180508_113120.jpg

I tried it earlier and thought my lines on the floor were not square, so I had re did the cross line after confirming the center line was straight from end to end, than I did the aligning of torsion and took all the pic's.

I could support the backbone with a floor jack and take off the forks next, sure the bearings could use a cleaning and repacking, but if I lift it up enough I can see if the bearings in the neck are worn, or how badly worn. Also I wonder if it would help cleaned out so I could site the lazer done inside the neck centered and see how it lines up to the line on the floor, also if I had the trees and stuff out of the way wouldn't a long straight edge help me find out if the neck has a twist to it ?

Plus to me it looks like the forks where for a longer neck than what I have, as there is a couple of washers under the top tree taking up space before the neck.
 
3/16 ain't too bad for something that was hand fabbed. You could live with that.

So it does look like most of it is in the fork.

But yes....do all you can to check for twist in the neck. Drop the forks and stick something through the neck.

4 inches of trail....a lot less than it looked. Must be because it is short. If it is 4 inches you could live with it. As light as it is in the front it will not be terribly hard to steer. Gonna want to flip over to the stops when backing up....will have to strong arm that. But still not dangerous out.

Raise it to where you want it to be and do the math for trail.

It may be too much luck to ask for.....but it sure would be nice to find a set of used legs on ebay and just swap out some parts.
 
Good day to everyone, so I rechecked the alignment, first setting the back and than check along up the backbone.

I got the same offset difference up near the neck area on the back bone, but does not mean the neck is off, the ridge I used as center of the back bone, well it is a second piece of metal that was welded over the tubular back bone beam. So it is only true center if it was welded in position true and on mark. I know has nothing to due with the front wheel location, that is the mystery to solve.

Pics of the tranny, not sure what it is you want to look at, but I read something about the ribs across the back, so here they are.

20180509_051253.jpg

20180509_051308.jpg

20180509_044624.jpg

transmission#.jpg

that is the stamped number on the transmission, was there something particular you wanted a pic of ?
 
Good to see the Bowden tube is there.

I am gonna guess 70 to 73 model.

4.12 ring and pinion. Do not put low profile tires on it. You want as tall of tire as reasonable.

And

That is not a 5 speed conversion.

It looks to be a normal 4 speed.
 
Good morning to everyone here at TT. Apparently I did not get my reply posted yesterday like I thought I did.

I was told it had a 5 speed in it, and to me it does seem to be a 5 speed shifting pattern.

Could a 5 speed shift linkage be used on a standard 4 speed transmission ?

Okay I here what you are saying, but I have checked it out again just yesterday after your reply.

I go from 1st to 2nd down that side of the H leg, stop in the cross bar of the H, push down and go to the left and back down and I am in reverse. Now going over to 3rd and down to 4th on the right leg of the H pattern, all is just normally fine. Now if I come up out of 4th gear and push down than I can mover more to the right and pull back down into 5th gear, so it seems to me. It does not pull back as far for 5th gear as 4th gear, at least that is how it feels and looks to me.

When you push down in that cross bar area of the H pattern, it will only pull back towards 4th gear location, you can not go upward towards third gear.

So this is a 5 speed transmission, or the shift linkage is moving around in a 5 speed pattern that allows on to shift out of 4th gear(normal position)and when one thinks they have gotten it into 5th gear, but the reality is that they just moved the shift linkage around and put the transmission back into 4th gear???????????

Is this possibly what is happening with me ?????

Forks of the trike, they are much heavier than I thought, so short looking, only 29" total length to them.

Now that the forks are off the trike, I wonder if laying the back bone beam on the floor over the center line with torsion bars on mark. The neck would be much closer to the ground so the framing square can be used to see if the neck tube aligns top and bottom to the straight edge of the square. Worth the try as nothing to loose from it.

I do hope all can, and do, enjoy everyday that we have to live. Life is to short not to enjoy it, so live your life and enjoy it.:)
 
reply

gp61....sorry I shortened your handle but.....just following along here on the short fork and low front end....just a thought, but if you found neck alignment "off" you could consider reducing rake to pickup the front end, or possible relocating neck to the rearward and angle enough to raise up. just thinking outloud here on how to use existing forks.

the forks can be checked and straightened if not too far off. rocker length can help adjust trail also. just my .02 Interesting project you have got going here....enjoying following along!
 
Std 4 speed next to a 5 speed conversion.

There is not a place to put a 5th gear inside the case. So a lot of pieces added to create the area for it to be in (the silver bare aluminum)

tranny_comparison.jpg

The Porsche 901 does come close to fitting. But is hard to find and even harder to afford. It even looks like the conversion vw trans.

000_07381274487390.jpg
 
I was not doubting what you said, I was wondering why it shifted the way it does, which leads one to believe it is a 5 speed transmission.

Looking at a standard 4speed up against the 5speed, a very noticeable difference for sure, plus the need for the extra room makes total sense. I do not think I need a 5 speed, but it did sound nice and it would help when going down the Freeway.
 
Good morning to everyone

Welcome to the world of G-pa, wow, my condition has some set backs and one of them is the ability to turn facts around backwards. I can hear something and by the time I speak it the mind has turned it around or gotten it off a bit.

Same thing will happen with memory at times, so I do re read a lot of material because the 1st or 2nd time reading it does not always mean it is stored correctly in my mind for future recall. I know it is a wonderful life, but I am alive and that I am thankful for each and every day.

Okay, I noticed the patent drawing, further search got me to download a copy of the entire thing I believe. It has been a interesting read for sure, and the inventor had a reason for it to be low to the ground, but to low is a hazard with other drivers, so he had to change a little from his very first design.

Here is pic's of what I did yesterday.

I tried to center this pipe down inside the neck tube as I slide it down to contact the floor.

20180510_101818.jpg

and we always have to check our alignment of the T bar and floor line before looking at the neck for anything.

20180510_153540.jpg

So you can see the foot rest assy. does not align perpendicular to the plum bob string.

I put the top bearing back in the neck tube, aligned the points on the nut to form a center line at top, ran the plum bob string and had to keep moving it to the right ( if I was sitting on the trike ) in order to get the plum bob to align with the line on the floor ( yes I checked floor lines with a lazer light )

20180510_153527.jpg

I tried to stay square with the camera so this pic might reveal line of sight of top of neck to rear center of engine/tranny.

20180510_153501.jpg

I will hopefully get to the forks today, see if I can see any real out of wackiness that maybe exist. I have to get a few other things done first.

Now as you jack up the back bone the rake angle changes on the neck. Above pic's have the foot rest on the ground and the rake is near 40 degrees, jack it up to original height and rake is 45 degrees, jack it up more to the height I thought I wanted, and the rack is 48/49 degrees. And of course as this rake increase so does the trail distance from the axle mark on the floor. So reading the patent papers the idea was to keep all low to the ground as possible for stableness and to keep it from overturning during cornering maneuvers. I do understand it, but do think I would like to be off the ground a bit more than what it was. I have to run some horizontal plane lines and what not to see how and what the rise in height will effect. I do not see a few inch's making a difference, but we need to check and make sure that we do not exceed what the design calls for. I do not want to create issues for myself. Just wish the patent had more true figures in it as it would be more helpful. Oh yeah, this trike has the original designed foot pegs that are in this old patent, I had taken them off the trike while I worked on it, plus wife is short legged and I was looking at having to relocate them, or find a second set for her, and a two step method might be in her favor.

Enjoy your Friday, I thought yesterday was Friday, so I get 2 Fridays this week, welcome to my world.
 
I forgot, DeathSnubySnu, are you saying that the tires that are on it are "low profile" type tires ?

As far as I have found out they have been on the trike from the beginning.

Or are you referring to the 1 inch of rubber around the rim type low profile tire/rim design ?

I have had others argue about this, but VW did make a 5 speed transmission for their Transporter, which was only sold overseas, never in the USA. I am almost 100% sure this is not such a transmission as the numbers do not match up for it, and as I learned a stock 4 speed has one look to it and the 5 speed has a much larger bulkier look. And the public got fooled a bit as I keep getting told that a Super Beetle was sold with a 5 speed transmission in it, yes it had to be ordered apparently, so what they just put the 5 speed up grade kit to the original 4 speed when it was ordered and sold ?

I am not saying I have a 5 speed, I am just puzzled and lost at why it's shift pattern is that of a 5 speed and why does it all feel like it truly is a 5 speed.

I just can not get my mind off of it, how does one get 4th gear into place from two different locations with this shift pattern. I guess it is time to get into transmission design and reading up on what I have to understand it how it works, also I wonder about what damage could be done (if not a 5 speed ) and yet all who rode it shifted and used it as a 5 speed ? Love my puzzling issue.:xzqxz:
 

Welcome to the Trike Talk Community

Join our vibrant online community dedicated to all things Trikes! Whether you're a seasoned rider or just starting out, this is the place to share experiences, tips, and stories about your three-wheeled adventures. Explore modifications, maintenance advice, and rides, all while connecting with fellow trike enthusiasts from around the globe

Forum statistics

Threads
55,289
Messages
786,215
Members
22,757
Latest member
Eddienorman
Back
Top