:clapping::clapping::wave4:
Navigation
Install the app
How to install the app on iOS
Follow along with the video below to see how to install our site as a web app on your home screen.
Note: This feature may not be available in some browsers.
More options
You are using an out of date browser. It may not display this or other websites correctly.
You should upgrade or use an alternative browser.
You should upgrade or use an alternative browser.
4th generation of my trike
- Thread starter irondad01
- Start date
Over the months I have watched this project go thru the stages, wow, it is going back together and looking so good each day. We do a lot with what we have or know we can get, it has been a real pleasure watching you work and share with others.
irondad01
150+ Posts
- Thread starter
- #153
Thanks, posting it here helps to keep me motivated. I've learned so much from others that I'm glad I can pass a little on.
I bolted a few more things on.
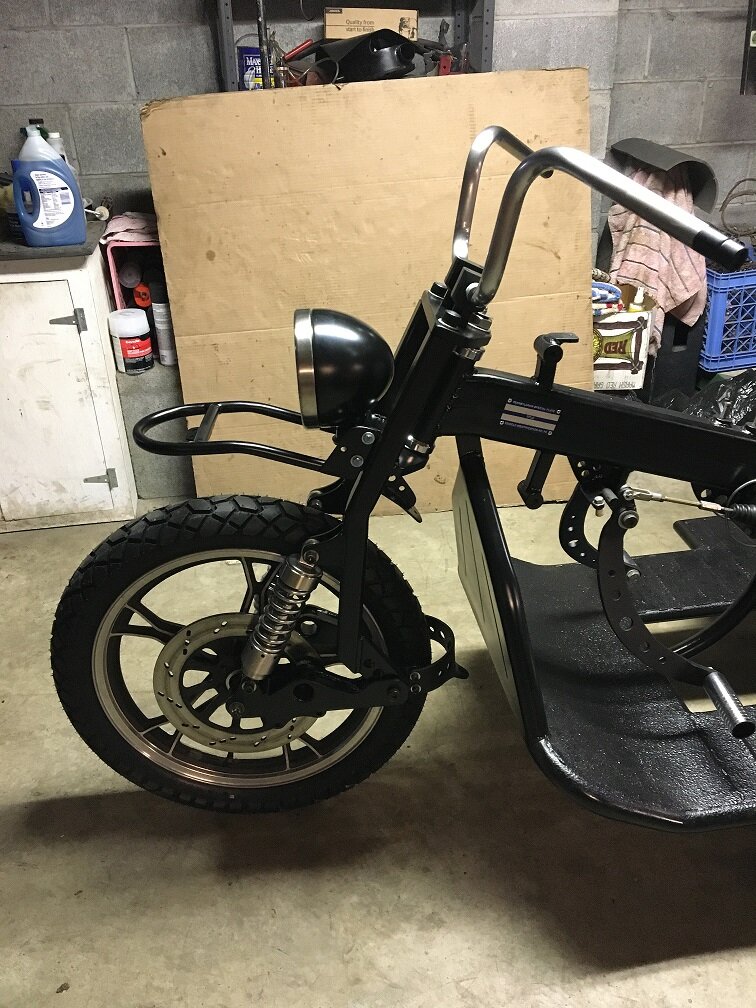
Handle bars, light, and fender brace. I can't put the light bulb in until I get the wiring in there.
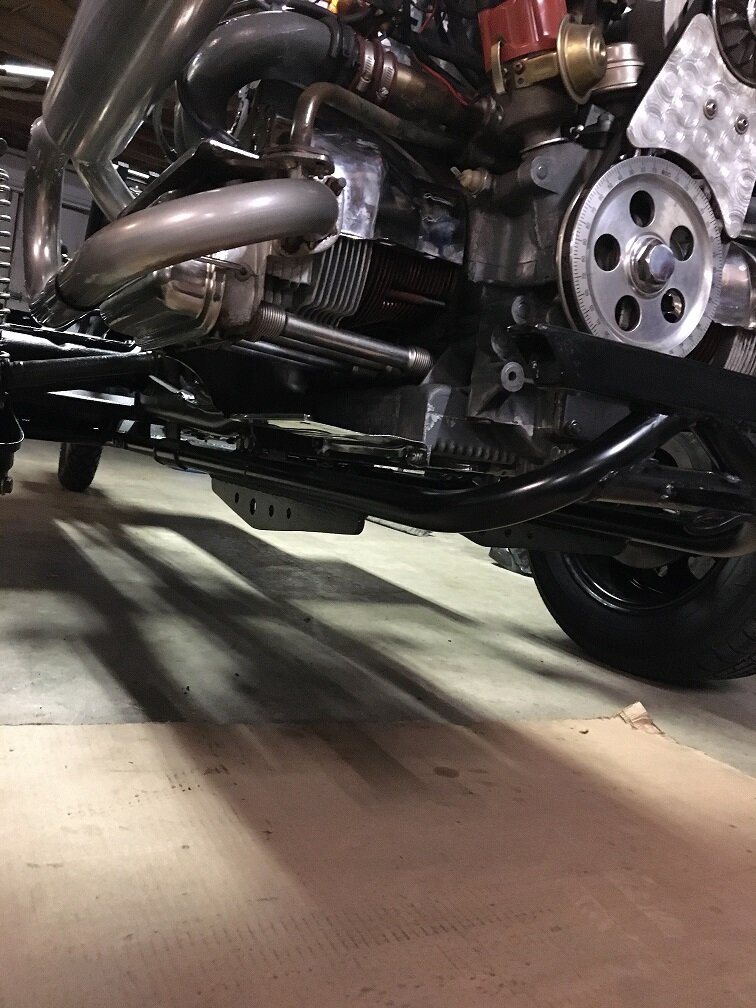
This might be hard to see but this is the trailer hitch/ body mount frame.
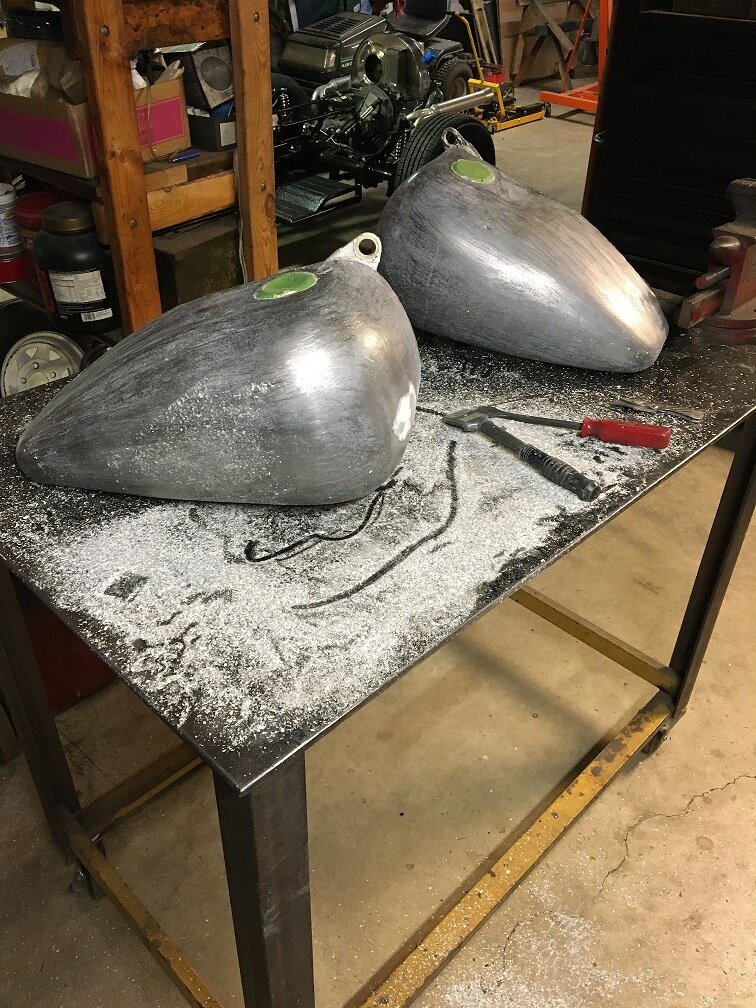
Then I spent a bunch of time with a scraper getting rid of old white paint. I was impressed with how well it was stuck on. It was Valspar paint that I had bought at Tractor Supply years ago.
I bolted a few more things on.

Handle bars, light, and fender brace. I can't put the light bulb in until I get the wiring in there.

This might be hard to see but this is the trailer hitch/ body mount frame.

Then I spent a bunch of time with a scraper getting rid of old white paint. I was impressed with how well it was stuck on. It was Valspar paint that I had bought at Tractor Supply years ago.
irondad01
150+ Posts
- Thread starter
- #154
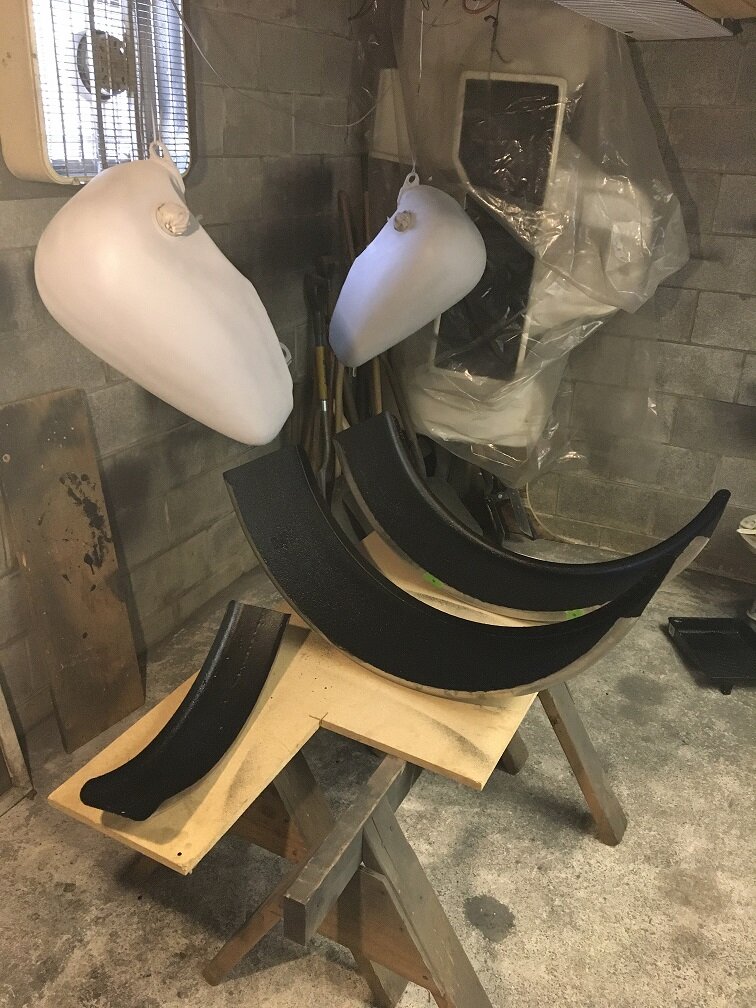
I spent some time with my paint room. The tanks are in primer and I coated the underside of the fenders with bed liner.
Next I dug out my do it yourself wiring kit in a tote.
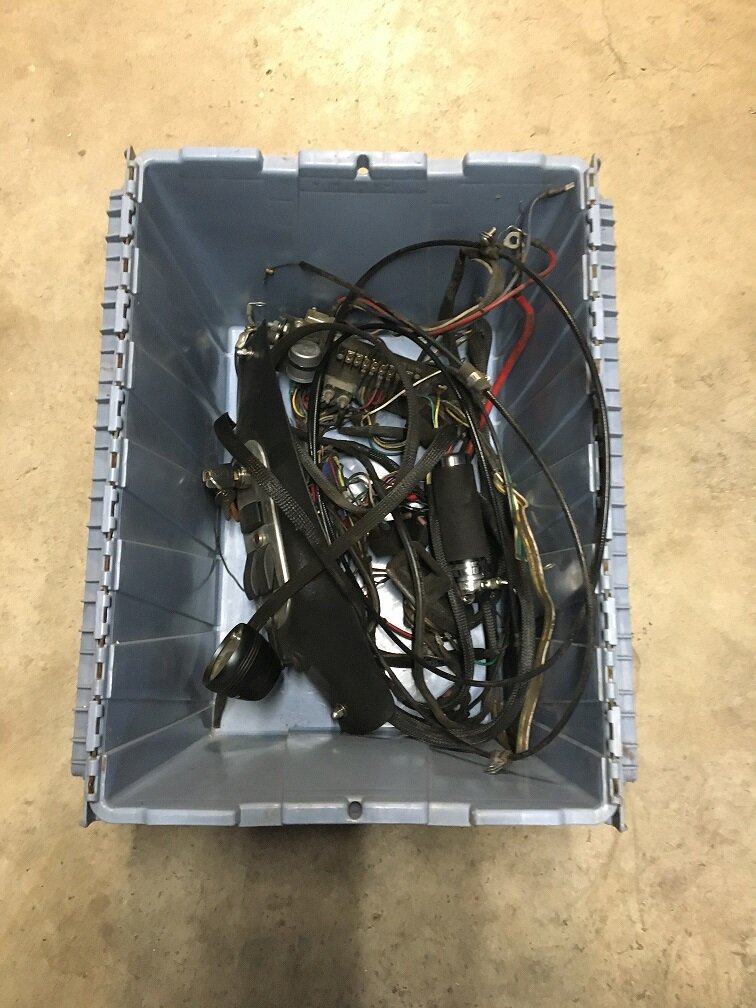
There really isn't much to it. Not many wires on an old VW. I feel like I'm cheating compared to some of you guys building a more modern trike with fuel injection and all that other stuff.
I have to make a different mount for the speedometer. The angle was wrong and I could just see it before. Now I raised the seat so it will be worse.

Next I dug out my do it yourself wiring kit in a tote.

There really isn't much to it. Not many wires on an old VW. I feel like I'm cheating compared to some of you guys building a more modern trike with fuel injection and all that other stuff.
I have to make a different mount for the speedometer. The angle was wrong and I could just see it before. Now I raised the seat so it will be worse.
peteg59
Meme Master
Lookin good Carl...:clapping:
I'm with you on keeping it simple.
This is in no way directed at anyone in particular: If someone were to "inherit" a project with too much electronic tech added on it could create a huge headache for the one working on it, or trying to work on it!!!
K.I.S.S.
I'm with you on keeping it simple.
This is in no way directed at anyone in particular: If someone were to "inherit" a project with too much electronic tech added on it could create a huge headache for the one working on it, or trying to work on it!!!
K.I.S.S.
irondad01
150+ Posts
- Thread starter
- #156
My body and fender paint was due in today at Home Depot and when we checked on it they said it was damaged in shipping. It had to be reordered so it will be towards the end of next week when it comes in. I still have things to do like put body filler on the joints of the body and primer so it won't slow me down much.
I'm thinking if my order was damaged that probably means there was paint all over some other stuff too. Hopefully it wasn't something someone was waiting on.
I'm thinking if my order was damaged that probably means there was paint all over some other stuff too. Hopefully it wasn't something someone was waiting on.
irondad01
150+ Posts
- Thread starter
- #157
I worked on putting bed liner in the storage compartment and body filler on the body joints today. Nothing worth a picture.
Friday I made a new mount for the speedometer. It's now adjustable.
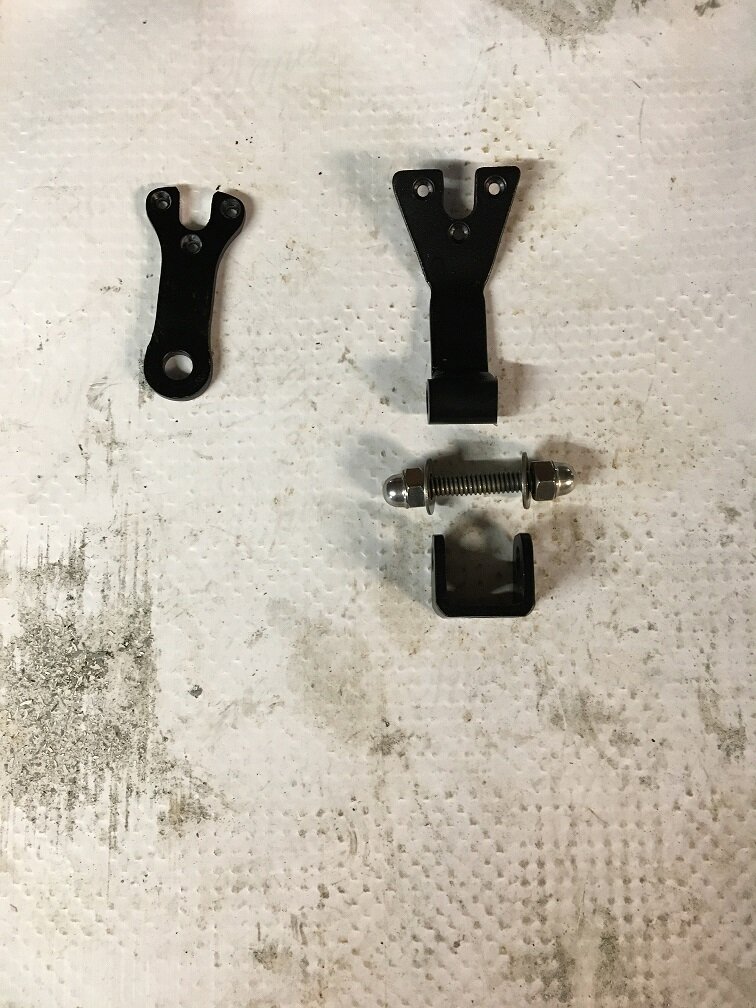
The old one is on the left. It was aluminum and held the speedo. in one position. It wasn't the right angle to see at night. I'll be able to set the new one, on the right, where I need it.
Looking through my scrap pile I found some old floor boards I had made and had on the trike for a while.
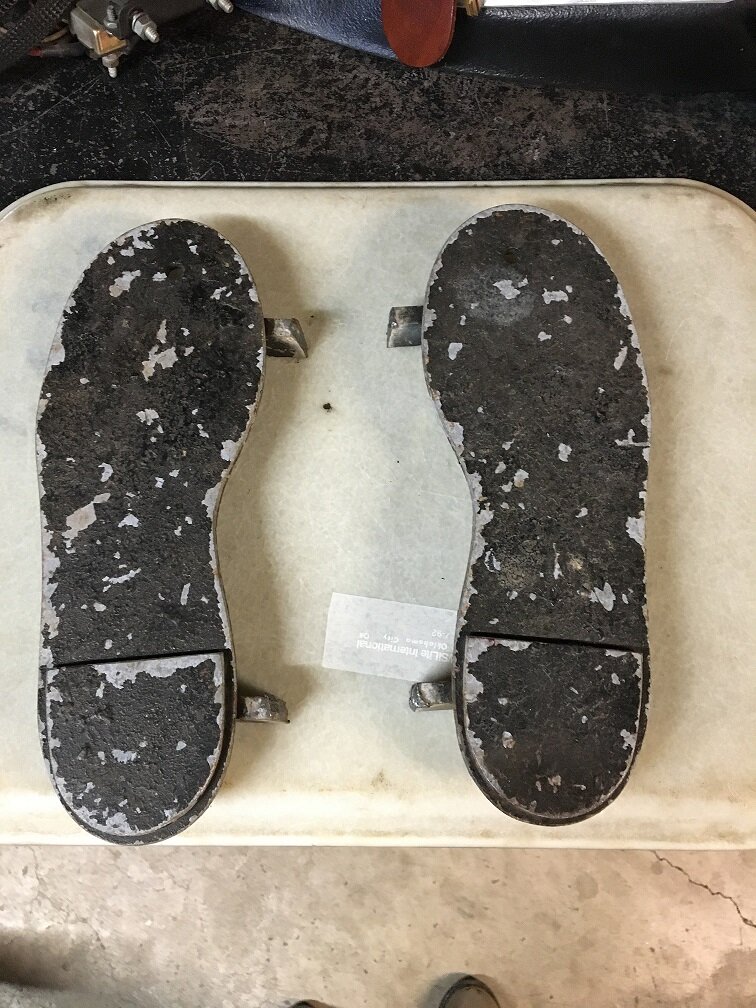
They fit my feet just right. Maybe because I used my boots for a pattern?
Friday I made a new mount for the speedometer. It's now adjustable.

The old one is on the left. It was aluminum and held the speedo. in one position. It wasn't the right angle to see at night. I'll be able to set the new one, on the right, where I need it.
Looking through my scrap pile I found some old floor boards I had made and had on the trike for a while.

They fit my feet just right. Maybe because I used my boots for a pattern?
irondad01
150+ Posts
- Thread starter
- #158
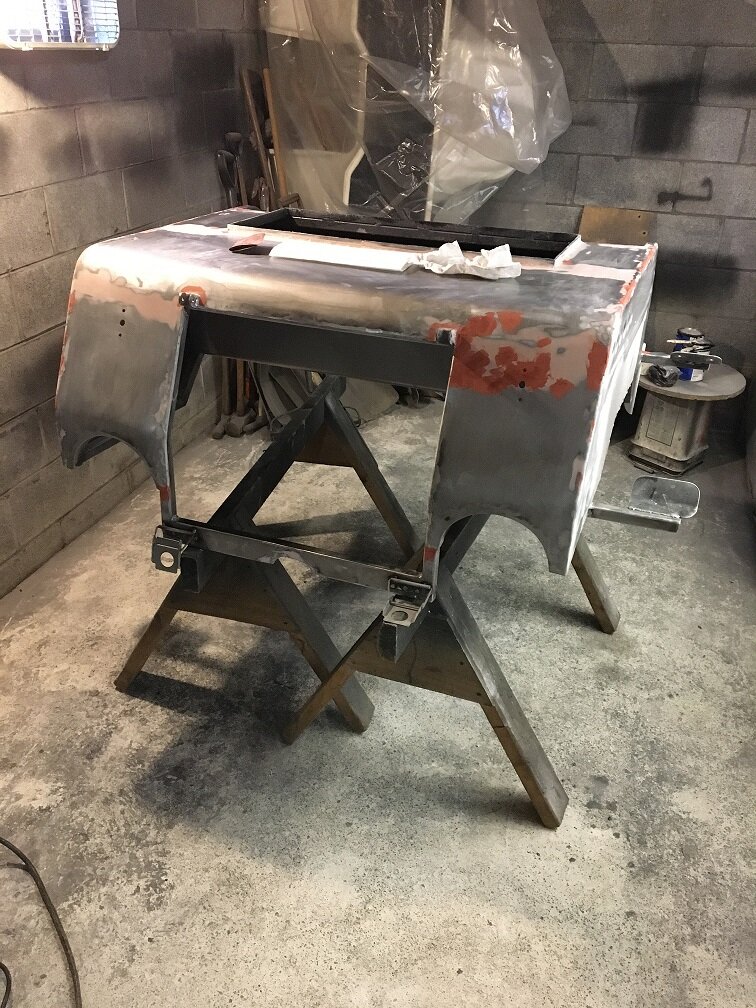
There sure is a lot of sanding involved with getting a body ready for paint. And I'm not even going for a show type finish, just something good enough for WWII.
I also started to put the wiring back on.
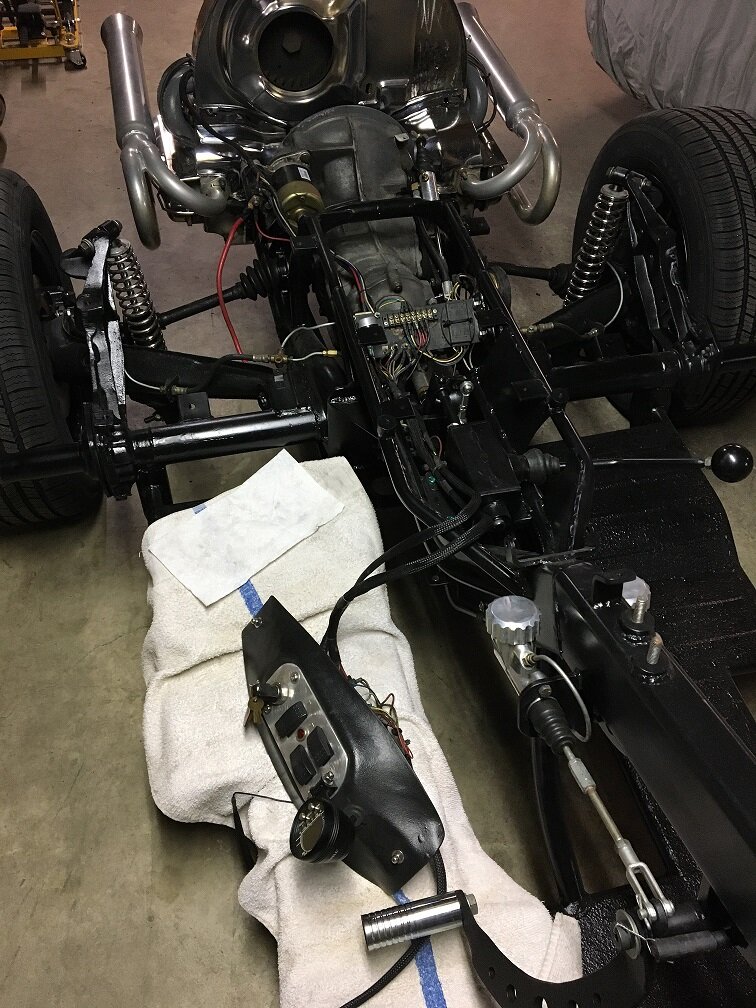
I have to wait on the dash until the tanks are bolted on.
This is my fuse setup.
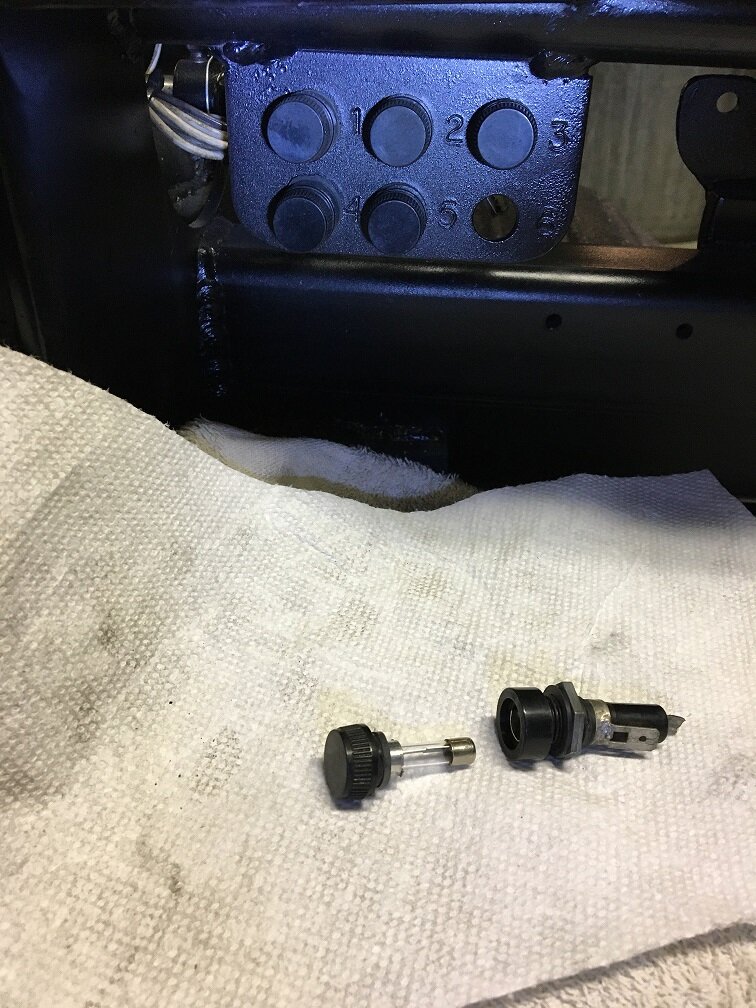
These are Caterpillar type fuse holders. The one on the rag is broken so I have to replace it. The panel is just below the front seat, easy to get to. I ordered a new holder and a battery disconnect switch.

I also started to put the wiring back on.

I have to wait on the dash until the tanks are bolted on.
This is my fuse setup.

These are Caterpillar type fuse holders. The one on the rag is broken so I have to replace it. The panel is just below the front seat, easy to get to. I ordered a new holder and a battery disconnect switch.
irondad01
150+ Posts
- Thread starter
- #159
My paint came in at Home Depot and this can was dented but still sealed.
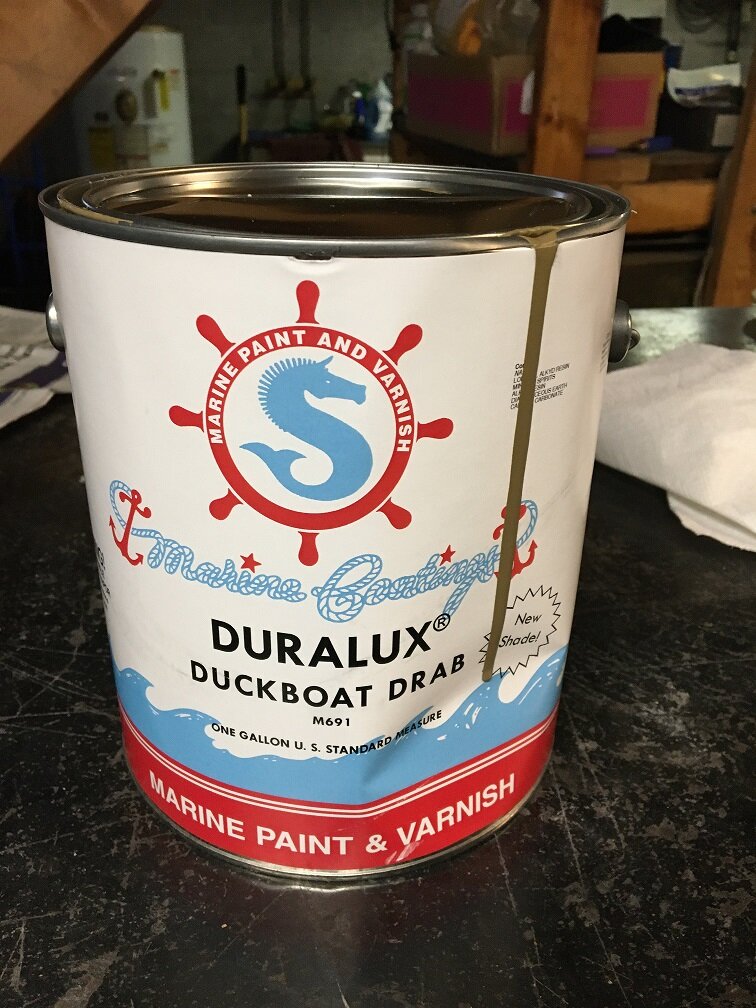
The color is a little more tan than I wanted but it still looks military and I don't have anything I have to match exactly.
Paint cans drive me nuts. You would think over the years they could come up with a better design for pouring. The paint always ends up in the lip at the top of the can.
Sometimes when you are so bad at something it turns out kinda cool. Like I said before, I'm no painter so I approached the tanks with a lot of stress. I have an air gun but the tip is too small for this paint. They recommend you don't thin it. I bought a Harbor Freight electric sprayer that you use to paint fences and stuff. When I started spraying it went splat and put gobs all over. I thought :gah:. The more I looked at it the more I liked it. It looks industrial. Now if I can replicate it on everything else.
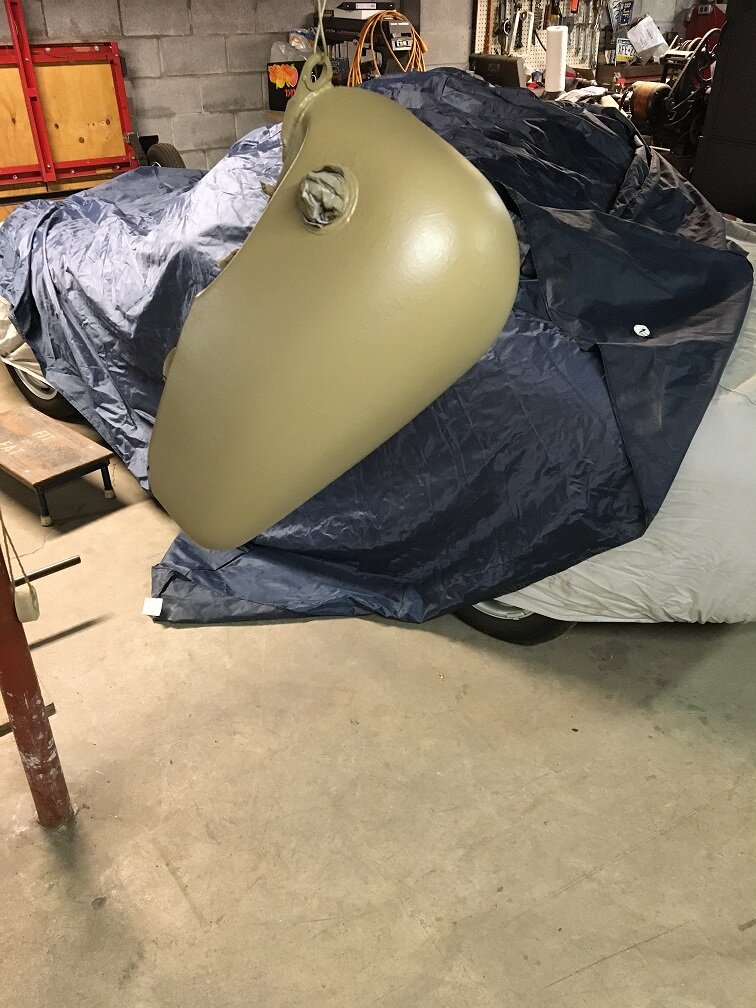
I'll let it dry over the weekend before I bolt them on. I also got the front fender painted.

The color is a little more tan than I wanted but it still looks military and I don't have anything I have to match exactly.
Paint cans drive me nuts. You would think over the years they could come up with a better design for pouring. The paint always ends up in the lip at the top of the can.
Sometimes when you are so bad at something it turns out kinda cool. Like I said before, I'm no painter so I approached the tanks with a lot of stress. I have an air gun but the tip is too small for this paint. They recommend you don't thin it. I bought a Harbor Freight electric sprayer that you use to paint fences and stuff. When I started spraying it went splat and put gobs all over. I thought :gah:. The more I looked at it the more I liked it. It looks industrial. Now if I can replicate it on everything else.

I'll let it dry over the weekend before I bolt them on. I also got the front fender painted.
LarryA
500+ Posts
Color and texture look great.....maybe some military stensiling in black or tan?
irondad01
150+ Posts
- Thread starter
- #161
Yes , I was planning on lettering. TP30 on the fenders for tire pressure and 73VW4G for ID number. 1973 VW and fourth generation. Maybe star on the tank? I was toying with the idea A45200, that was Merle Haggard's number at San Quinten. Most of the lettering I've seen was in white. It might show up better.
irondad01
150+ Posts
- Thread starter
- #163
If you remember my engine is in the rear so I don't get any heat from it. On the body, beside the passenger's seat, are 2 channels that will direct any trapped air back to the engine.
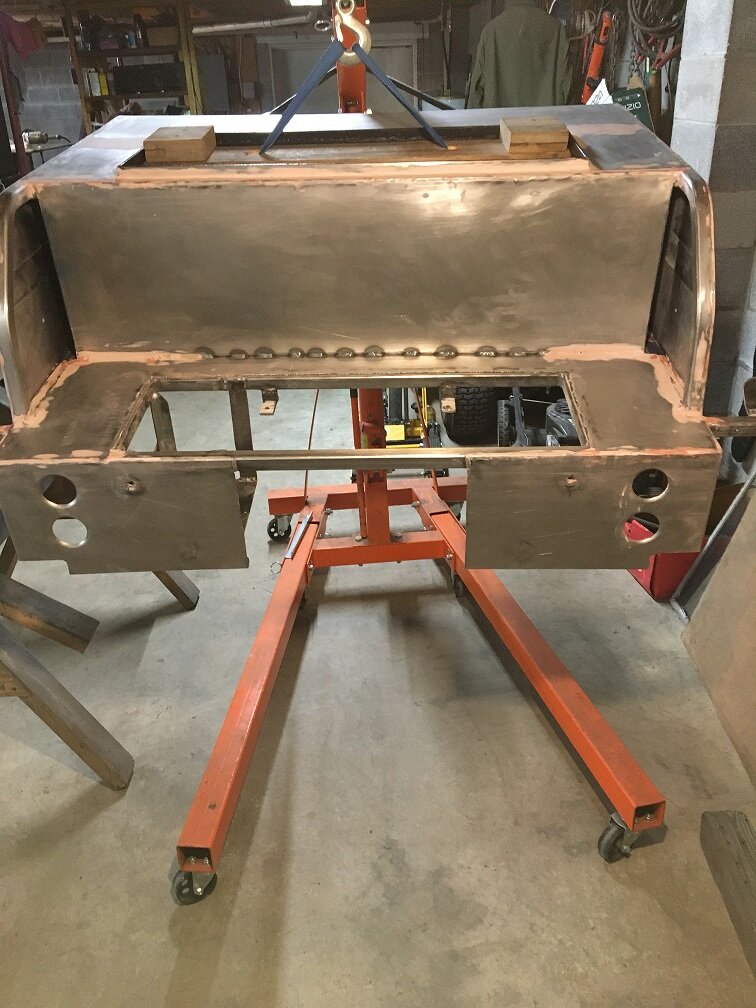
Looking from the front, the panel isn't much wider than the front end.
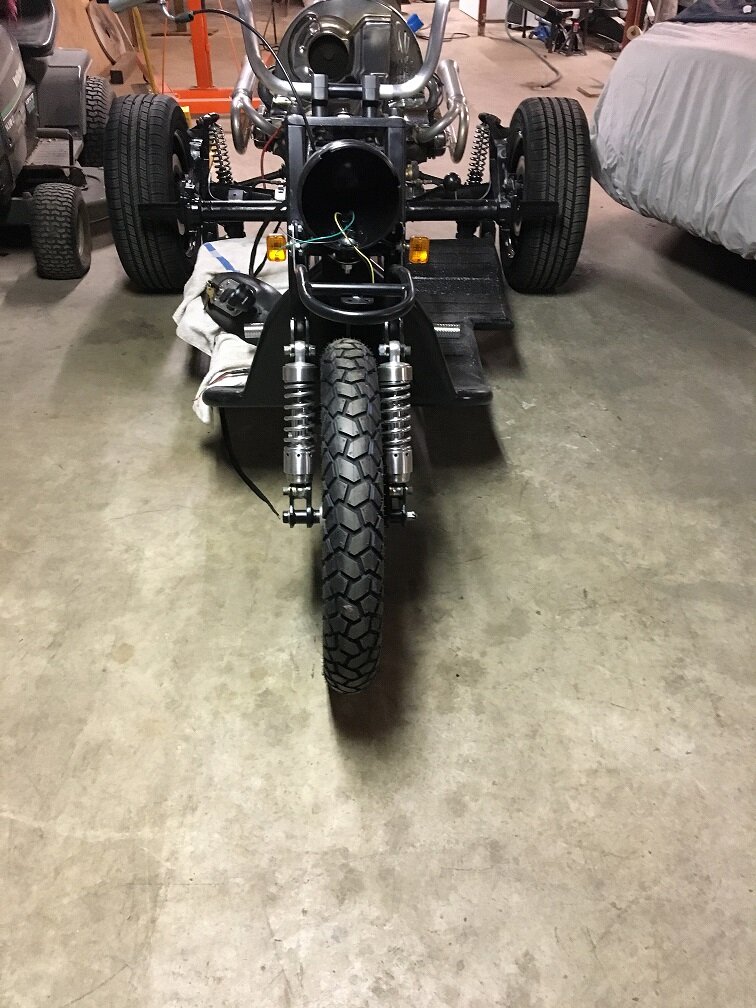
The panel will mostly keep any rain or mud from being thrown on me from the tire.

Looking from the front, the panel isn't much wider than the front end.

The panel will mostly keep any rain or mud from being thrown on me from the tire.
peteg59
Meme Master
Big Merle fan too.:clapping:
Not sure many would recognize his prison # though, unless you did a face pic nearby to go with it?
Not sure many would recognize his prison # though, unless you did a face pic nearby to go with it?
irondad01
150+ Posts
- Thread starter
- #166
A splash of color was added.
I have all the wiring done except the tail lights on the body. The front brake line is a little long because I had ape hangers on it before. I may try to reroute it a bit on the top to hide it better. The throttle cable is hooked up. I need to get some retro looking hand grips.
This is a trick I learned for fastening things.
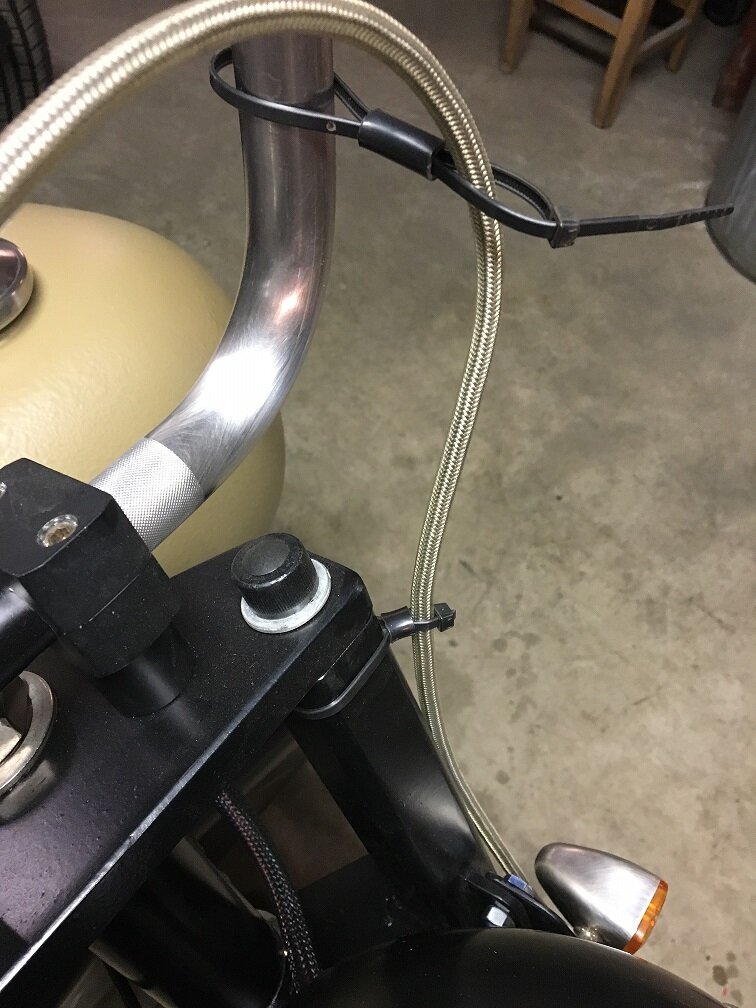
Use a piece of plastic tube the length you need and thread the zip tie through it. When tightened it makes a stand off so things aren't rubbing.
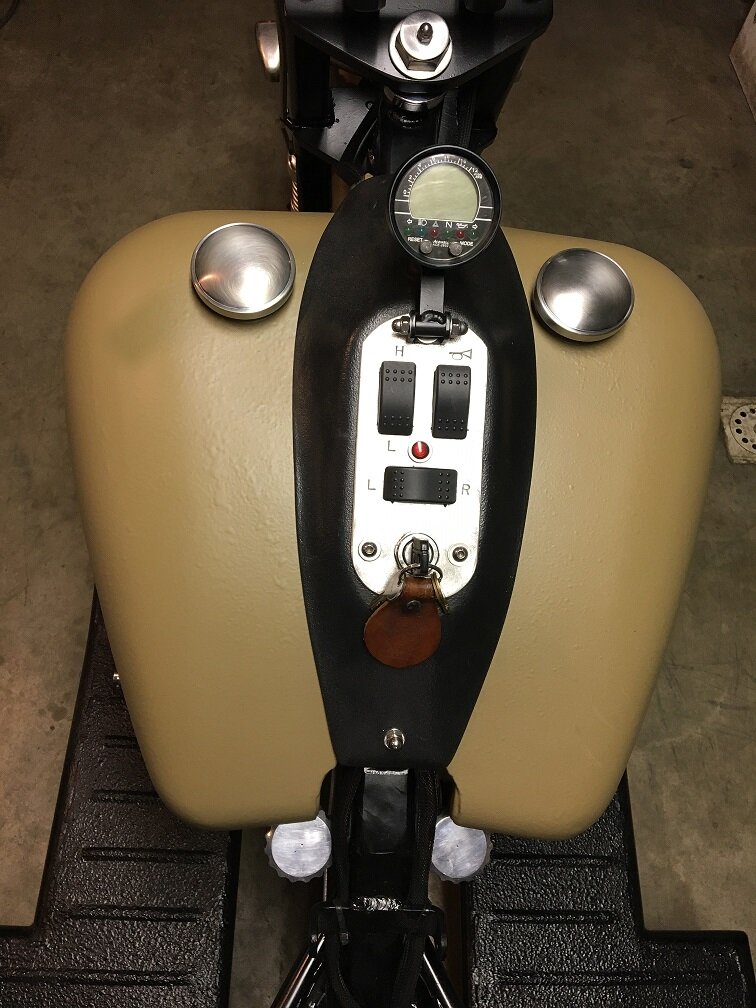
I made this dash before. I piled plaster paris on the tank and shaped it the way I wanted then put fiber glass over it. When it cured I knocked the plaster out of it. Those are marine switches so they are water proof. I didn't have a horn stamp so I used an 0 a V an I and an I. The speedometer is an Acewell. It's worked great for 12 years.
The body is primed, probably paint it tomorrow. This paint takes a long time to cure. That's what I read about it but they say it's super tough after it's cured.

I have all the wiring done except the tail lights on the body. The front brake line is a little long because I had ape hangers on it before. I may try to reroute it a bit on the top to hide it better. The throttle cable is hooked up. I need to get some retro looking hand grips.
This is a trick I learned for fastening things.

Use a piece of plastic tube the length you need and thread the zip tie through it. When tightened it makes a stand off so things aren't rubbing.

I made this dash before. I piled plaster paris on the tank and shaped it the way I wanted then put fiber glass over it. When it cured I knocked the plaster out of it. Those are marine switches so they are water proof. I didn't have a horn stamp so I used an 0 a V an I and an I. The speedometer is an Acewell. It's worked great for 12 years.
The body is primed, probably paint it tomorrow. This paint takes a long time to cure. That's what I read about it but they say it's super tough after it's cured.
irondad01
150+ Posts
- Thread starter
- #168
I think you're probably right. I had those handle bars hanging around so I put them on but they bothered me because they didn't look old enough. I'll have to shop around a bit.
I've been mostly waiting for paint to dry. Always exciting. I did get the gas line run and a few other small things done. I think I'll get the body on tomorrow then I can mount the tail lights.
I've been mostly waiting for paint to dry. Always exciting. I did get the gas line run and a few other small things done. I think I'll get the body on tomorrow then I can mount the tail lights.
irondad01
150+ Posts
- Thread starter
- #169
I got a bit done these last couple of days.
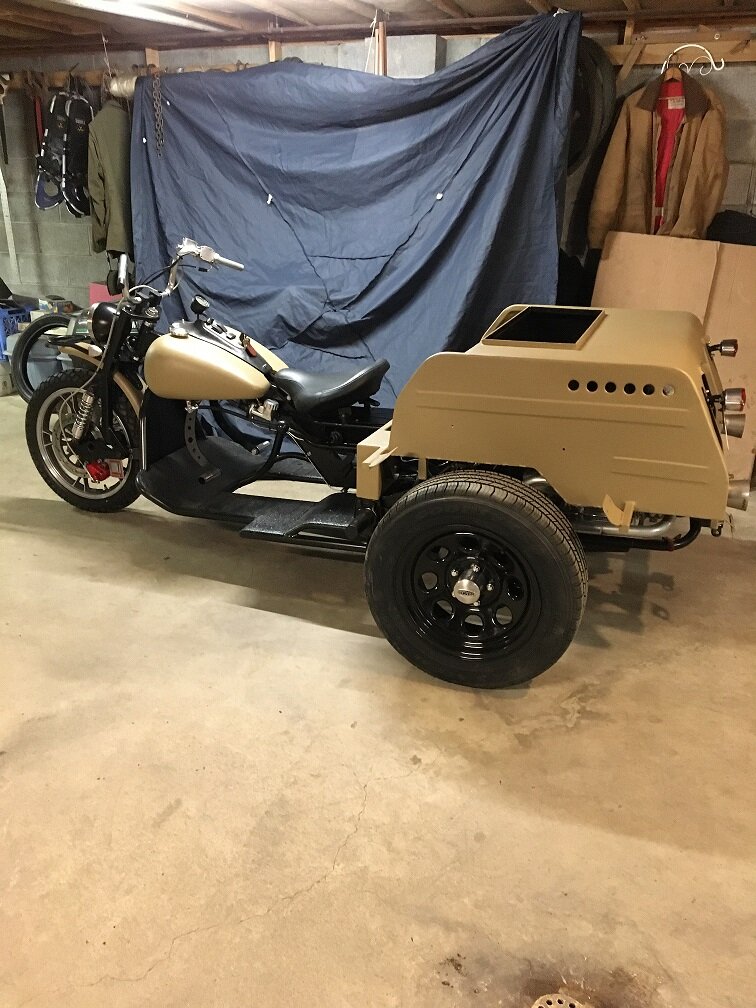
Body is on, tail lights wired, seat on. If I put a little gas in it I could fire it up and go for a ride, not legally with out fenders.
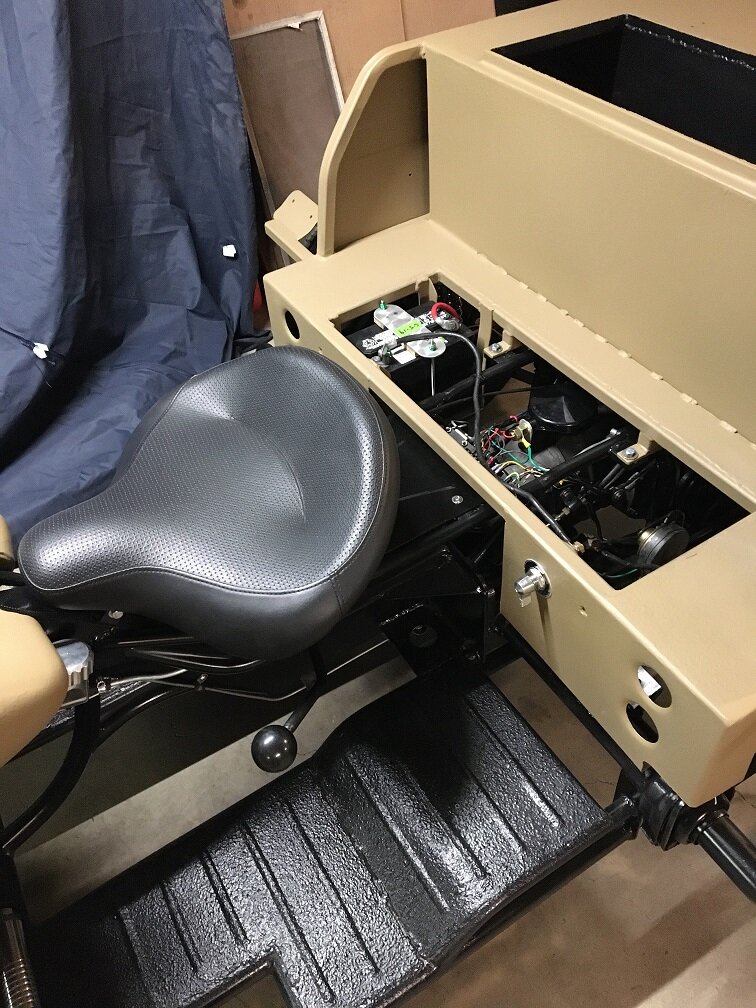
Battery is bolted down. The battery disconnect switch is hooked up. It will be hidden when the rear seat is on but easy to get to.
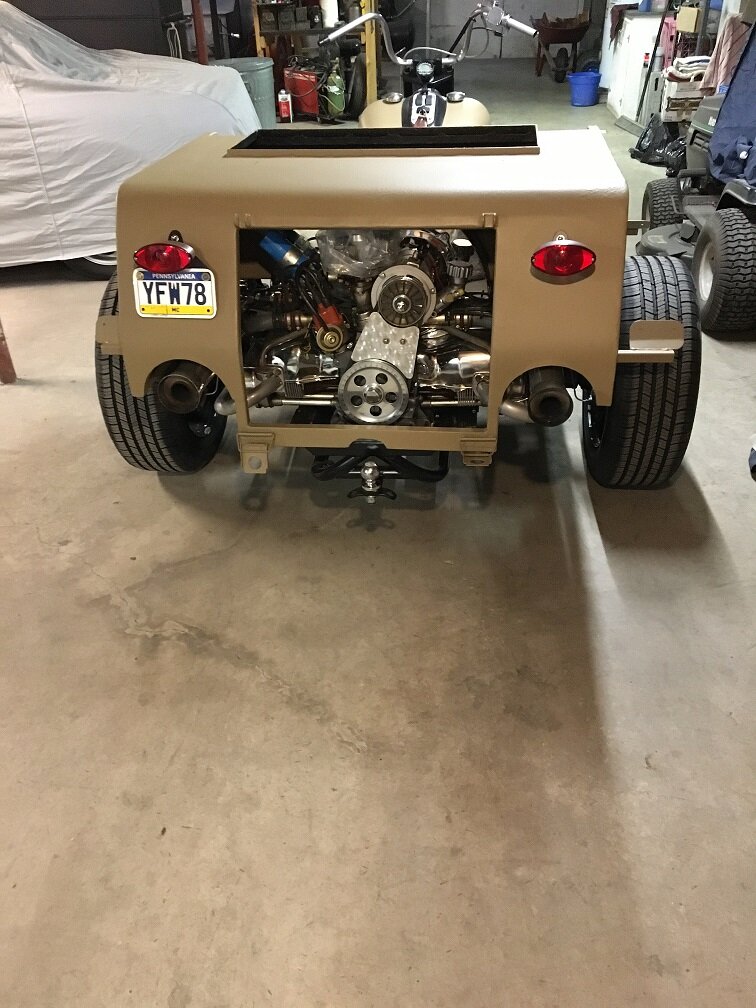
I have the tail lights wired so they are the turn signals too. While the fenders and lids are drying I'll break out my wife's sewing machine and work on the rear seat.
New handle bars and grips are on their way.

Body is on, tail lights wired, seat on. If I put a little gas in it I could fire it up and go for a ride, not legally with out fenders.

Battery is bolted down. The battery disconnect switch is hooked up. It will be hidden when the rear seat is on but easy to get to.

I have the tail lights wired so they are the turn signals too. While the fenders and lids are drying I'll break out my wife's sewing machine and work on the rear seat.
New handle bars and grips are on their way.
Looking Good :clapping::wave4:
irondad01
150+ Posts
- Thread starter
- #171
Thanks everyone.
I mounted a breather box for the engine inside the engine compartment then I worked on the seat.
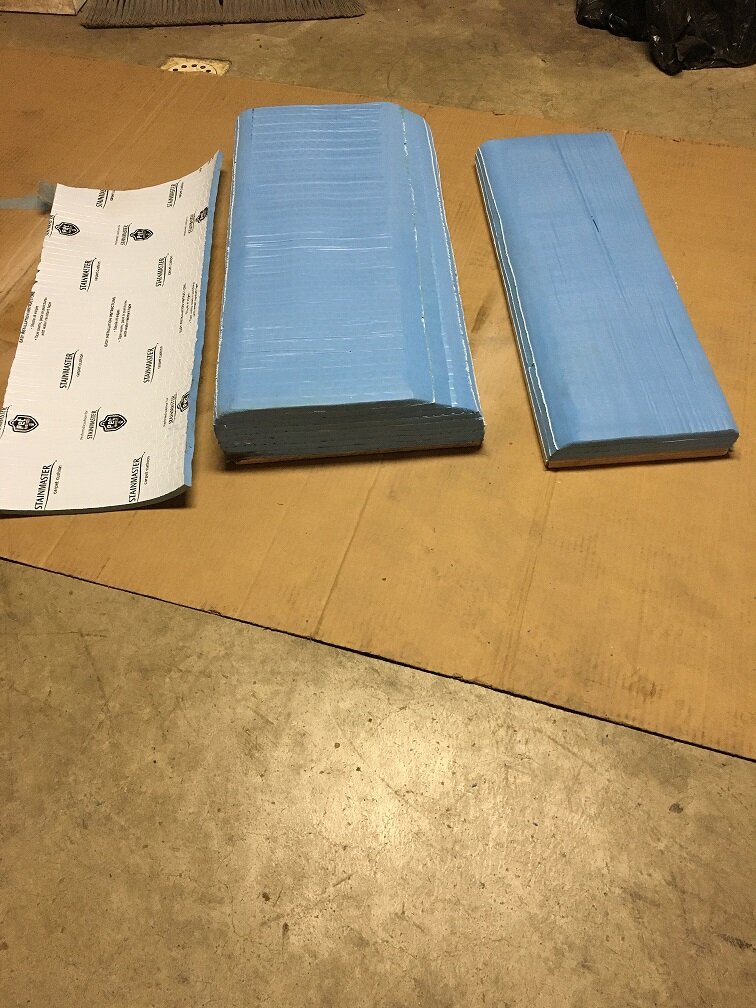
That's carpet padding from Lowes. My brother had a roll left over and gave it to me. It's 1/2" thick so I glued 8 layers together to get the 4" I needed for the bottom. The back is 1 1/2" thick. It's pretty stiff. About like a Corbin seat. Softer foam lets you bottom out. You can't bottom out the stiffer stuff so there is still some give when you hit a bump.
The handle bars and grips just got here so I guess UPS is still working.
I mounted a breather box for the engine inside the engine compartment then I worked on the seat.

That's carpet padding from Lowes. My brother had a roll left over and gave it to me. It's 1/2" thick so I glued 8 layers together to get the 4" I needed for the bottom. The back is 1 1/2" thick. It's pretty stiff. About like a Corbin seat. Softer foam lets you bottom out. You can't bottom out the stiffer stuff so there is still some give when you hit a bump.
The handle bars and grips just got here so I guess UPS is still working.
- Moderator
- #172
WOW I'm impressed. It is coming out very nicely.
irondad01
150+ Posts
- Thread starter
- #173
The rear seat is done. I have a lot of respect for people who sew seats for a living.
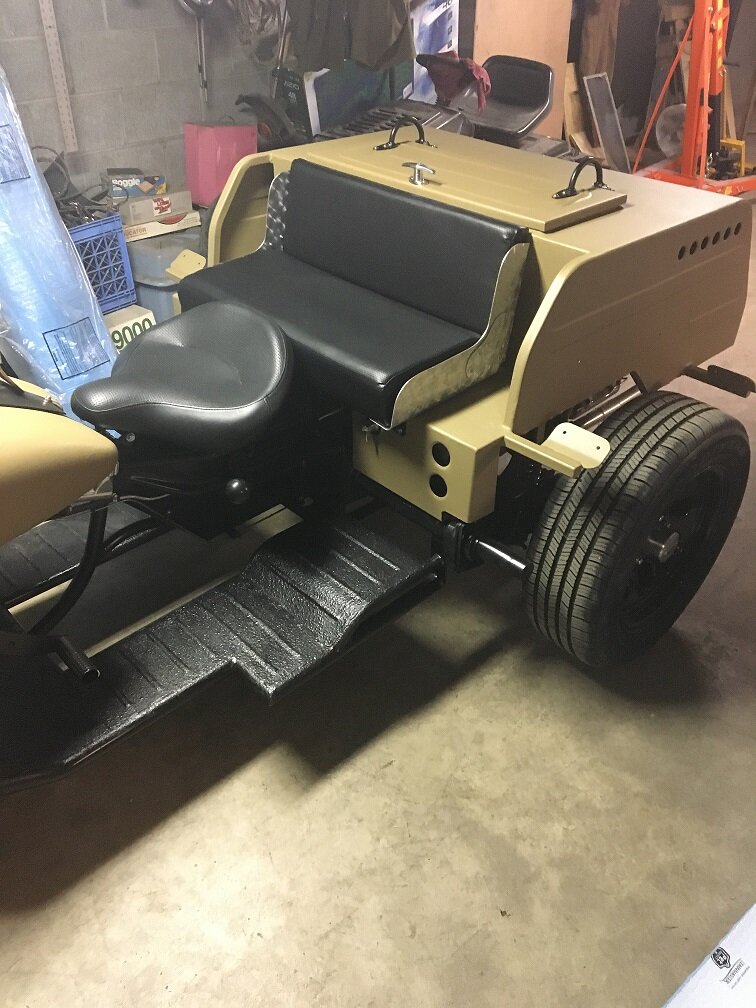
I used a dimpled material for the top and plain stuff for the sides to match the front seat. I was going to do the double stitching to match but didn't think I could pull it off without messing up. It's really pretty comfortable.
I got the storage lid and the engine lid on too.
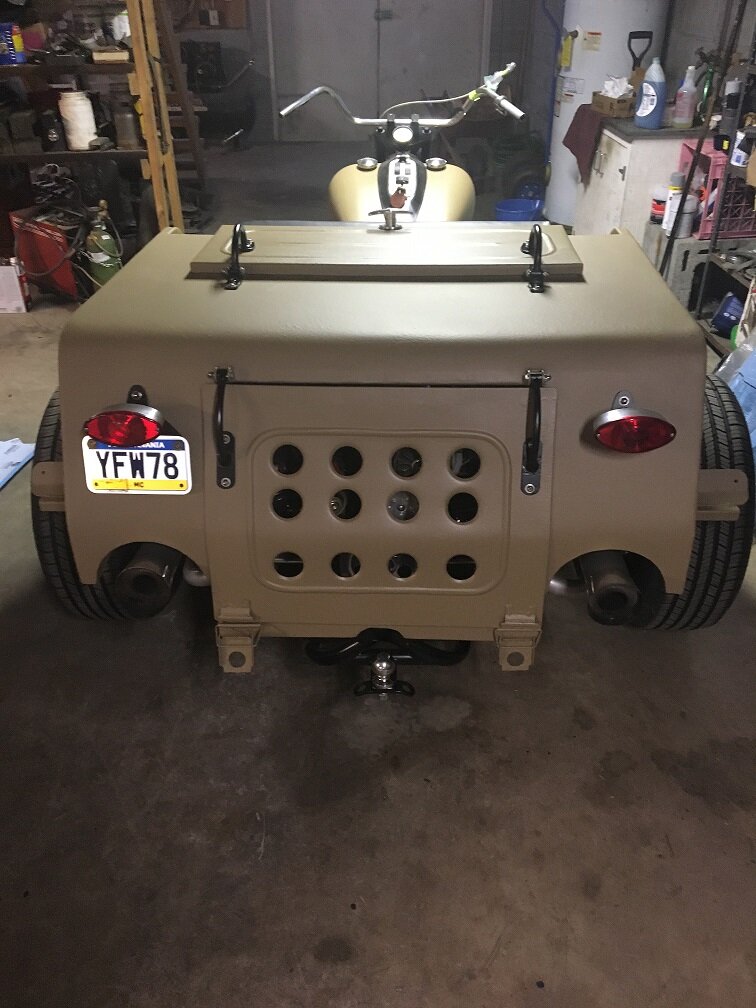
When I was changing the handle bars I stripped the banjo bolt hole for the brake line in the master cylinder so I'll be repairing that. The handle bars are supposed to have the same bend as older Harley big twins. I like them a lot better, thanks TomyJ for the suggestion to change bars.
Fenders mounted probably tomorrow. There isn't a lot more to do to finish. Lettering whenever I can get to someone who does that. This whole Shelter in Place is sure putting a crimp in a lot of things.Oh well, we have to do what we have to do.

I used a dimpled material for the top and plain stuff for the sides to match the front seat. I was going to do the double stitching to match but didn't think I could pull it off without messing up. It's really pretty comfortable.
I got the storage lid and the engine lid on too.

When I was changing the handle bars I stripped the banjo bolt hole for the brake line in the master cylinder so I'll be repairing that. The handle bars are supposed to have the same bend as older Harley big twins. I like them a lot better, thanks TomyJ for the suggestion to change bars.
Fenders mounted probably tomorrow. There isn't a lot more to do to finish. Lettering whenever I can get to someone who does that. This whole Shelter in Place is sure putting a crimp in a lot of things.Oh well, we have to do what we have to do.
wlivin2
400+ Posts
you have skills looks great
irondad01
150+ Posts
- Thread starter
- #176
These are the latest basement photos.
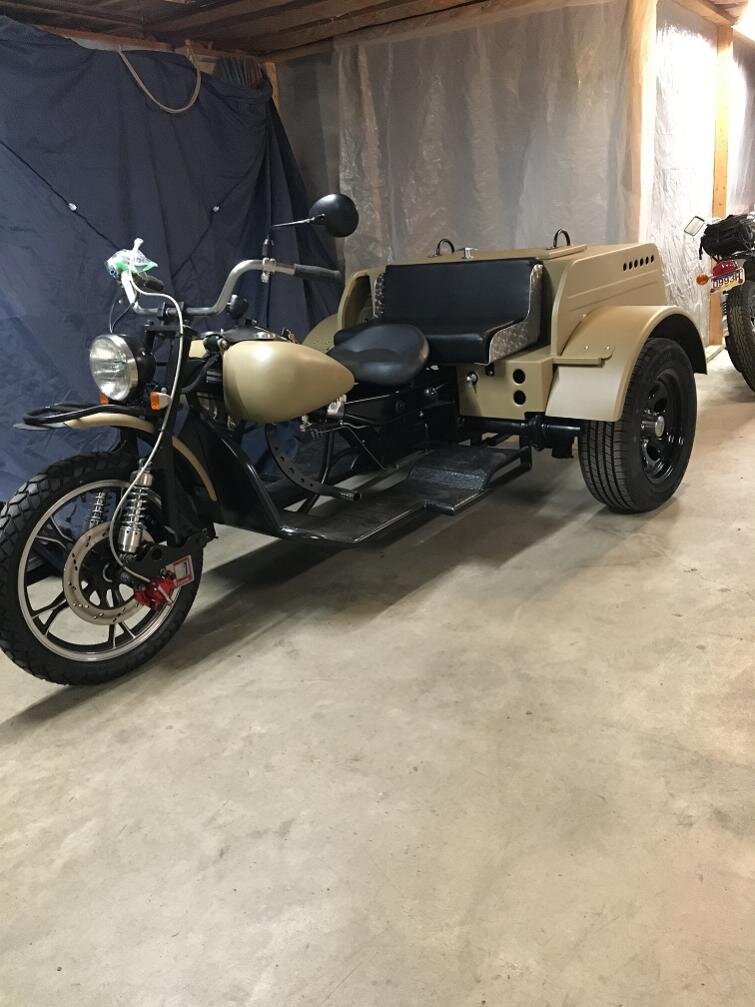
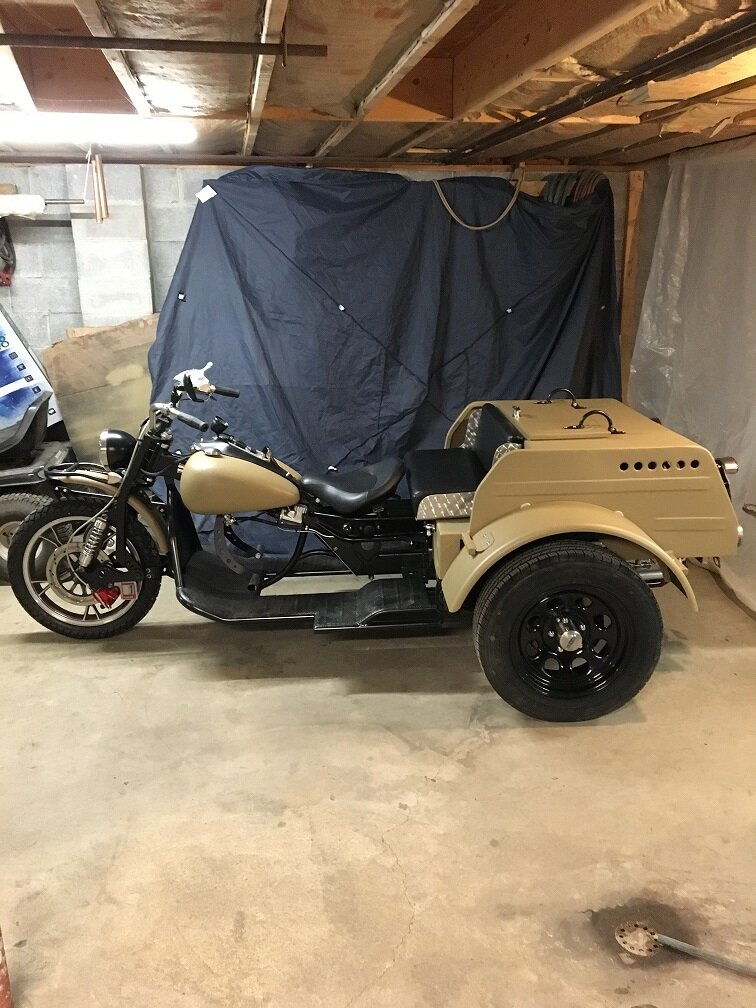
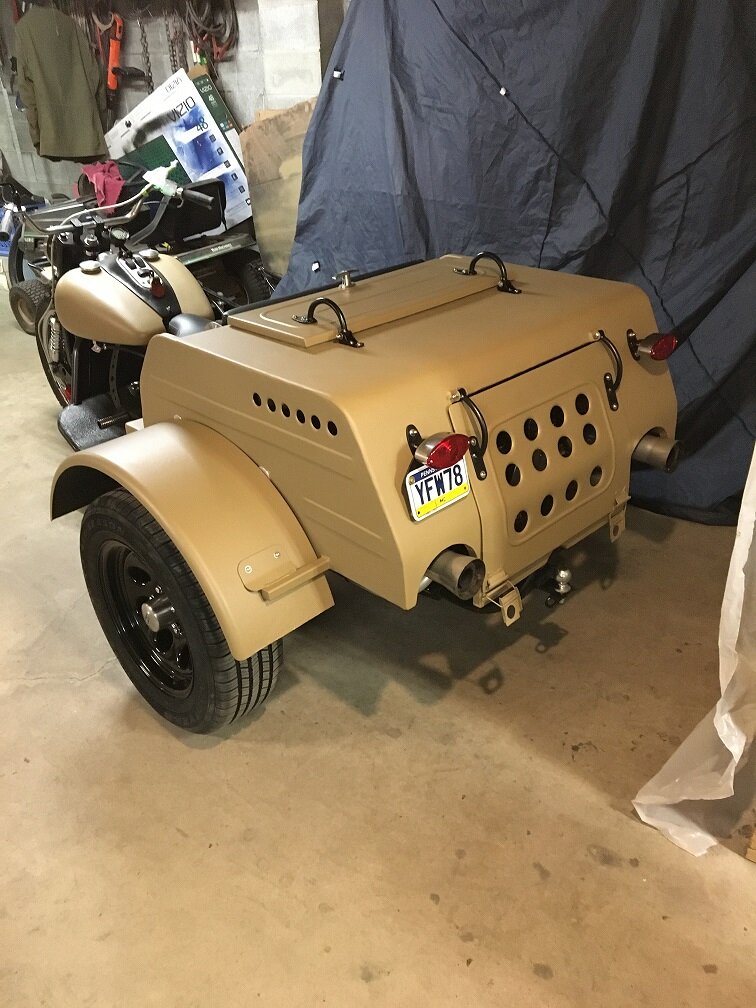
I have a fitting ordered for the front brake and I have to get some lettering done. Everything else is complete. Once I get that done and we get some nicer weather I'll pull it outside and take some better pictures. I have a 1/4 mile mud pit for a driveway so hopefully that will dry up and these travel restrictions will go away. I think it would be hard to practice social distancing riding this because people would want to talk about it.


I have a fitting ordered for the front brake and I have to get some lettering done. Everything else is complete. Once I get that done and we get some nicer weather I'll pull it outside and take some better pictures. I have a 1/4 mile mud pit for a driveway so hopefully that will dry up and these travel restrictions will go away. I think it would be hard to practice social distancing riding this because people would want to talk about it.
LarryA
500+ Posts
I'd say you definitely nailed " the look", a machine the Desert Rats could only wish for!
The length and heavier front should make for good riding and handling.
Well done, my friend!
The length and heavier front should make for good riding and handling.
Well done, my friend!
Motorcycle Mike
800+ Posts
I've really enjoyed watching this build, I'm kinda sorry it's over.
Nice work building a true one of a kind.
Nice work building a true one of a kind.
Jack Klarich
Guest
Looks darn good, thanks for putting together this thread with your build:clapping:
Looking good Carl, I thoroughly enjoyed watching the build, almost there !!!

