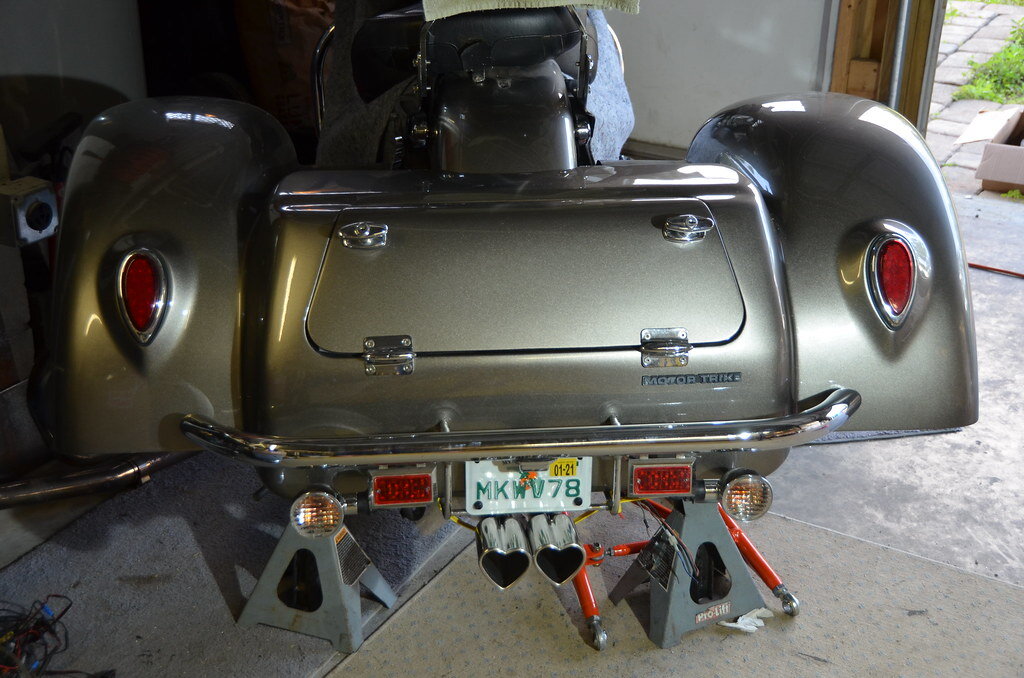
2006 Motortrike vtx1800 is my next ride....

WOW. Like Holy Flurkin Schmidt WOW.

Dry braking with the race tire is what i wanted. Mrs V said it was easily twice the stopping force, and I was being cautious testing with a passenger.

I warned her, it was a declared test, but she was still squished to the 'cant breathe' point and I still had not locked the tires. :clapping:

WORTH*EVERY*PENNY

First fill up since running out of gas, 3.32 gallons did 101 miles. 33mpg

GLEE ON THREE!!!
 
About them sticky tires..............

In one of the 'acceleration tests' ..last one actually.... I thought it was starting to pull right. New feeling.

Mrs V was on back, and we had to stop for groceries anyway. Took it easy on the way home, but could sense a 'accelerate and crab to the right' feeling, not so much the other way on deceleration.

Might have found the vibration problem..

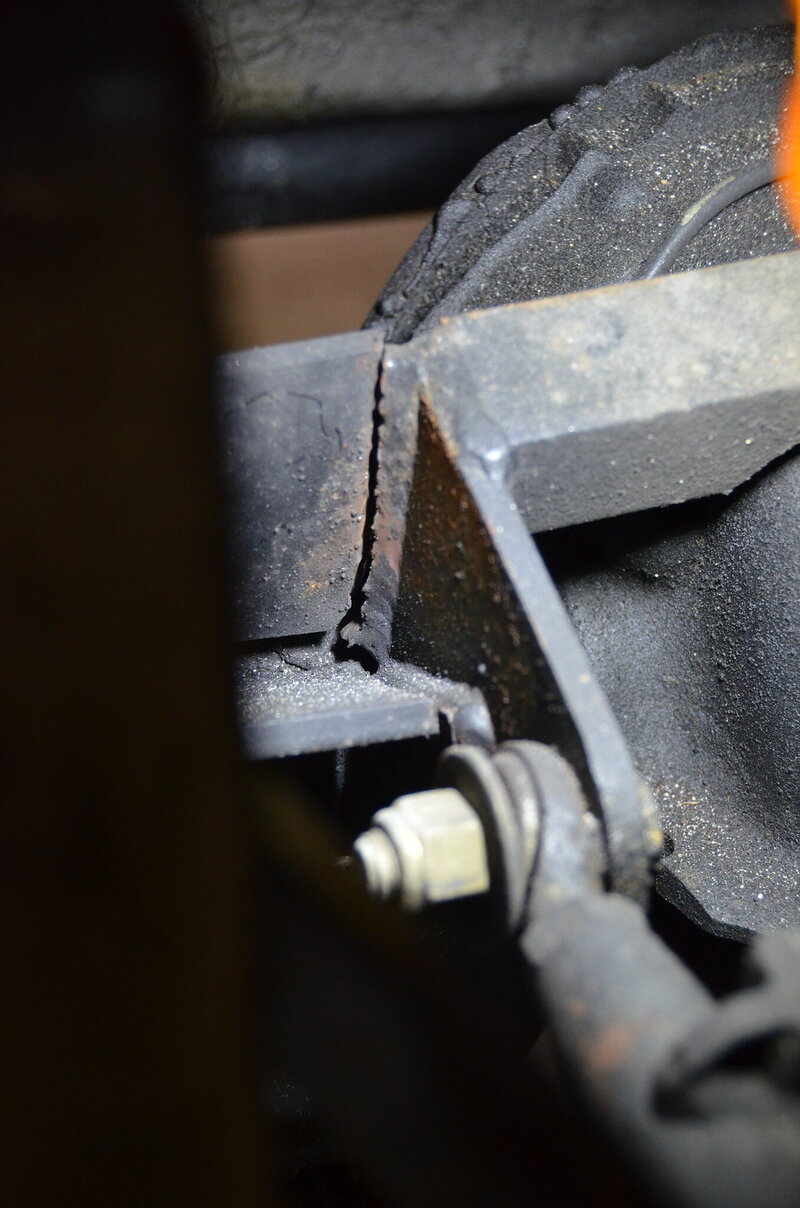
This is the right hand ladder bar mounting to the axle. The nut you see in the lower center is the upper link.

You can readily see where the weld failed on the vertical member. Also on the horizontal weld coming 'towards' the camera, you can see the displacement from the weld. Both are separated, and to my eyes look like 'old damage'.

49318609702_7c5469e56b_h.jpg

________________________________________________________________

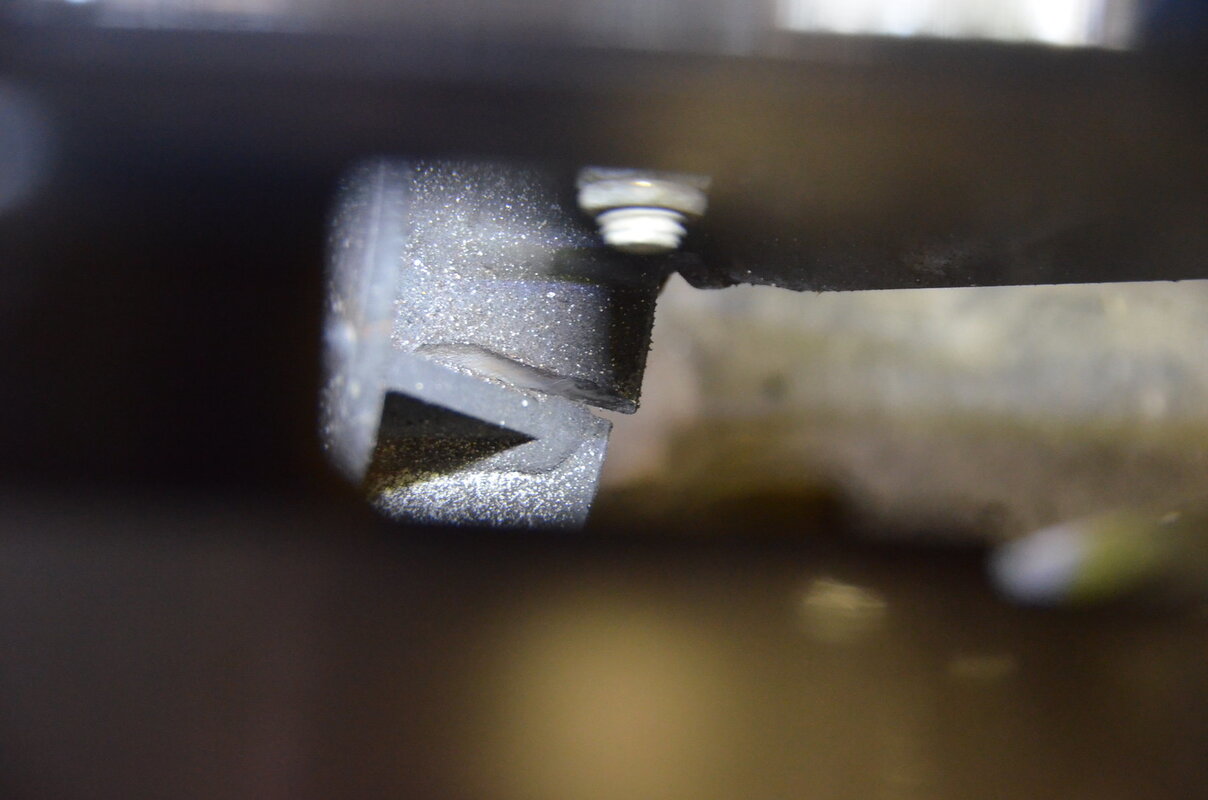
This is fresh. :cxtv: WHOA. Tough getting a picture, the top nut is on the top link, and the jamnut for the bottom link is visible. That's fresh metal in that tear. :xzqxz:

Axle is coming out, getting stripped and cleaned, inspected and rewelded.

49317939873_8d6e1356c6_h.jpg

_________________________________________________________________________________

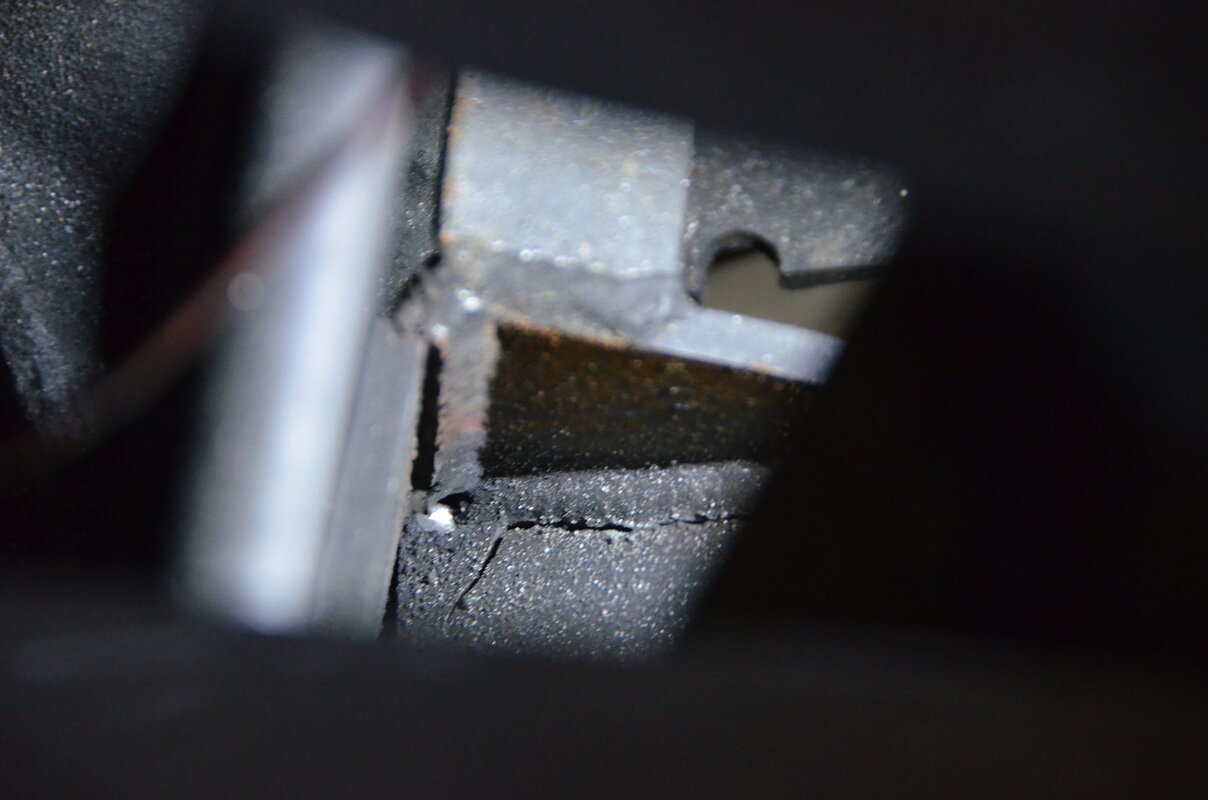
This is a top view of the two broken welds. Good view of the displacement of the vertical weld.

You can see evidence of rust, and I bet this happened before I owned the trike. Just got worse with my 'testing'. Glad i found it here in the garage.

You can see the tear on the horizontal member, that corner area does tie into the axle weldment.

49317907068_14772f92af_h.jpg

_________________________________________________

Dinner time, and get plans together. I am gonna know a LOT more about this trike soon. :clapping:
 
Glad you found the cracks & tearing at home. I expect the trike will be heavier when it goes back together. I like E7014 myself.

I like those tires, been "looking" some myself.

I never did & still don't believe that disc are better brakes … or that drums are somehow inferior brakes, true, they are heavier but by golly, they work.

Happy New Years!

A happy new year to you and yours also!

I do love the 7014 rod too. Most forgiving stick I ever use. But pretty sure I will rip it all apart and MIG it.

Not to mention anneal the welds when I am through. I have yet to get the pieces out to see, but looking at the top cracks, they look 'old'. I am betting that the fabricator was in a hurry, and things went down hot and quick. Enough locked in stress to be close to cracking. And then it did, who's to say from what. Or when, but judging from the rust I feel safe in saying it predates my purchase.

But that tear on the bottom with the fresh gray steel... thats all mine. :D

And I am hoping the driveline vibration has been the other broken ones flexing all this time. Be nice to have that solved when it goes back together.

The two top welds are about impossible to see from the bottom, and I didnt really do a 'check it for ticks' close inspection... lucky it wasnt worse. The only way I can see them clearly now is after removing the top piece between the fender and seat. I can see them somewhat from the front of the right rear wheel, but you sorta have to be looking for them.

Disc vs drum... good thoughts. I would be hard pressed to say which is heavier, the rotor, its mount and caliper might easily be more weight than the drum and backing plate ass'y. Never weighed them. I was sorta surprised there was less than 2 pounds difference in the tires weights.

As far as 'better'...well for better performance in heavy use and nearing the 'extreme' limits, disc. The drum will have fluid boiling in the cylinder before a caliper gets to that temperature. Not to mention drum expansion can lead to a very strange feeling pedal. But on a trike, I would be hard pressed to get them that hot. I hope. :xzqxz:

But drums sure keep things cleaner. :) And they are whats on there. So keeping them for now.

Been reflecting on how it did NOT turn into a disaster with the ladder bar mount completely off. I think the air bag in back, and the coil spring on the front of the axle helped a lot in keeping things centered. Good design. :good: Possibly saved our lives. That, and the fact I backed off instantly when I felt it start to crab. Mrs V knew something was wrong, but I am pretty good at hiding my 'OH SH*T' feelings. Never let them see you sweat, right? :cool:

For those who wonder why I am still shaking a bit after finding this, watch this video to ~20 seconds.


Note the rear axle behavior in the Dart. Now imagine that happening with a trike... :shock: Might hurt.

Ripping things apart tonight, will be taking many pictures! :wave4:


I have the same trike kit on my 97 Honda Valkyrie. No vibrations on mine, but will get a flashlight and inspection mirror and take a good look at my rear end also. Hoping it isn't a problem waiting to happen. Glad you are taking some pictures of the repair.

David
 
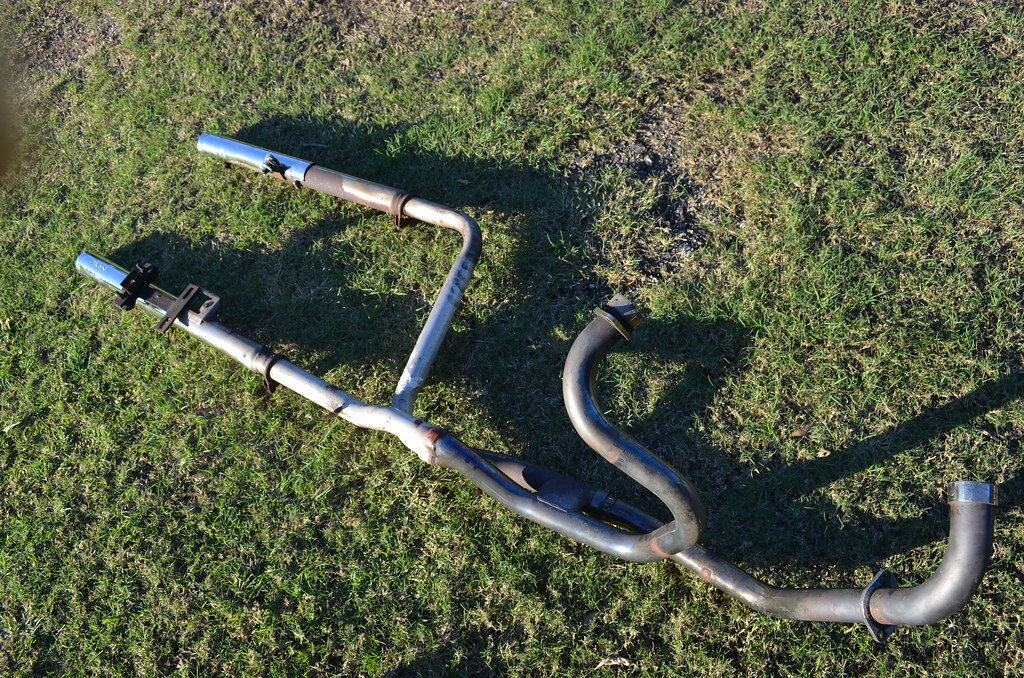
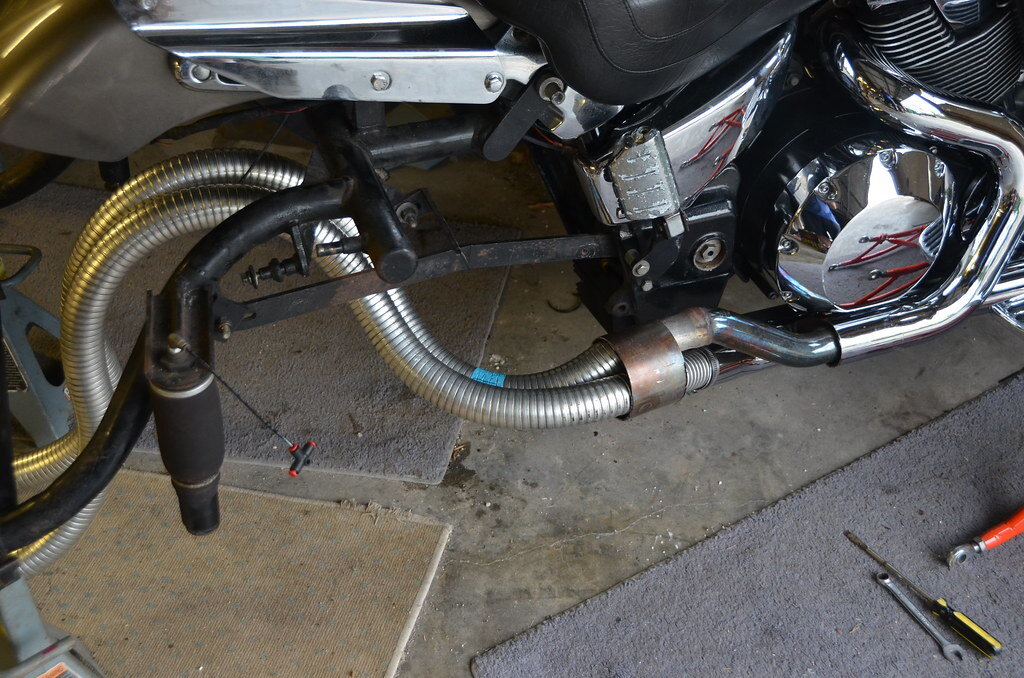
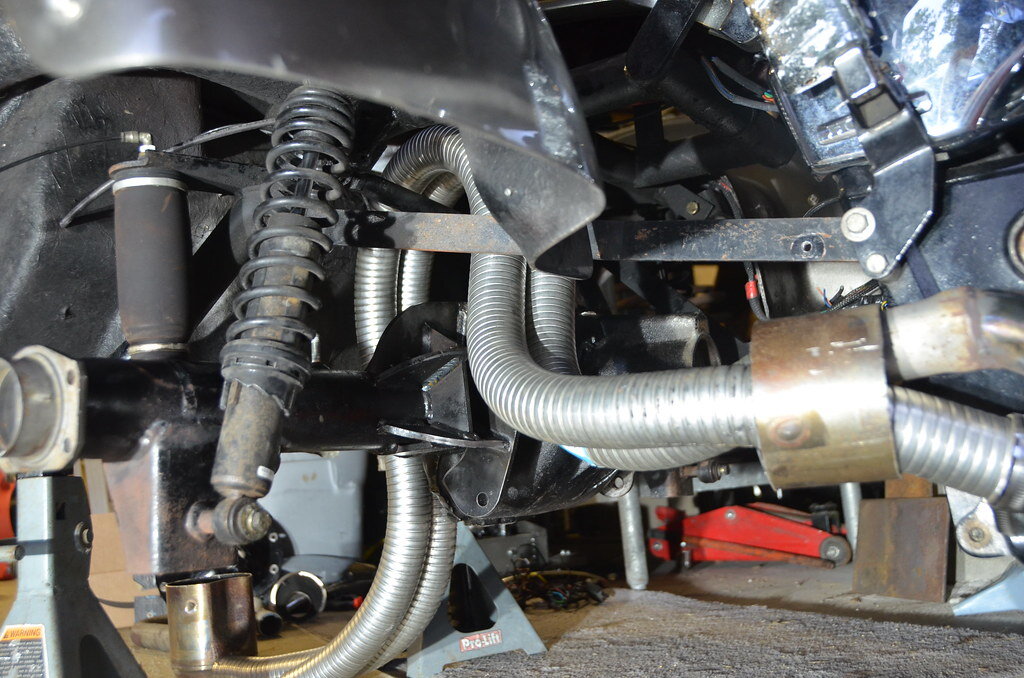
Mocked up the VTX1800C exhaust. I LOVE the look. Will trim the chrome near the axle.

I like it is a 2-1 system. Fits tighter and better. Still want dual outlets.

The muffler is not in there, the pipe ends in the middle of the transition cone.

49341927986_d68d857188_h.jpg

********************************************

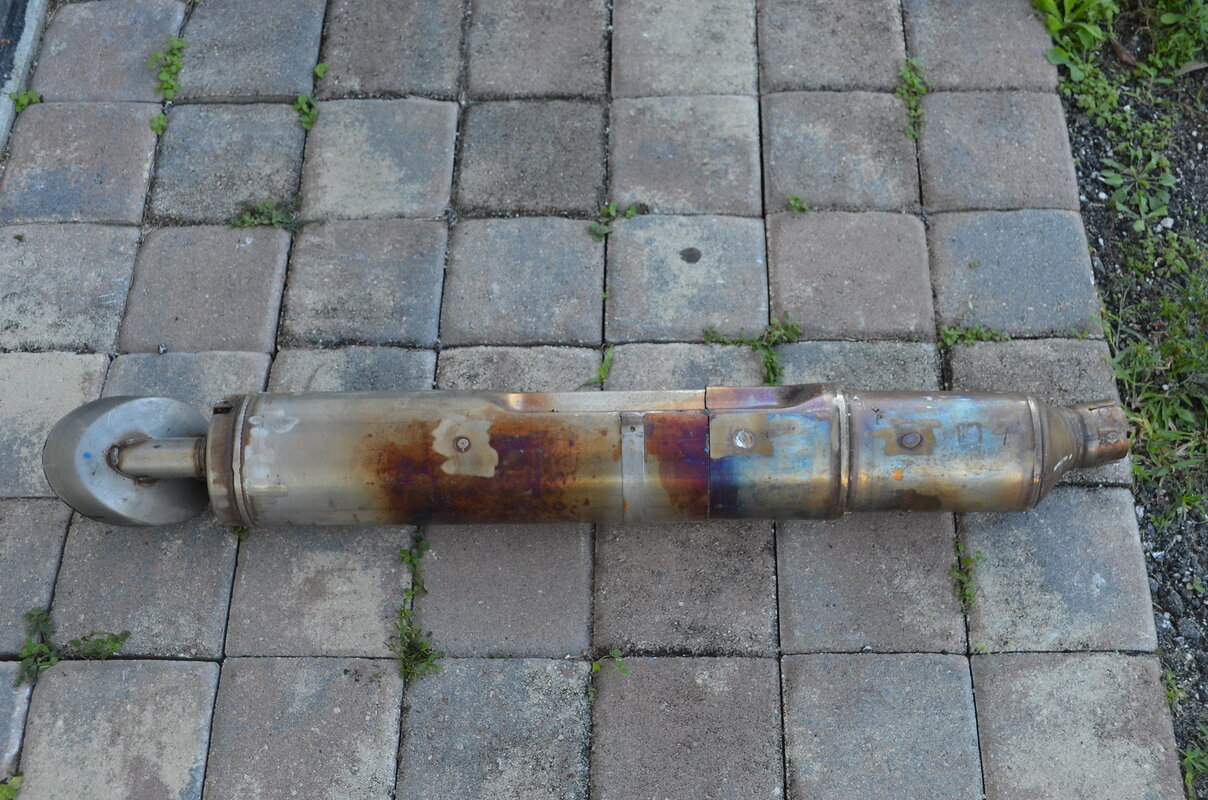
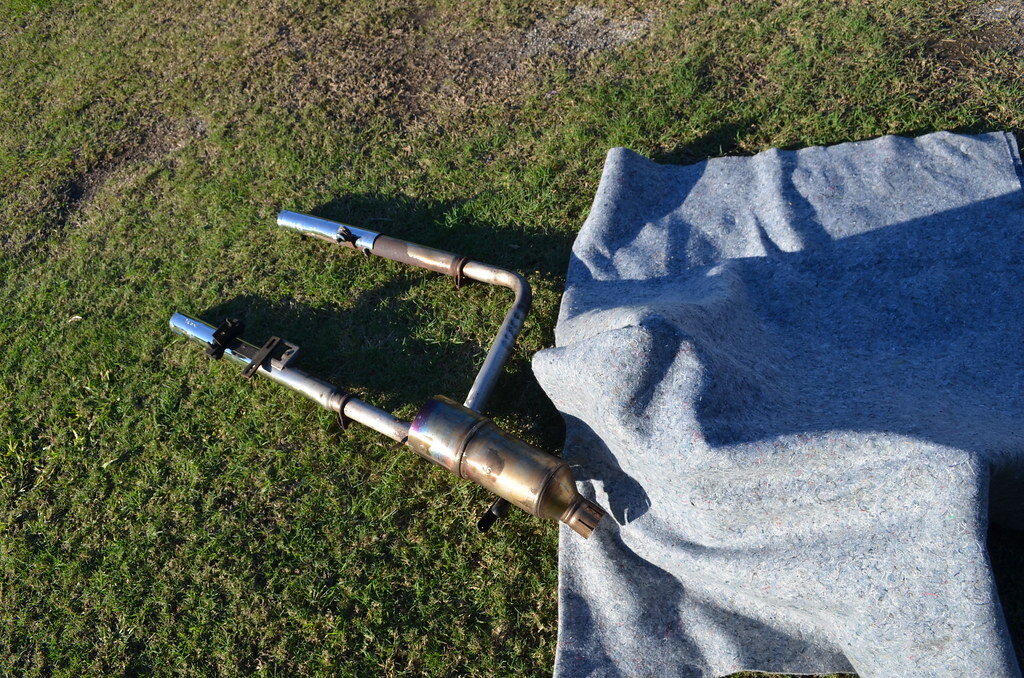
This is the stock muffler. I cut 2 tabs that held the chrome on.

49342152622_e995830eab_h.jpg

*******************************************

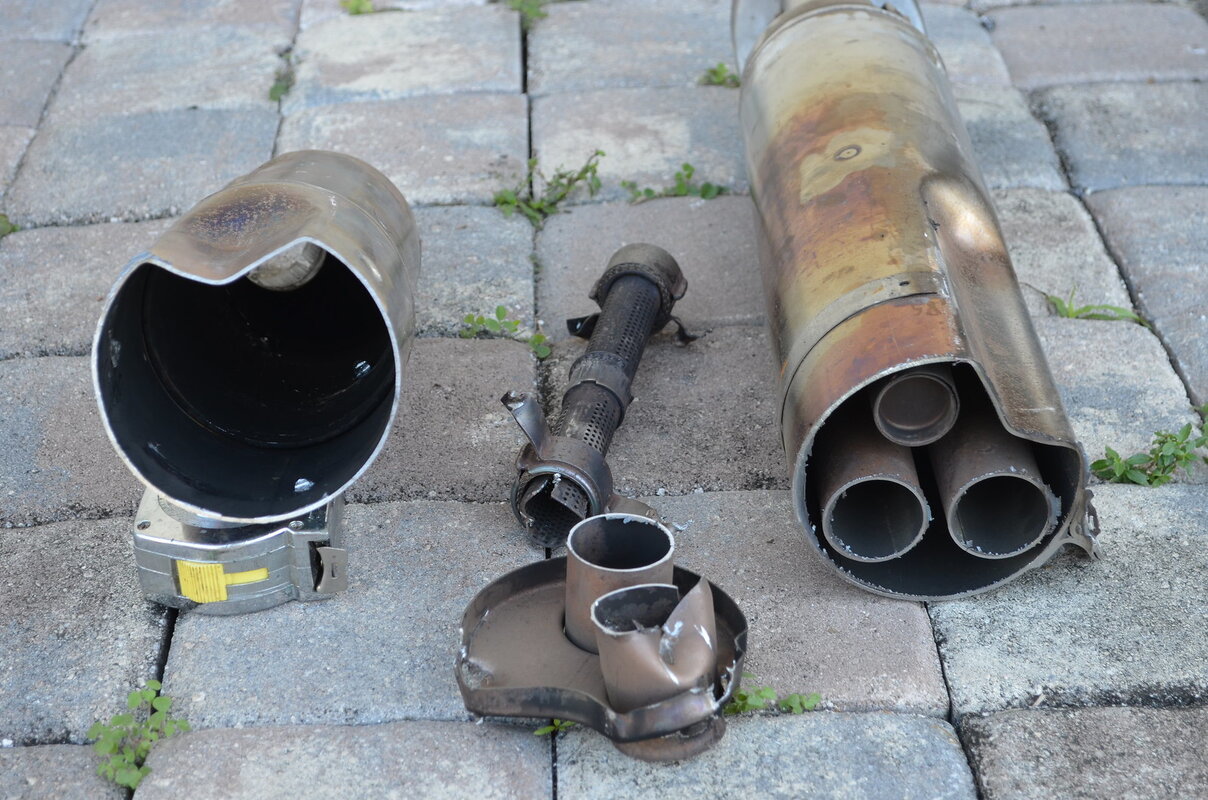
I need the section on the left, and have gutted it.

49342153362_666c5eeb7c_h.jpg

***********************************************

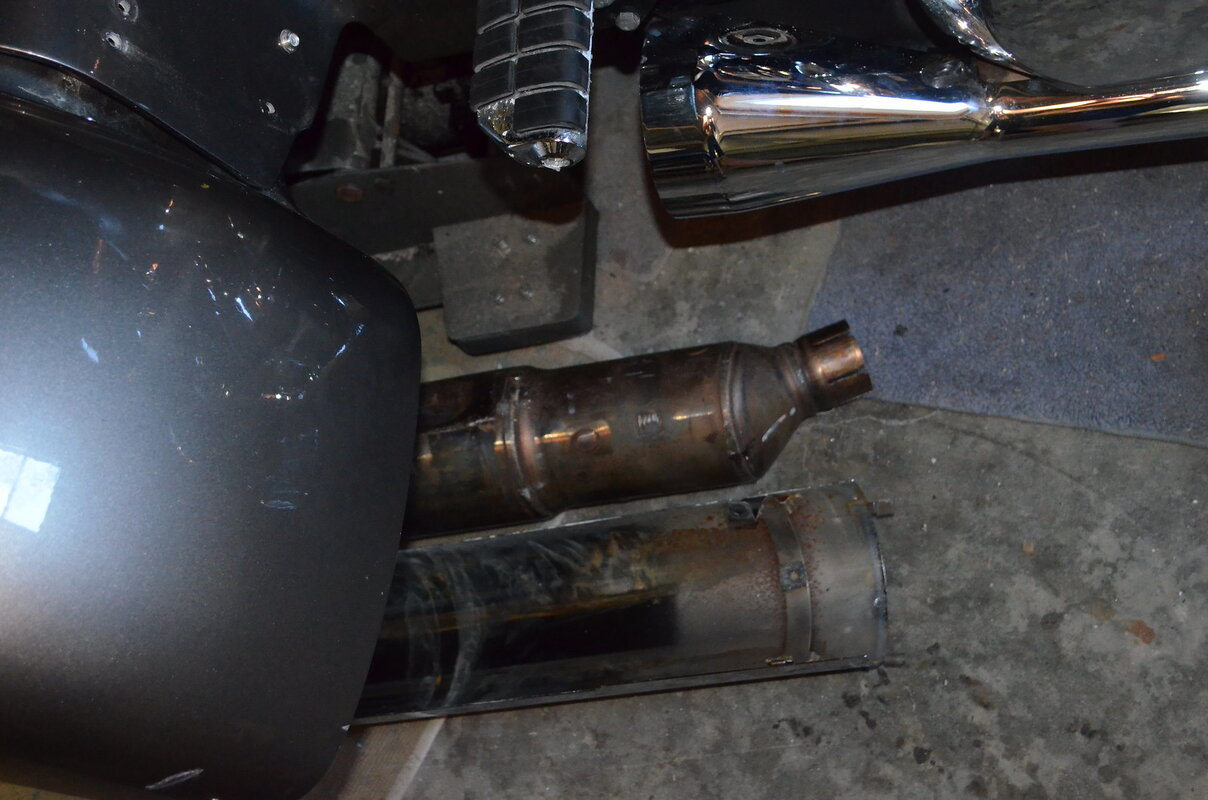
The clamp on the chrome cover fits around the pipe. You can see the rub mark from that little square pad. It will make a very good front mount. It is roughly aligned front to back with the (hidden) pipe it goes on.

49341480343_7e6afa7ebe_h.jpg

************************************************

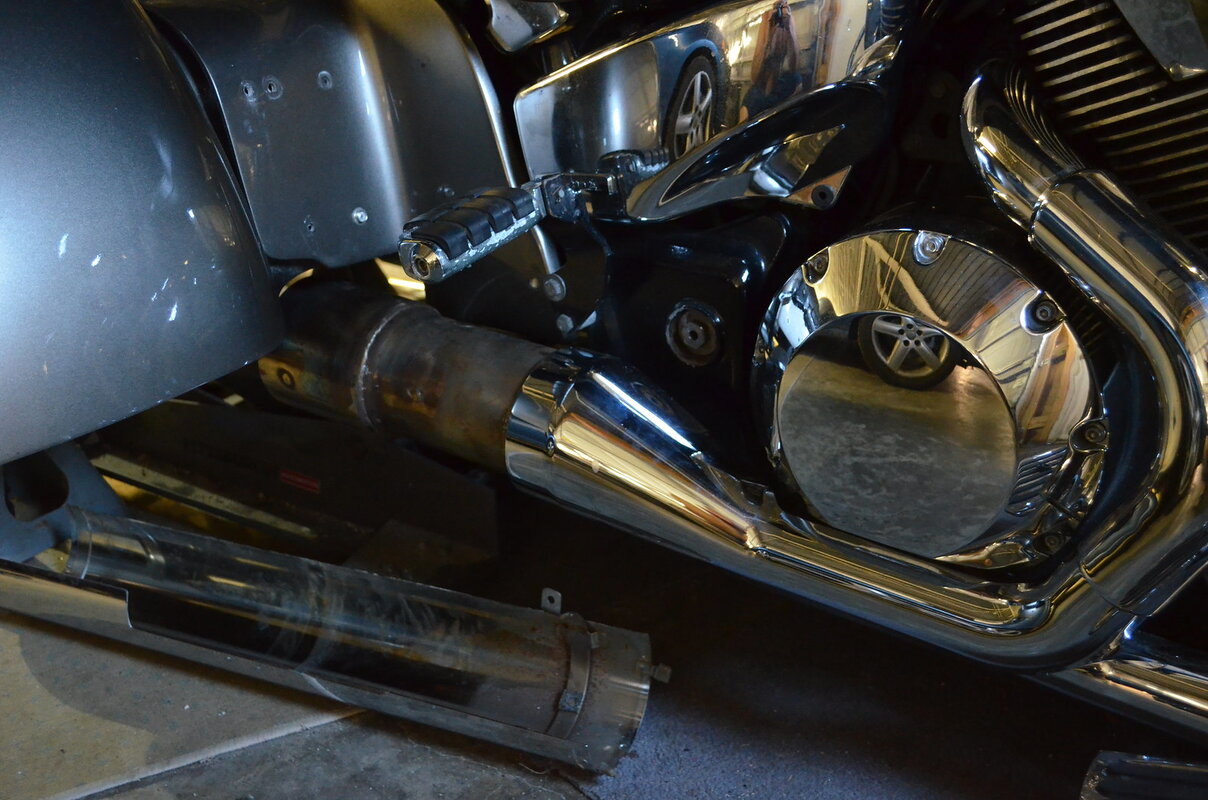
Fits like factory. This piece will be the transition between the dual tips and the stock system. You can see the end of the canister, the chrome will go further.

I want it to cover well enough that you can be on your belly and not see the end. :clapping:

49341931101_2fc878d150_h.jpg

***************************************************

This is the current system, without front chrome covers. Not put together well, and crooked. Tips uneven.

49342154287_6d76890d45_b.jpg

**************************************************

This is a mockup to help visualize what I have to build. Will redesign the mounts too...rough workmanship shines out.. :blush:

49341479578_c6cb6d502b_b.jpg

Should be fun.

Toying around with using the stock taper cut end on a single exhaust too... Might give a cool look.

But with all the bad axle news I needed something shiny to play with, STAT.
 
This is a mockup to help visualize what I have to build. Will redesign the mounts too...rough workmanship shines out.. :blush:

View attachment 81305

Should be fun.

Toying around with using the stock taper cut end on a single exhaust too... Might give a cool look.

But with all the bad axle news I needed something shiny to play with, STAT.
It's an exhaust system, they are allowed to be rough around the edges. I thought you were doing something different. I actually liked the thought of a single large tip but not gutted, but duals are good. The test is if it doesn't crack in use.

Video? I had a '69 Dart Swinger 340 4spd, 3.91 rear in early '70s, ran a best 13.01 quarter once on G60-14 recaps that hooked fair, I sure hated to see that one loose a rear (in video, it's a '68), but the price you sometimes pay to play stupid. Seen cars loose front U-joints and pole vault too.

Buddy of mine had a VTX 1800 & when he rode it on group rides, he rode it at the rear, but I don't think he had any baffles? Loud, but not as bad as that Valkyrie with 6 straights. He is some "hard of hearing".
 

Attachments

  • DSC_6317 (800x571).jpg
    DSC_6317 (800x571).jpg
    389.3 KB · Views: 93
It's an exhaust system, they are allowed to be rough around the edges. I thought you were doing something different. I actually liked the thought of a single large tip but not gutted, but duals are good. The test is if it doesn't crack in use.

Buddy of mine had a VTX 1800 & when he rode it on group rides, he rode it at the rear, but I don't think he had any baffles? Loud, but not as bad as that Valkyrie with 6 straights. He is some "hard of hearing".

Yeah, rough around the edges is one thing, but uneven tip height AND uneven 'stickout' looks like crap. Cracking during use isnt a 'test' in my book, good design and construction should eliminate all but abuse damage. I hope it is clear that the pic above is just shot at a good angle for 'seeing' a concept. Nothing is actually built, you can see the plastic clamp the transition piece is balanced on.

The 'ungutted' stock muffler would not work, it would occupy the same space as the rear axle. Well, unless the same 'test' standard was in effect for the rear axle, and the welds cracked and the rear axle fell off. PLENTY of muffler room then. :mad:

It will be quiet, I am a "Walk softly and carry a big stick" guy. Let those with tiny sticks go deaf. :laugh: I do want a rich mellow tone though. I really like the sound of the duals I have now. They are just long, so need more piping.

I am also leaning towards a big single tip. And I think it would be a boss touch to use the 'stock' chrome tip. Have it coming out at a 'down to the right' angle. Be very different. I may mock that up and get a pic.
 
OK, twin tips won. Mrs V has a point.....well... two of them, its coooool outside ;)

She has not seen these. Hope its a surprise.

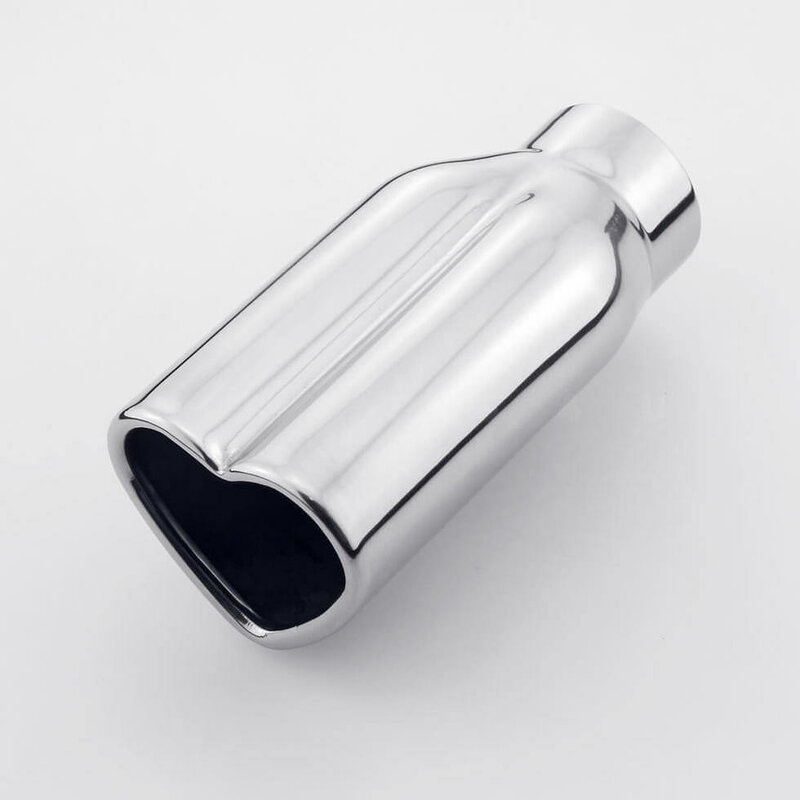
Got the last 2 of 3 available. I know she will like them.

s-l1600.jpg

s-l1600.jpg

DB arrestors before, and new muffler as high pass filter... be a good deep lovin' sound. :)
 
She'll like them a lot I think. Glad you got 2 of last 3 left. Good exhaust tip size, location, exposure is like the dot (.) to the eye (i) or the cross (-) to a tee (t). Completion.

Much like two points are … well … you know! ;)

Like, "if you don't look back as you walk away, then you bought the wrong one".
 
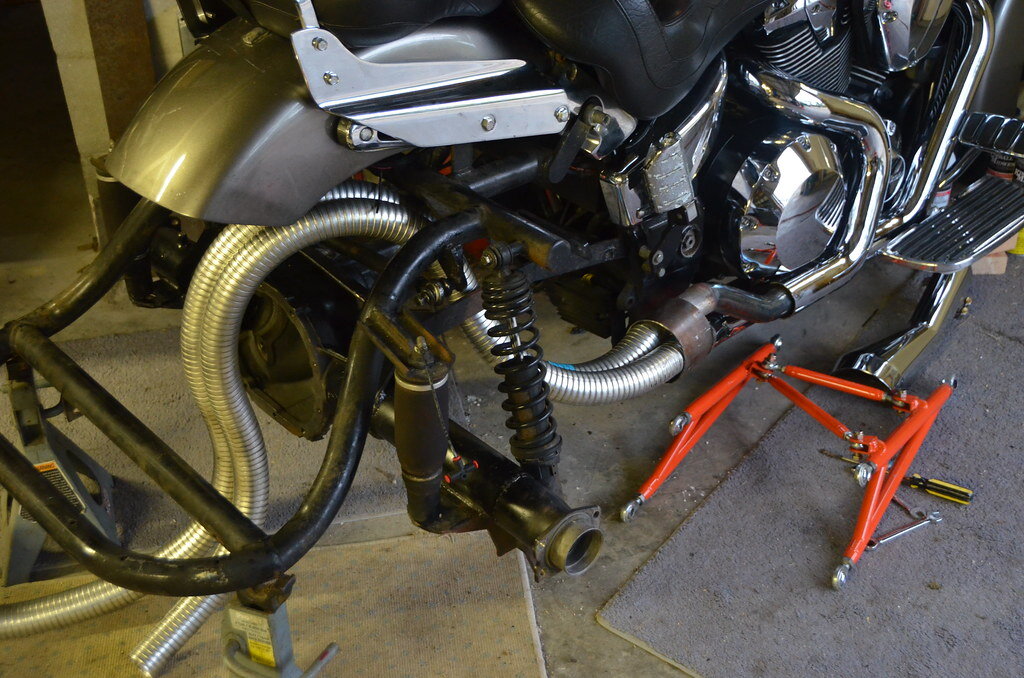
Exhaust tips came in, so did flex pipe. So I mocked up the trike to give Mrs V a look, and a lift in spirits.

49402870898_882de8914e_b.jpg

**************************************************

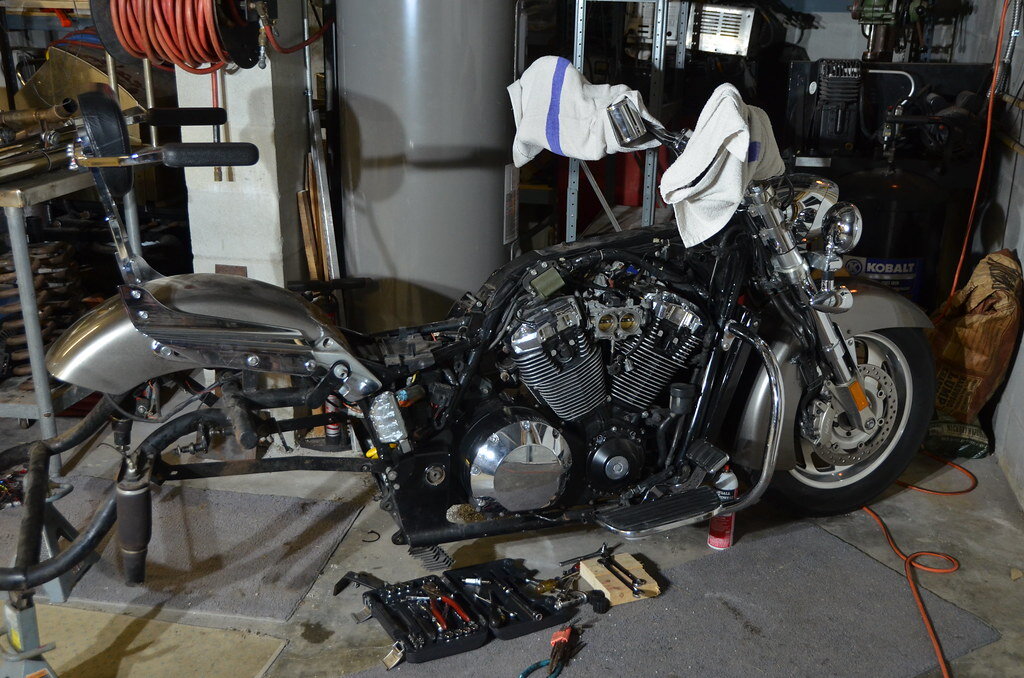
She really needed one, as this is the 'state of the trike' as I type. Valve adjustment today, then assembly begins.

One of the BEST tips i found was to wrap the handlebars with towels. Using the bareass chopper site for a lot of helpful 'how to' articles.

https://tech.bareasschoppers.com/engine/valve-adjustment-vtx-1800/ The menu on the left has LOTS of helpful stuff.

49403547547_0c08a40e74_b.jpg

*******************************************************

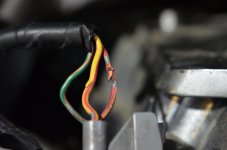
Found wires in poor shape going to the throttle body. Hard to say WTF cut into them, whether it was a pocketknife for 'diagnostic connection' :xzqxz: or poor handling? Going to solder/heatshrink, then carefully inspect as i reassemble. Going to clean up the ground(s), and check EVERY wire. There has been some a**hats 'working' on this bike.

49403407931_e9029919e4_b.jpg
 
Woooohoooo!

Got my official Honda service manual in the mail. About 1000 pages of 'everything-you-want-to-know' about 02-07 VTX1800's.

B+W wiring diagrams, but SO nice to have info.

Should there be other VTX1800 owners in here that need info I can scan and upload a section for you. Knowledge is POWER. :clapping:
 
YEAH Baby!

Aside from some delays, getting back to work on the trike.

Here is a shot of the exhaust in development.

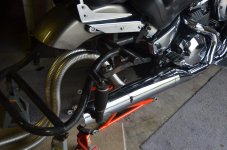
I wanted to use the 1800C exhaust I got REALLY cheap on craigslist, but it is not compatible with the 1800N brake setup. :annoyed: I have the 'came with it' ""Cobra?"" header pipes and coverings. Then I have a Factory VTX1800C(? Pretty sure...) exhaust chrome on the collector and big outlet pipe. The outlet pipe is not trimmed to length, will have to be. This is a mockup before I got the axle housing back.

49466226351_822bc8f19b_b.jpg

Here it is without 'her knickers' on. The collector and big exhaust removed, and the ring cut from from the original 1800C muffler exposed. The factory clamp on the 5" dress/outlet pipe fits just right on this, and it will be welded to be a secure mount. :clapping:

49466226081_a2e3193f57_b.jpg

Got clearance to fiberglass and track rod. I am going to wrap the exhaust, so heat will be controlled.

49466448442_b11240c2c8_b.jpg

Body removed, axle on.

49466449207_968c8f8215_b.jpg

This is gonna be cool. :good:
 
The new lithium battery feels light enough to be fake. Over twice the cranking amps. May have to upgrade cabling.

49539850558_53ab8523b9_b.jpg


Got 100' of titanium exhaust wrap, made from lava. Cool stuff. (Needed 150' total by the time it was over.) Got the tool and 100 stainless ties.

49540570452_de26af3dd7_b.jpg


Very cool looking, and should retain a lot of it after burn in.

49540570212_ef8b231eed_b.jpg


Had to fabricate the rear exhaust mounting plate before welding the mounting ring. Worked out well.

49540346301_acab3f9eeb_b.jpg


Welded up the mounting ring for the 'collector' pipe.

49539848878_03eb96484f_b.jpg


Transition piece mounted... collector down below.

49540569427_14ea0daa68_b.jpg


Mockup complete. Gonna look good. Now to rip it all off the trike AGAIN and wrap it. :eek:mg:

49540569672_81f0a8bd5b_b.jpg
 
OOOooOOOOOOH yeah. This is nice wrap. Took this after going through the first roll, had to order another 50'

49581513236_96d0094f25_b.jpg


VERY pliable. Best wrap I have ever used. This is a close up of the 'H' section. There are 3 layers, and it has minimal/no (!) wrinkles. Will minimize problems getting the chrome on...

49581015228_2ea539987e_b.jpg


FINALLY wrapped.

49581744712_8fb84c7122_b.jpg


I used ~35 feet to do the tailpipes. Looks 'greener' to me. Started on one, go to the top and wrap, then down to end on the other.

49581744442_1896f228c4_b.jpg


I am HOPING that this is the last time I install the exhaust. Looks great.

49581511401_dbc0c0231c_b.jpg


Now about the rust on the back of the chrome... the factory stuff was minimal, the cobra has a lot of fluff.

49581743747_51f6178913_b.jpg


EVERYBODY scuffed, rubbed with ospho, and painted. Gonna let it dry. Should last another 20 years.

49581743442_7d1bdbdfb0_b.jpg
 
First I have to assemble the rear mount. 6 clamps to the plate, 4 holding the dress covers. NO rattles. :clapping: I had to notch one of the covers to clear the ring gear bulge on the diffy cover. Should really have the visual effect that I plumbed the exhaust through the axle.

49581013008_e103296b44_b.jpg


Mounted and solid. Now to install the front covers...

49581012738_4e2d7eb676_b.jpg


Like this. :D With the wheel off, you can see the rear pipes. When its back 'on three' it will be tough seeing the ends of the covers. Perfect.

49581011903_6856eaac3d_b.jpg


We got our new tag/licence plate.

49581015683_af9cccbbb3_b.jpg


Devoting all the time I can to this. Missing some PRIME riding weather here. Have to finish welding the rear axle housing :annoyed: where Motortrike missed. :nonono: Then put it together! :yahoo:

I have to update my signature too! :cool:
 
Well hey.... must have been having fun, cause time FLEW by. Out on medical leave until Oct 4, and just up and about now for a couple weeks. :yahoo:

Spent the last week cleaning off the trike and assembling. :jumpy:

Whoever set up the rear axle before had NO idea WTF they were doing. :Joker3: Now that the axle is where it should be, square and solid... it rides SO much better. I understand how to set up a 3 wheeler with ladder bars now. :cool:

First version of the exhaust was WAY too loud.. now with quad baffles and the DB inserts, it is a very mellow sound. Very cool.

50312069891_a19bac6a47_b.jpg


Either having the pinion angle correct, axle setback correct or not having the axle flex cause of broken welds... or a combination of all... the vibration in the driveline is gone. :clap:

Few test rides have shown no issues... about to load Mrs V on the back and take a jaunt. First time for her after the near-disaster of the last ride. but she is on good spirits and anxious to enjoy the ride again. :clapping:

Yes, the side covers are missing. I want to be able to check things for a few rides. There is a fire extinguisher strapped to the back now for the trip too. JIC.

Wish us luck!!


50311407883_5c6e745d53_b.jpg
 
YeeeeeeeHAW! It rides great. Any/all vibration is the 'character' of the V-twin.

Even got to rain check it... we got DUMPED on. The rain/race tires were in their element. Even through some deeper puddles, it was stable at speed while imitating a motorboat. Mrs V commented on how stable it felt. :clapping:

I now have a bit of cleaning and polishing to do... again.. But I am SO f'n glad to be back on three. Was getting into that 'will it ever ride again' blues... over it. :good:

Gotta make up some floor board mounting brackets next. I did find out that the rear footpegs were installed wrong - side to side. Swapped them over, and boy do they fit better. Now to cut them up for new floorboards. :wink:

GLEE ON THREEEEEEEE!!!!!!!!!!!!!!!!!!!!!!
 
THANK YOU!

We put on another 100 miles and one more rain storm.

:yahoo::yahoo::yahoo::yahoo:

and Mrs V broke one of the rear footrests... so her floorboards are on the' Top-o-the-list' now.

The quiet exhaust is So sweet... but...it lets you hear EVERY other noise... I swear I can hear the cam chain slapping the case sometimes. And I am pretty sure this motor does not have a cam chain. :eek:mg: Time to re-calibrate ears. :fool:

After it warms up, I can hear the front exhaust valve clearance open up a bit. I'd rather 'hear them clatter than feel them splatter', so I am OK with that. I set all of them and checked them TWICE.

30 MPG - The flow fuel light turned on before, and I added 3 gal. 90 miles later and the low fuel light turned on again. :bye: Good to see that working.

The exhaust wrap works really well. It never got hot enough to smoke after the collector area, and the part under the seat stays cool. I love how 'clean' it looks underneath from a distance. Mission accomplished there.

I wish it was as smooth as a flat 6 or even an inline 4... but that big chrome V Twin look is worth it for a recreational driver.
 
Well, maybe I should wait until the *8* MONTH OLD gas works its way out before I go changing ring gears. :jumpy: Bike is running smoother and smoother. :clapping:

Lack of storage was another issue... when I got the trike, there was a leather bag on the back. Nice size, but OMG what a butcher install. Pic back on page one, post #8, or click this - https://www.triketalk.com/forum/attachment.php?attachmentid=79658&d=1575500060

Well... of course it is still sitting around. It needed to be dropped 5 inches, and mounted forward 3-4 more.

I recycle sheet metal, this is some 16ga aluminum. Its dirty, but gonna all be hidden.

First I formed the main bracket to drop the bag, and mount to the rack. Same size as the bottom of the bag. Yes, I used a piece of the cutting board. Cleaned it this time.

50336764548_df1d84fc3c_b.jpg


******************************************************

Made a bottom piece with a relief for the fender, two sides and a back plate. All fit inside the leather perfectly.

50337609187_e1ed2b8448_b.jpg


*******************************************************

Fitting in the bottom plate. This will form a storage pocket that is reachable by going behind the passenger seat. Good for carrying emergency stuff in ziplocks. In a small bag. Hated to waste the space.

NOT shown is another piece of cutting board that fits underneath the rack. Indexes on the two stock poles that come out the bottom of the rack(seen below), and has (3) 1/4-20 threaded inserts. Bolts are tightened from inside the bag.

50337452416_6c9e020c7e_b.jpg


******************************************************

Mounted sides and back pieces. They are solid enough to push the trike with. :D

50337608582_aa6ca3dfc7_b.jpg


*****************************************************

Bag mounted. It fits PERFECTLY. The little chrome 'nugs' you see below are the ends of the fender mounts. The bag sits clear of the paint by ~2 inches, and will not sag. It is riveted to the frame.

50337451746_a3450e8c62_b.jpg


*************************************************************

Why I couldnt make a simple box - the back of the bag had to bend to fit. The armrests push it in a little, but look fine at rest.

50337451411_01f5a0e288_b.jpg


*****************************************************

Little more finish work to do, but usable 'as-is' for now. We head out with the RV Tuesday for 5 days, trike will be in the trailer behind.

50337450991_e8211e96e4_b.jpg


Not bad for using stuff laying around the shop on a Saturday night! :high5:
 
OK, now we have cargo capability, but there is still the issue of Mrs V's rear floorboards. Lets GO! :clapping:

Started by making a couple flat mounting plates for the floorboards out of 3/16 steel. Cut the top off the original rear footpegs to get a clean spot to spot weld the plate on. Right one is still on the trike, left one on the floor.

50337596096_70e98b2f5d_b.jpg


***************************************************************************

YEEEEEHAW! On to the saturday night shenanigans. Needing more 3/16 plate, I ended up using (2) lower control arms off a Club Car Carryall. :rofl:

On the toolbox workbench, working out a gusset design.

50337751262_57776ee5fe_b.jpg


*************************************************************************

All pieces ready to weld. The studs that are on the two big gussets were the lower shock mount on the golf cart. I left them on for now, not sure for what. Easily cut off later, so I will let them live.

50337595451_4643b17731_b.jpg


**************************************************************************

No welding pictures. It was ugly. After 8pm on saturday night, go to the MIG welder....and my shielding gas tank is EMPTY. New tank, and closed up tight. Should have had plenty. I will be returning it, but for now I am on plan B...........

Run to Home Depot, they have flux core wire in .035. YAAAAAAAAAAAAAAAAYY!!!! I am the last customer out.

I forgot how MESSY that stuff is. Oh My. Even on a stainless welding bench, sh*t is stuck everywhere.

Oh well, why I have air disc sanders. <sigh> For now its cleaned enough to test fit.

*******************************************************************

OH HELL yes!

50336905938_428dd1a466_b.jpg


50336905613_da2626191f_b.jpg


50337594251_abf98afb73_b.jpg


********************************************************************

I can stand on one floorboard, and it is sturdy. 235# (115 Kg) is about the biggest load I would want on them.

Mrs V is gonna love them. Should really make her riding experience much more comfortable. Also makes the entry/exit of her seat MUCH different. A lot more graceful.

For now, I am going to continue designing a center left step mount. I might be really happy I left the studs on. ;)

50336905298_0ecafc4c57_b.jpg


Now I have to get them finish painted. Or at least black !!
 
Good looking setup you have there. Questions:

What engine does the motorhome have

What is brand of trailer

What kind of mpg are you getting fully loaded at interstate speeds

Thanks..
 
Good looking setup you have there. Questions:

What engine does the motorhome have Its a V10 6.8l 2006 E350 chassis reprogrammed ECM

What is brand of trailer http://chariotmanufacturing.com/ Model - Cycle Shuttle 16 (~14' box) Year - 2005

What kind of mpg are you getting fully loaded at interstate speeds 70-85 MPH, mostly cruise at 75MPH 8 mpg fully loaded with trailer, 11 mpg coach only

Thanks..

Welcome!

The trailer was a hard item to find. I really wanted tandem axle, but the motorhome has a 5000# hitch rating. The tandems I was finding had 7-10K GVW, but weighed too much empty. This one has a GVWR of 5000#, weighs 1550# empty with my additions. Has 3500# torsion axles, 14" tires. Gives me over 3K# for cargo. :cool:

I got the trailer used needing a lot of TLC. Just a box inside. PO had added a 15K (!) rooftop unit, and collapsed the roof in. With the aluminum box tube struts every 2 feet, I can walk on the roof easily now. 2" poly insulation, hardboard walls covered in in/out carpet make it a comfy cabin too. A folding queen size bed fits perfectly. Future plans are to have the bed fold down from the wall. We hauled a golf cart before in there, but now its the trike's full time house. :clapping:
 
Nice set up you have there. Salt Springs is a great place to visit;) I assume you have been to Cactus Jacks saloon already?

We did drive by it twice. But both of us prefer to ride around in the drizzle than hang in a bar. We found Square Meal restaurant and Bass Champions BOTH had great food. The BBQ... Not so much.

When we get up into the Jax area I will be sure to message you! :high5: For now, I have a LOT of cleaning to do. Smiling the whole time.
 
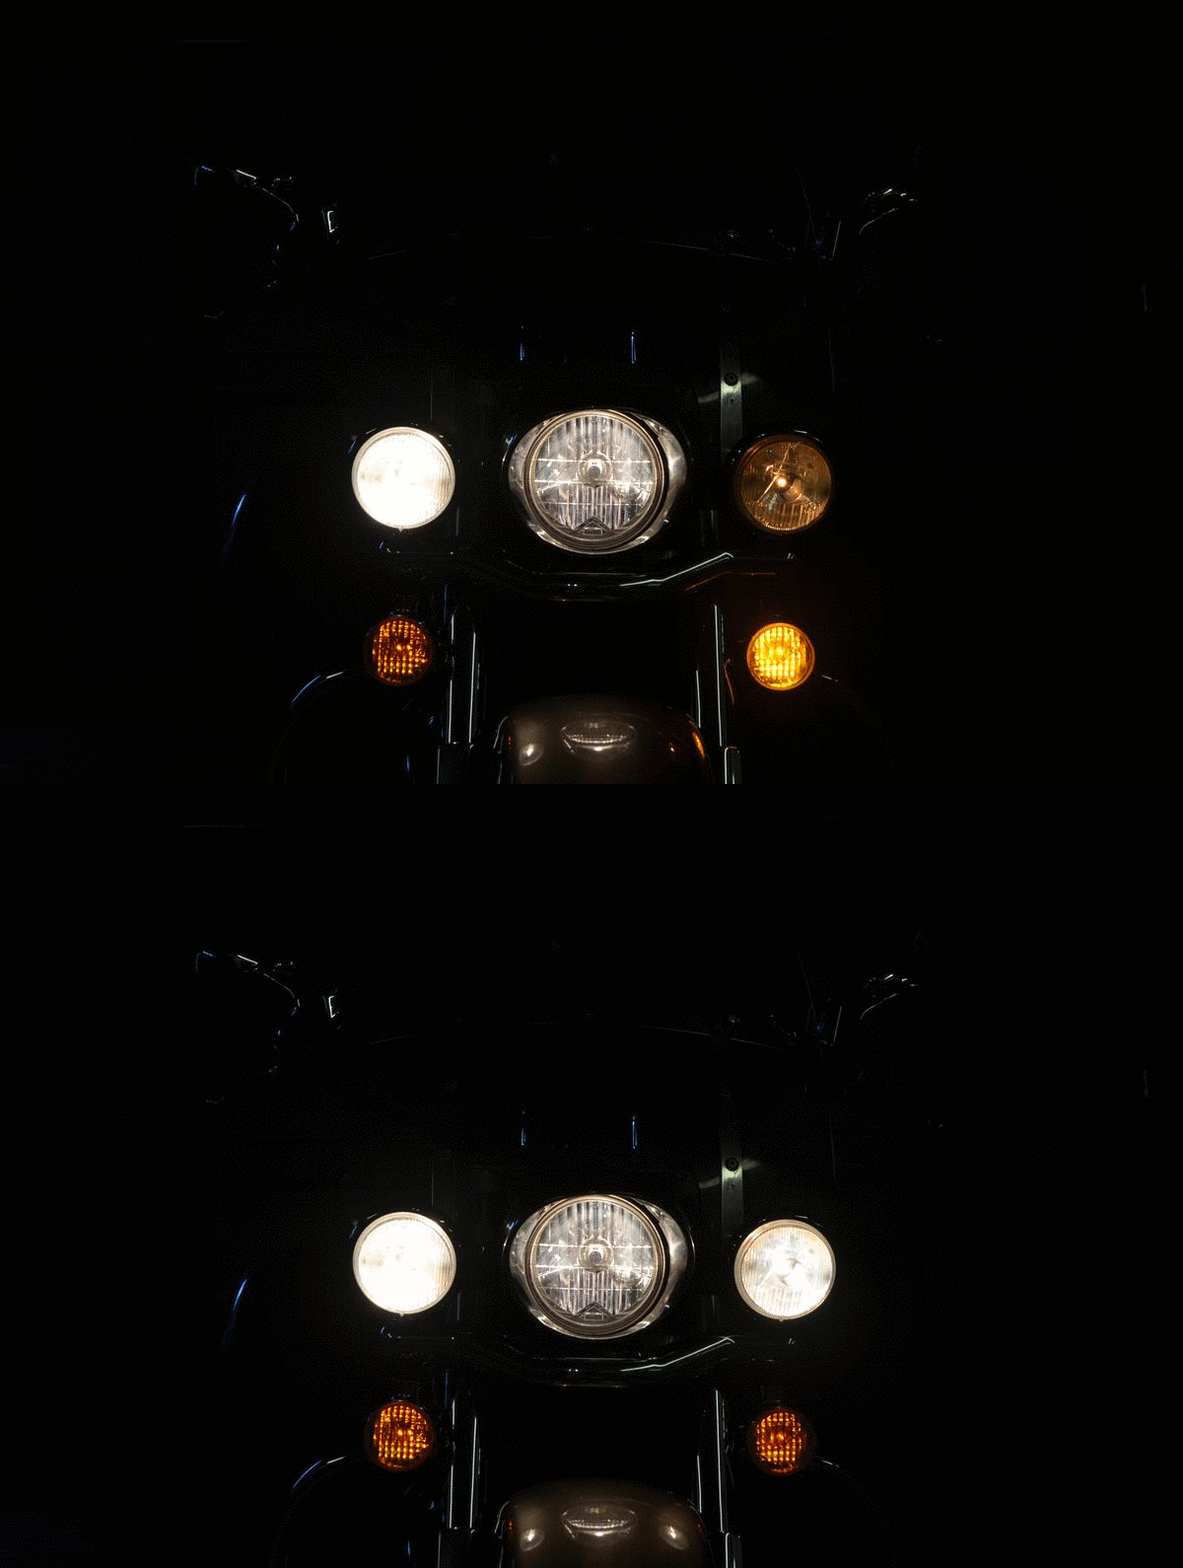
Got my front driving lights wired up and working, with a twist.

I had separate right and left wires for the lights, so I added a couple relays.

I put the power feed through to the lights on the normally closed terminal.

I tapped into the rear turn signals and used the signal to trigger the relays, so when the turn signal flashes, the driving light goes off on that side. If the picture below is not animated, click on it. :clapping:

turn sigs.gif

REALLY helps signal visibility. Similar to how the new cars turn off the daytime running lights for the turn signal.

Also got the air compressor wiring done, the low pressure guard keeps it at 15 psi minimum.

Also have a aux power feed, and 3 wires to the lower compartment from behind the left cover for future use.

Got a cool idea for a turn signal indicator on the side of the radiator. Should blend in unless its on...and its BRIGHT!! And it will take care of the turn signal 'blind spot' on the sides.
 

Welcome to the Trike Talk Community

Join our vibrant online community dedicated to all things Trikes! Whether you're a seasoned rider or just starting out, this is the place to share experiences, tips, and stories about your three-wheeled adventures. Explore modifications, maintenance advice, and rides, all while connecting with fellow trike enthusiasts from around the globe

Forum statistics

Threads
55,020
Messages
792,171
Members
23,312
Latest member
corsair
Back
Top