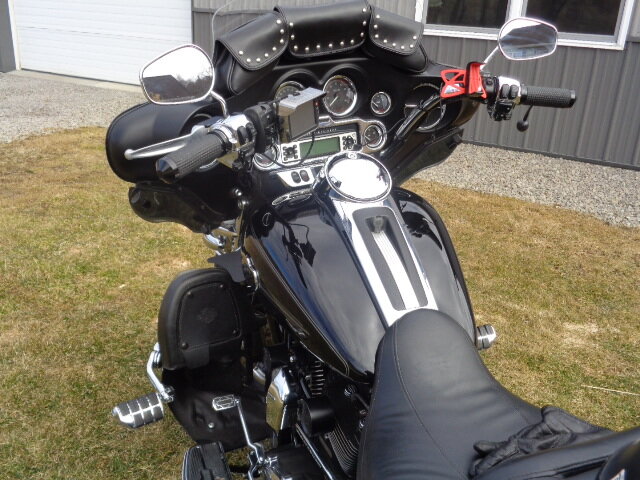
What did you do to Your Tri-Glide Today?

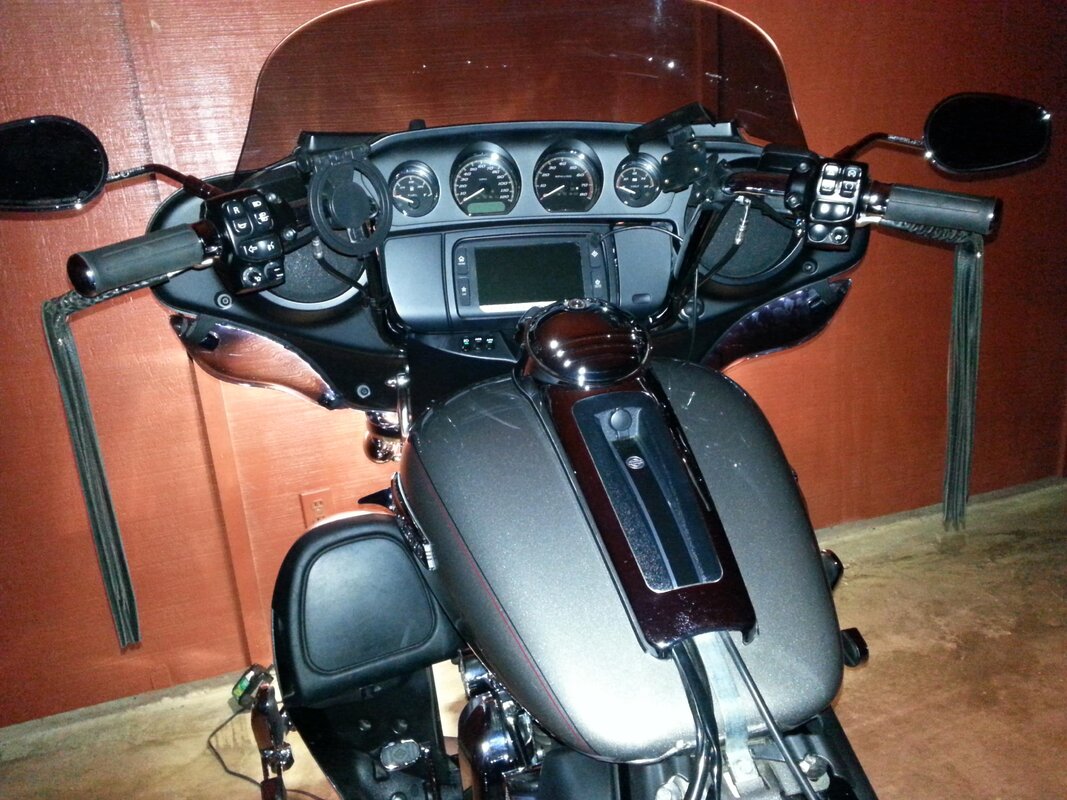
Alan, since there has been so many previous threads on handlebar changes, I figured I just post highlights of my projects. Since the inner fairing only needed to be released from the forks and tilted back for access to disconnect/reconnect and rerouting of cabling, and swap out of riser bushing.....I didn't take any pics of that. Just took the one below of new bars. Right now I'm not sure if it's good night or good morning.:laugh:

First, I was overly optimistic in thinking I could singlehandedly do the handlebar change and Mighty Mite install in one afternoon, but did finish up so soldering jobs. However, due to all the bending and stooping my joints and muscles took a beating.....been heating pad and meds tonight. For today's efforts, age certainly proved it's more than a number.

I did completed the handlebar change, plus removed the stock riser bushings and installed polyurethane bushings. After running the internal cable for the TGS, I decided against attempting internal wiring for the other cables. I did a test fit of PV tuner and will leave it on the right side. Just have to tidy up the cable when I run other wiring. Think I'm going to like these bars and looking forward to getting a ride when I'm finished. I already like like that the center of the faring, gauges and auxiliary dash panel is more open now, just an illusion because the controls are farther apart.
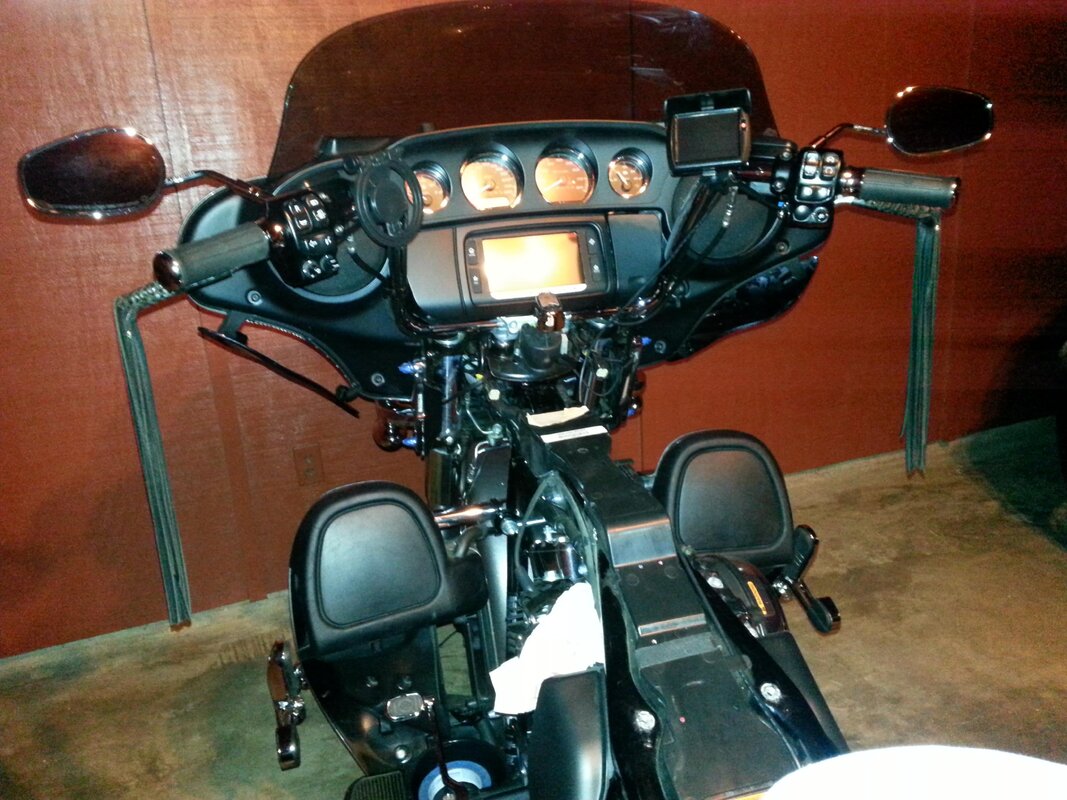
20190402_204646.jpg
 
Alan, since there has been so many previous threads on handlebar changes, I figured I just post highlights of my projects. Since the inner fairing only needed to be released from the forks and tilted back for access to disconnect/reconnect and rerouting of cabling, and swap out of riser bushing.....I didn't take any pics of that. Just took the one below of new bars. Right now I'm not sure if it's good night or good morning.:laugh:

First, I was overly optimistic in thinking I could singlehandedly do the handlebar change and Mighty Mite install in one afternoon, but did finish up so soldering jobs. However, due to all the bending and stooping my joints and muscles took a beating.....been heating pad and meds tonight. For today's efforts, age certainly proved it's more than a number.

I did completed the handlebar change, plus removed the stock riser bushings and installed polyurethane bushings. After running the internal cable for the TGS, I decided against attempting internal wiring for the other cables. I did a test fit of PV tuner and will leave it on the right side. Just have to tidy up the cable when I run other wiring. Think I'm going to like these bars and looking forward to getting a ride when I'm finished. I already like like that the center of the faring, gauges and auxiliary dash panel is more open now, just an illusion because the controls are farther apart.

View attachment 69904

Nice work...know what you mean about the joints and age.:xzqxz:

Question for you...where did you get that cover that is over your electronics, under the seat? Did you make it, or purchase it?

Kevin
 
Been riding it to work...perfect weather. Today supposed to hit 72*. :)

Tomorrow I have to ride up to Memphis on the TG. Tried to change the appointments. Could not.

100% chance of thunderstorms all day. High of 60*. Gonna be wearing rain gear and dodging lightening bolts. :)

Weather%201.JPG


Weather%202.JPG


Kevin
 
Where can I get a shirt like that?

It you asking about the "Three Wheels Moves The Soul" T-shirt. It was from Amazon.

Nice work...know what you mean about the joints and age.:xzqxz:

Question for you...where did you get that cover that is over your electronics, under the seat? Did you make it, or purchase it?

Kevin

Kevin, you guys have great eyes and can spot all the small differences and little oddities, even those in photos with bad images. Even I was stumped as to what was so neatly covering the battery and seat area. It's not a cover, it's my Service Manual that's open in a binder. Fits neatly there for quick reference. Guess the night shot under car port with bug light and flash washed out the pages color and binders outline.. Man you had me puzzled.....and I took the photo.:laugh: Taking it a bit slower today, besides starting tomorrow our forecast is thunder storms through the weekend.:(
 
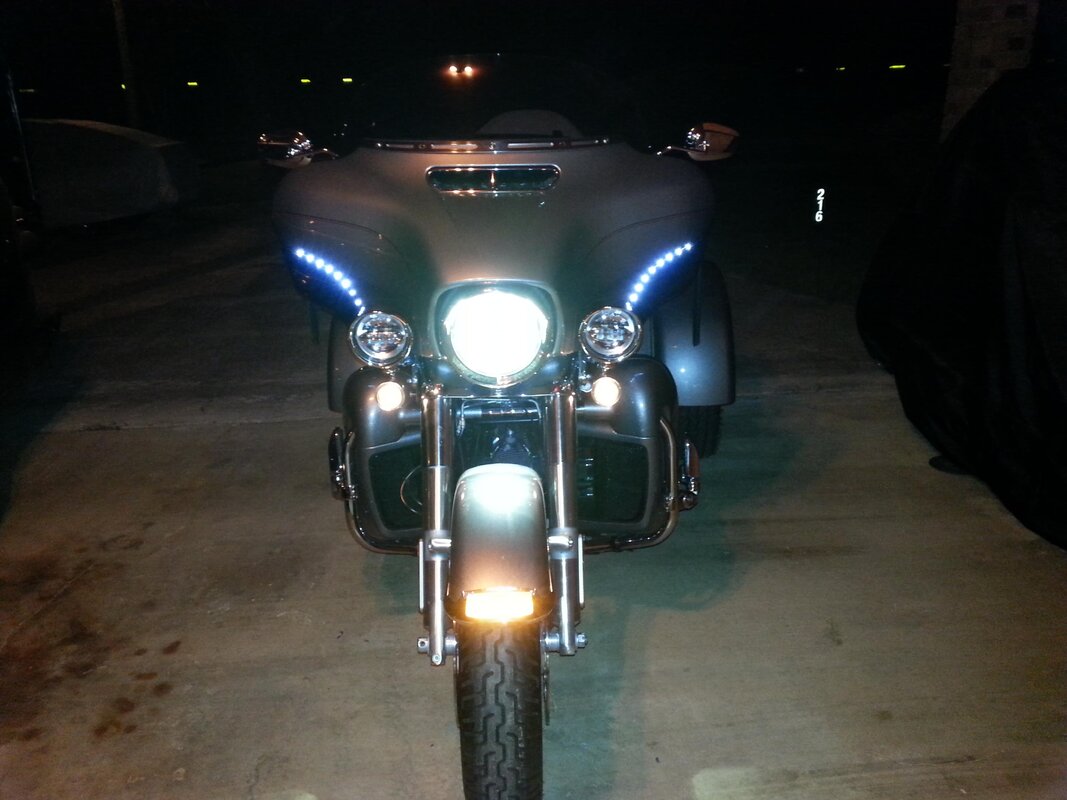
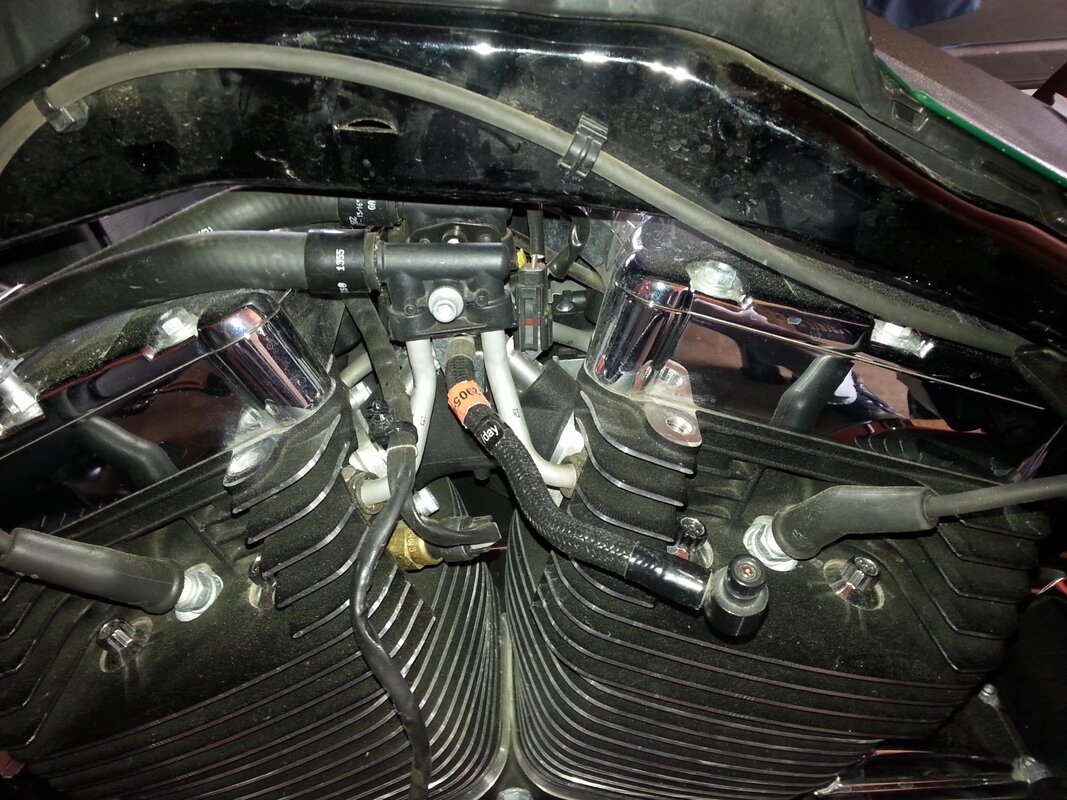
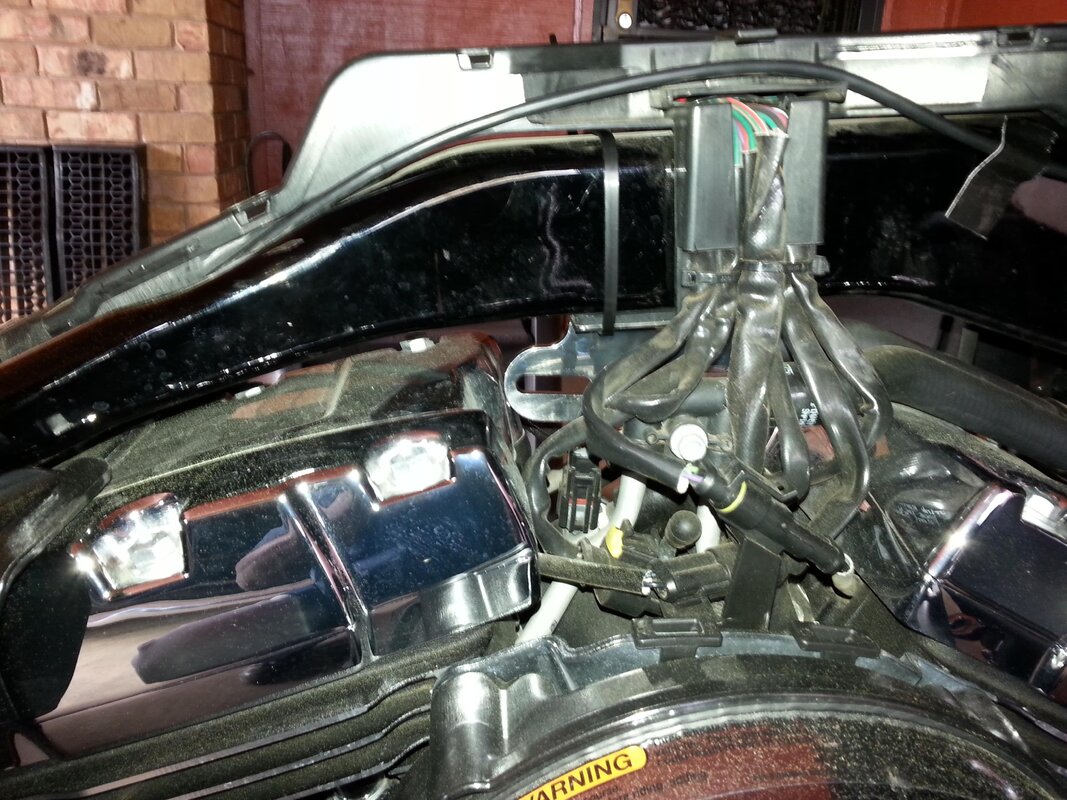
Today reattached and torqued the steering damper, installed the Mighty Mites, but used the horn mounting method. Made this decision after discussion with Randy. The frame mount method requires installing on the frame between the two cylinders very close proximity to the hard coolant lines carrying fluids to and from both heads. Just don't trust my skills in that tight space. Decided to play it safe! Will return the frame mounting kit. Will see how well the horn mount method works. Can always get a Vibration Master later if need be. All electrical connections received dielectric grease. Torque Wrenches got a workout too.

The Mighty Mites look great (like fine jewelry) and they're not as loud as I thought. They will really earn their keep when temps begin to climb. I added some daytime running LED's to the fairing. They also have amber turn signals on each side. Got the tank reinstalled too. Hopefully, a few more things will get done over this stormy weekend.

20190403_205007.jpg

20190403_205328.jpg

20190403_205608.jpg
 
Today reattached and torqued the steering damper, installed the Mighty Mites, but used the horn mounting method. Made this decision after discussion with Randy. The frame mount method requires installing on the frame between the two cylinders very close proximity to the hard coolant lines carrying fluids to and from both heads. Just don't trust my skills in that tight space. Decided to play it safe! Will return the frame mounting kit. Will see how well the horn mount method works. Can always get a Vibration Master later if need be. All electrical connections received dielectric grease. Torque Wrenches got a workout too.

The Mighty Mites look great (like fine jewelry) and they're not as loud as I thought. They will really earn their keep when temps begin to climb. I added some daytime running LED's to the fairing. They also have amber turn signals on each side. Got the tank reinstalled too. Hopefully, a few more things will get done over this stormy weekend.

View attachment 69952

View attachment 69953

View attachment 69954

My 16 is at the dealer getting a few things done and one of those was to put on the Mighty Mites with the frame mount. Dealer tried it but did not like how tight the frame mount / coolant lines were, so they did the horn mount instead. So, I guess I will see how that all works out too.

By the way, nice job there!

Feels good to know that my concerns were shared by the professionals. No chance to ride as we've got stormy weather through Monday, but I'm anxious to get time behind the new bars.Here's a couple of snapshots showing the location for frame mounting. Second pic shows the bracket under the frame with one zip tie, but that's as far as I cared to go. That wiring loom on the right side poses difficulty too.

Do know that the kit has been installed on trikes.....just takes someone with a Skill Set Echelons above my level.:)

Thanks for the compliment.....Congrats on your Mighty Mites!

20190403_154137.jpg

20190403_160808.jpg
 
Tour Pak

Removed the luggage rack from the Wife’s trunk and put her RAZOR pack on, looks goodNext I’ll do mine - with our FLHXXX it is really nice/great having the OPTION of the rack or Tour Pack, SUMMER IS COMING.......:clapping:
 
Dakota Digital Gauges

I got my gauges installed and what a big difference. Got my new tires 18" rear and 21" front wheels installed. I think I'm done with new installs this year. Oil filter relocation kit and chrome JAGG oil cooler with all Teflon braided hoses , Chrome cooler cover, chrome heat shields, gas tank lift kit, tour pak relocation kit, filler for seat, upgraded stereo with new flash, Added Amp and speakers to Rockford Fosgate, Air breather catch can, Power duals with FM mufflers, Adjustable pegs for passenger, Windshield Trim light and Chrome vent trim and lights from Custom Dynamics, Custom Dynamics LED turn signals, LED front fender tip light, 14" Pro Action shocks and comfort lift from DK. New flash for my Power Vision Tuner for all the upgrades.
 
Feels good to know that my concerns were shared by the professionals. No chance to ride as we've got stormy weather through Monday, but I'm anxious to get time behind the new bars.Here's a couple of snapshots showing the location for frame mounting. Second pic shows the bracket under the frame with one zip tie, but that's as far as I cared to go. That wiring loom on the right side poses difficulty too.

Do know that the kit has been installed on trikes.....just takes someone with a Skill Set Echelons above my level.:)

Thanks for the compliment.....Congrats on your Mighty Mites!

View attachment 70011

View attachment 70012

Would you keep me posted on your thoughts on whether you stay with just the horn mount or go to the vibration master?

Thanks

Jeff
 

Yeah, a first appointment at the Tint Store to have them put protective film on, then over to drop it at the dealership for them to install the bars.

I have a screenshot of the weather I rode thru yesterday to get to those two appointments...will post it later. LOTS of rain, no lightning hits! lol

Hopefully they will be calling this weekend that it is ready for me to pick up.

Unfortunately, I need to take it back to the Tint Store. He did not get the job done before I had to leave to take it over to the dealership.

Here's a photo I took while is was in progress on the Tour-Pak Lid.

Film%20in%20progress.jpg


It you asking about the "Three Wheels Moves The Soul" T-shirt. It was from Amazon.

Kevin, you guys have great eyes and can spot all the small differences and little oddities, even those in photos with bad images. Even I was stumped as to what was so neatly covering the battery and seat area. It's not a cover, it's my Service Manual that's open in a binder. Fits neatly there for quick reference. Guess the night shot under car port with bug light and flash washed out the pages color and binders outline.. Man you had me puzzled.....and I took the photo.:laugh: Taking it a bit slower today, besides starting tomorrow our forecast is thunder storms through the weekend.:(

Thanks man....was trying to figure it out!

Kevin
 
What did you do to your Tri-Glide today?

Trip to Boise from Stanley to get my 2018 TriGlide after it received the Clutch Recall update and most especially the Stage III upgrade. Had to ride in Rain and Sun and temps ranging from 46 to 34 but boy was is ever a great ride. I had the shop at High Desert H.D. keep the Torque CAM SE447 instead of the Power CAM SE498. The results seem totally awesome...mind you it now only has about 250 miles since the upgrade so going easy on it....But it sure seems like the Torque is right where I wanted it. More miles will tell.

JUST RIDE.

Gary
 
Put my AVON grips on today. Very easy. Looks good, feels good. Didn't have a T27 torx, so I had to go buy some. While I'm at it, I'm going to retorque my lug nuts.

PS. Found a T27. Torqued the grip mounts. Also check the torque on the lug nuts. Perfect. Not loose at all. Pease of mind.
 
Put my AVON grips on today. Very easy. Looks good, feels good. Didn't have a T27 torx, so I had to go buy some. While I'm at it, I'm going to retorque my lug nuts.
Sounds like a great day which style grips did you put on Two years ago I installed Memory foam the largest diameter Avon makes I love them.

DSC01203.JPG
 
I ordered a park brake for my bike today . It uses the front brake to hold the bike. Its like a drag racing line lock. You replace the banjo bolt with their valve. You pull the brake on, then push in the button on the valve. It holds line pressure until you hit the brake again.... My park brake sucks, so I'm not even going to use it any more. This will be a lot handier. ..... https://www.bulletbrake.com/
 
Just curious what the problem is with your HD parking brake? jc

When I bought it, it only had 5300 miles on it. The brake already didnt work. And by what I've read once you adjust it up to work, the pads drag enough that it weares then out fast. And you have to keep adjusting the park brake all the time.... So I'm not even going to bother adjusting it. By what I've read, a lot of people have even removed the leaver for the brake, since it doesnt work anyway...

I figure this will work great when getting gas, so the bike doesnt run away. Just set it when I stop. When I'm ready to go, just pull the front brake and it releases . Dont have to screw around leaning down and pulling the leaver to find out its not going to hold. Even if it did hold, youd have to lean over again to release it... Poor design in the first place...
 
First of all your park brake is designed to keep your ride from going by by at a minimal incline. Plus it only weighs 1100lbs. You also have it in gear while parked.

Second of all , when adjusting at the caliper, you just want the pads to touch, not drag.

Third of all , when adjusting the lever tension you don’t need it as you need your foot to push it to park. I use my heel to release it.

I do a adjustment check at the beginning of the season, and it’s good all year. It’s a very simple and effective device. Remember , it’s a parking brake , NOT an Emergency Brake :Shrug:

First of all, The brake didnt work when I bought the bike.

Second of all The Brake didn't work when I bought the bike.

Third of all you can run what you want and trust.... I dont trust the brake that HD puts on, I've heard to much bad about them. I'm not replacing pads all the time to find out that the stories I heard are true.... In 5300 miles the brake shouldn't be totally out of adjustment on the leaver... And the pads are only 1/32 worn off from new. So they may or may not have been replaced....

I'll use what I feel will work the best for me. And its not HDs setup, to me its already proven to me that its a poor design. They must agree too, since they changed to a different style of brake.

PS I'm a retired after 40 years, class 8 truck mechanic. So I do know just a little bit about brakes...
 

Welcome to the Trike Talk Community

Join our vibrant online community dedicated to all things Trikes! Whether you're a seasoned rider or just starting out, this is the place to share experiences, tips, and stories about your three-wheeled adventures. Explore modifications, maintenance advice, and rides, all while connecting with fellow trike enthusiasts from around the globe

Forum statistics

Threads
55,374
Messages
804,525
Members
23,942
Latest member
nmbr1soonerfan
Back
Top Bottom