What Did You Do To Your Freewheeler Today?

Looking good, looking forward for reviews on your set-up, ? who makes the fairing.

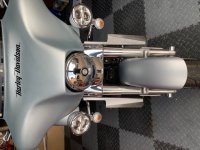
Hi It's from Tsukayu and I went for a plain fairing (no sound system) with a small storage shelf to store sunglasses etc. I liked it because it is a one piece molded fairing rather than 2 seperate pieces with a join along the top edge. It came quicker than expected and Im really happy with it. It is lockable but with a turn of the key lifts off for the summer :clapping:
 
Added Stabil to fuel tank, and rode it for 1-mile. That should have mixed it pretty well.

I like to do this treatment, as it will probably be parked for a few months.

Balloo
 
Tsukayu Hardware needed?

Well it was raining all day yesterday so I set up a small spraying area under the Freewheeler in my garage and colour matched the new fairing, here are a few pictures....

Just a couple of small holes from the manufacturing process that needed filling and as it came already primed and sanded it was ready for 2 colour coats and 2 clear coats in matt.

Then back on the Freewheeler, very happy with the result. Total cost was about £50 ($67), much better than the £350 ($470) I was quoted...happy days:D:D

View attachment 93658View attachment 93659View attachment 93660View attachment 93661View attachment 93662View attachment 93663View attachment 93664

Hi Nick:

Thanks for the pix...the fairing looks great. Does it mount to the Harley windshield mounts or somewhere else?

Ride safe

Dante :wave4:
 
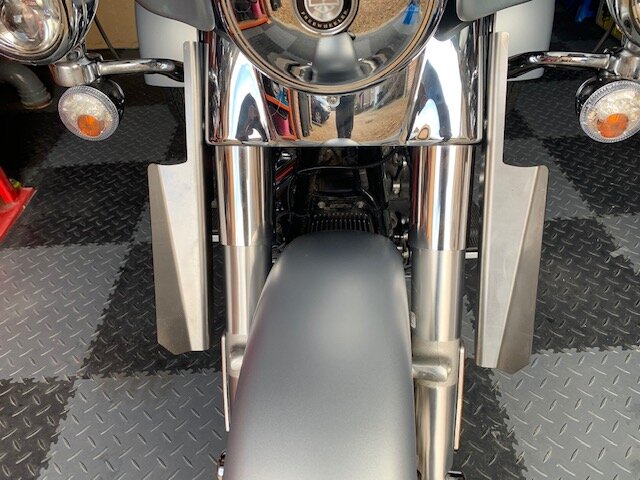
Hi Dante, yes it fits to the windshield mounting rubbers and also locks in place with a key to stop it going missing. Added a decal to the front just to break it up a bit. Also fitted the fork fanks from JES yesterday and hopefully get out for a ride tomorrowThumbUp

IMG_1688.jpg

IMG_1689.jpg
 
Installed Custom Dynamics LED luggage rack light on Kim's Freewheeler today.

20210211-145935-Film1-1.jpg
 
I have not rode my poor neglected FW in so long due to health issues, i hope it starts & I hope I remember how.:cool:

I may try tomorrow.
 
Im sure with time you will be out and about, better to go when you feel comfortable rather than push things too quickly and regret it ThumbUp
 
  • Thanks
Reactions: MDO
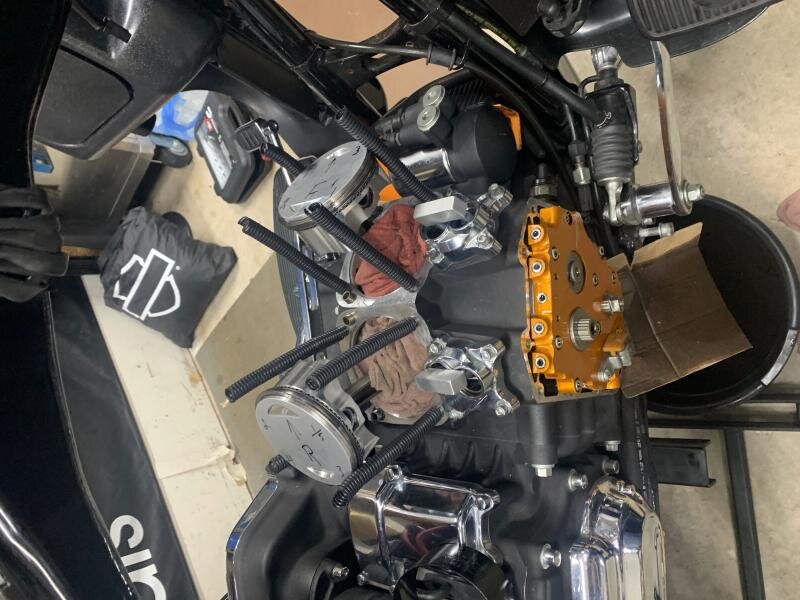
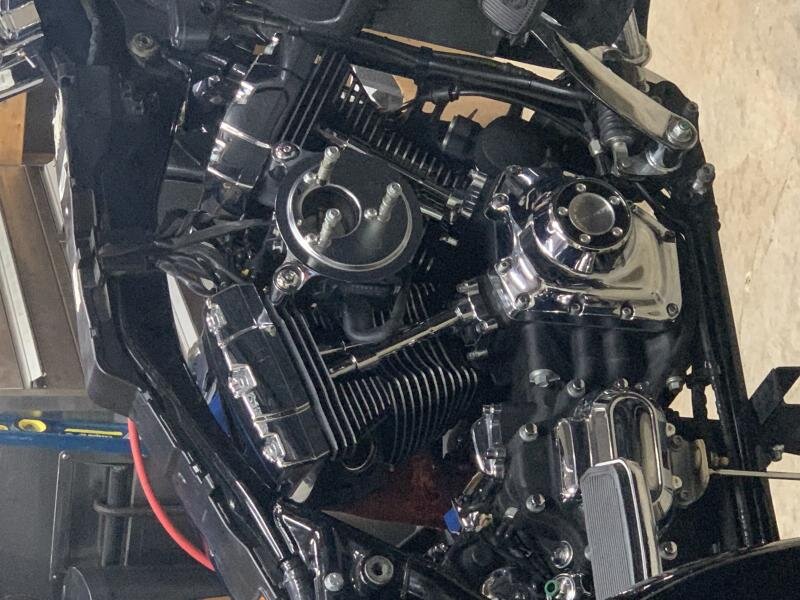
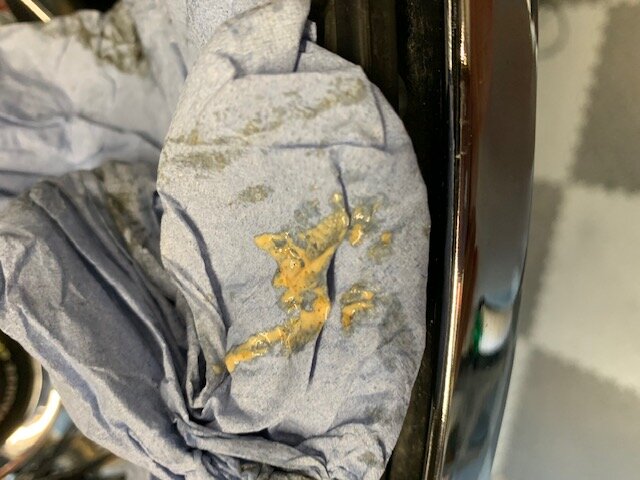
One of my lockdown projects was to improve the air intake to iliminate the milky residue from entering the engine.

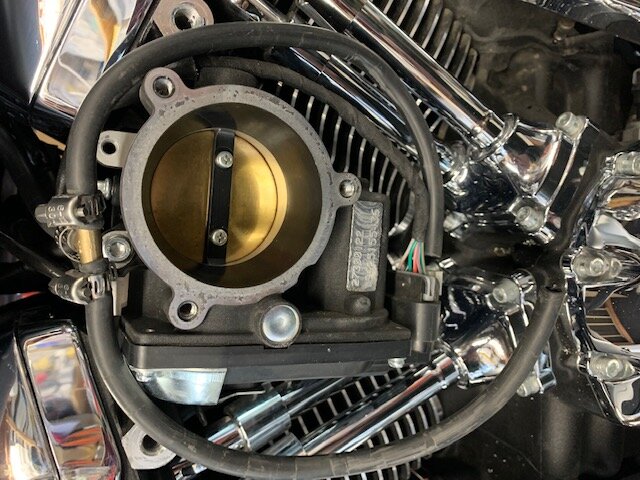
This is just some of the resisue build up on the inside of the throttle body after 3000 miles.

IMG_1713.jpg

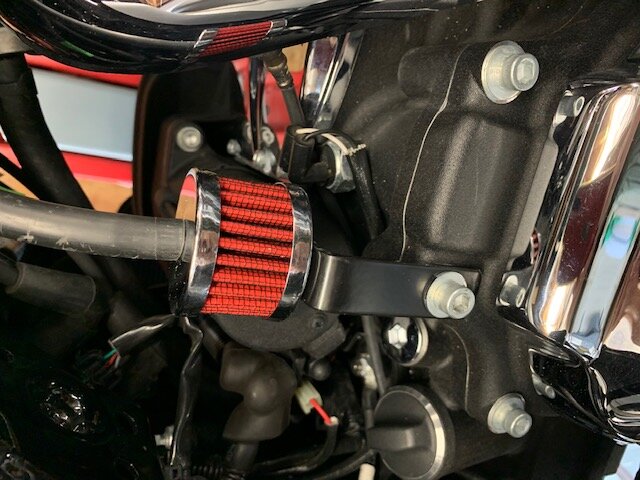
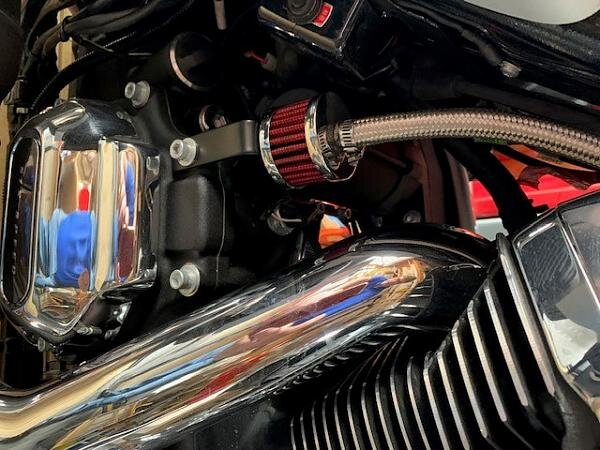
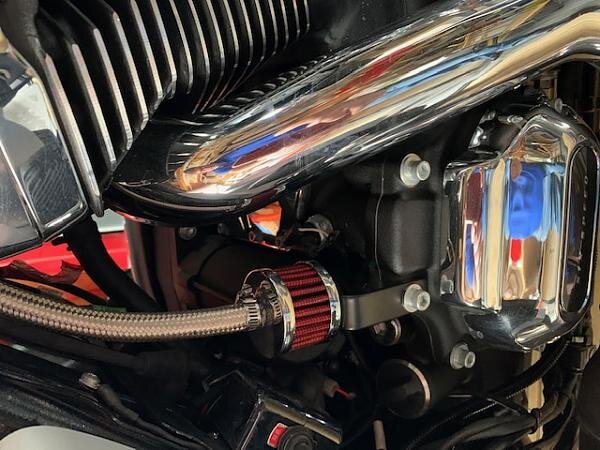
I now have the breather system going down to a K&N filter rather than back into the engine

IMG_1762.jpg

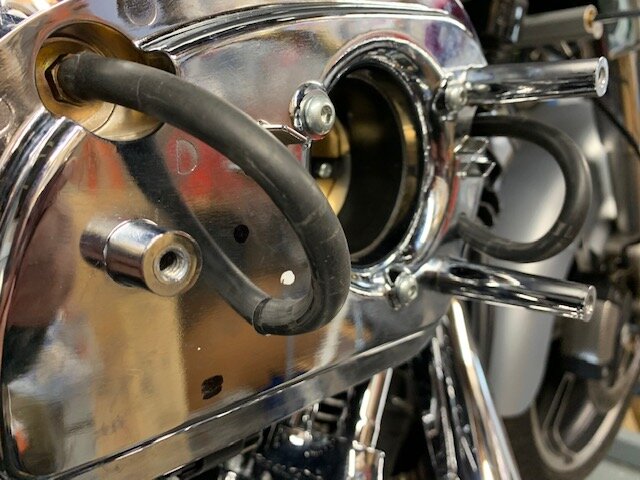
It was a simple job really, there are companies that produce kits to do the job but I went the DIY route and saved some money in the process. I removed the filter and drilled 2 8mm holes in the backplate. I removed the factory rubber tubes from the breather bolts and relaced them with 2 approx 6" long breather hoses routed outside the A/C housing and then joined them using a "T" piece behind the filter housing so that it couldn't be seen, then I joined them to a piece of stainless steel braided hose to be routed above the engine and down to a filter that I mounted on a home made bracket, that is basically it, job done. No more gunk going into the air intake, sorry that some of the pictures are the wrong way up amd I can't see a way to correct them

IMG_1764.jpgIMG_1761.jpg
 
Can someone point me in the direction of how to rotate the pictures as its annoying when they appear the wrong way around ... thanks
 
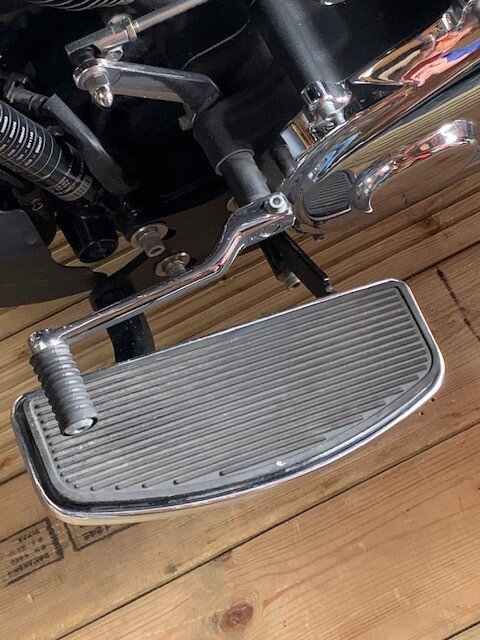
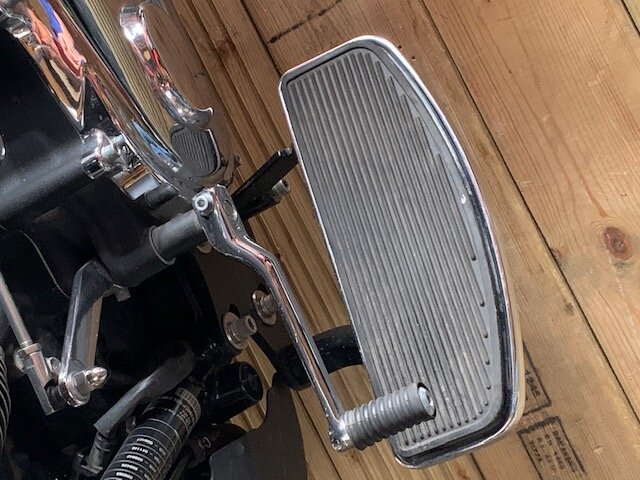
Thought I would share another project that I have just finished, although probably not a modification others would do or need but someone may get an idea for a similar type of mod. Quick background as to why I needed to do it first. I have a stiff left hip so I needed to lower the left hand floorboard to make it rideable.

On purchasing the Freewheeler my dealer agreed to make up a bracket to lower the floorboard as part of the deal, which they did and I was fine with it and it worked great but because the parking brake is located in the same place and provides one of the mounting points it also became lower which in turn reduced the ground clearance. The dealer did a few test rides to make sure it was safe under normal riding conditions but after a month or so I noticed I was grounding out over some speed humps or on ramps.

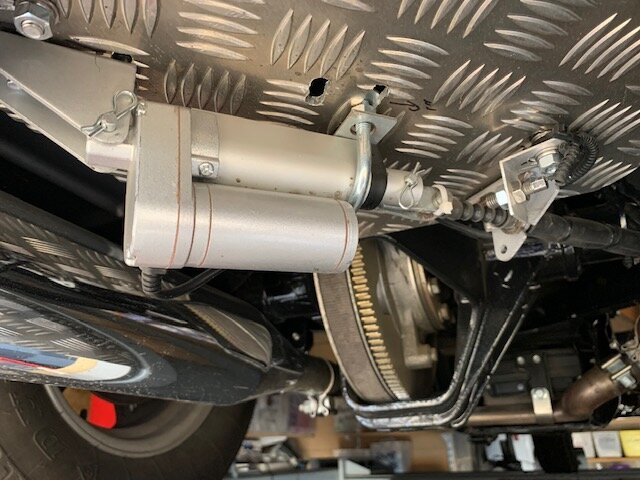
I decided to have a look at options a few weeks ago and have ended up removing the parking brake pedal altogether and converting it to an electric parking brake. I have had a blacksmith make up a new bracket to support the floorboard and now can move the floorboard down as far as i need, here are a few pics to show what i have now got as a parking brake.

IMG_1913 b.jpgIMG_1915.jpgIMG_1914.jpg

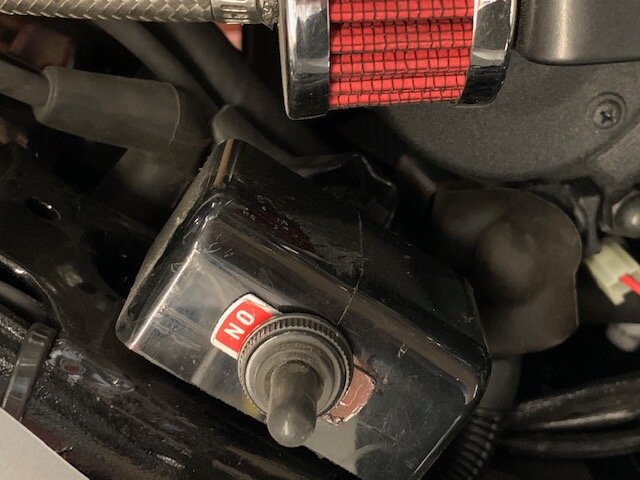
I mounted a plate under the trunk and used a linear actuator to operate the re-routed parking brake cable. It now works on a small switch situated by the right hand side panel and I now have plenty of space under the floorboard. The footboard now sits about 3 inches lower than standard and no loss in ground clearance. I hooked it backup to the original dash warning lamp. All took a bit of messing about but everything works perfectly and happy with the outcome:)

IMG_1913.jpg
 
Can someone point me in the direction of how to rotate the pictures as its annoying when they appear the wrong way around ... thanks

Changes made.

Rigsby, anyone can manage their photo attachments by clicking on the "Edit" feature at the bottom of their post and then scrolling down, click the "Manage Attachment" feature. You may have to resave the the photo in another file, then make the rotation edit, then reinsert the photo and delete the previous photos.
 
Last edited:
Changes made.

Rigsby, anyone can manage their photo attachments by clicking on the "Edit" feature at the bottom of their post and then scrolling down, click the "Manage Attachment" feature. You may have to resave the the photo in another file, then make the rotation edit, then reinsert the photo.

Thanks David, I will give it a go:clapping:
 
Went for a really nice spring ride. Out the superslab to the two lane blacktop country. Glided past several hundred cows... took in BBQ and camp fire smells... stopped and looked at a river for a bit.... pretty much perfect except that part where my brakes went wonky... that is in another thread

PS.... How's it going MDO? Long time no post-to.
 
Well, I got a 50 mile ride in & it was fantastic. You know it's been a long time since your last ride when you can't remember when your last ride was.:xzqxz:

My FW started right up & ran fantastic, due to constant use of the Battery Tender Jr. & Stabil marine grade fuel stabilizer.


It only cost a little more for the marine grade, but you only need 1oz. for every 5 gallons.

I needed to add air to all tires, I'm running 36psi in the front & 22psi in the rears. I stopped & topped the tank off on the way home. When I got back I added 6 oz. of Seafoam to the fuel tank.

It was great to ride again & with our beautiful weather here in STL, there were a lot of riders out.:cool:
 
Great to hear you got a ride in:clapping: I will keep you with me on the way to Daytona this week;)

Be safe & take some pictures. Just curious Jack, did you ever replace your front tire? I never replaced mine as i didn't hardly ride for a year...My new Avon Cobra is still sitting in my bedroom:)
 

Welcome to the Trike Talk Community

Join our vibrant online community dedicated to all things Trikes! Whether you're a seasoned rider or just starting out, this is the place to share experiences, tips, and stories about your three-wheeled adventures. Explore modifications, maintenance advice, and rides, all while connecting with fellow trike enthusiasts from around the globe

Forum statistics

Threads
55,378
Messages
804,577
Members
23,945
Latest member
Bullet Proof
Back
Top Bottom