Pinion seal on Viper conversion

Reread the instructions it's inch pounds not foot pounds. That would be for the rotational torque of the pinion assembly. That's usually done with the ring gear out.

Ah, good catch and interesting. The original directions did call for 185 ft lbs. for the nut but you are correct and the updated directions state 20-30 in lbs. for rotational force. I wonder why the change?
 
There is no change. You just don't understand the principles of what you're working with. That nut has to be near or at 185 ft pounds. Tighten that nut too tight and create too much pinion preload you can't just back it off a little. You have gone to far and crushed the sleeve and it will need a new one. I'm sorry I'm not much of an educator.
 
There is no change. You just don't understand the principles of what you're working with. That nut has to be near or at 185 ft pounds. Tighten that nut to tight and create to much pinion preload you can't just back it off a little. You have gone to far and crushed the sleeve and it will need a new one. I'm sorry I'm not much of an educator.

Maybe not an educator but your explanation is much more than what I've been able to gather so far. Thank you.

And this is what happens when you gain just enough skills to get yourself in trouble. Jack of all trades, master of none IIRC the proper phrase. That's about where I'm at right now...
 
I don't know how to link to YouTube. But if you Google it how to set pinion bearing preload. It should come up. About 3 minute video. I think the creator is Carid? About setting it on a Yukon.
 
Easiest way to avoid all the drama. Mark the nut to the shaft. Count the turns to remove.turn the nut the same amount on installation line up the marks done.

This seems to be the best answer but unfortunately that ship has sailed. I should have done a little more research and watched some more you tube videos prior to disassembly as I see similar advice mentioned in pretty much each one. Also marking the position of the yoke on the spindle to put it back on the way it was removed.

Of course that was not mentioned anywhere in the directions. But to be fair, what if I was installing a new yoke? No way to put a mark on that as it had never been installed before. I did take the advice from Will about spinning the yoke several times to get a feel of how hard the yoke is to turn. I am going to try doing it that way once it's finally ready to get the yoke back on.

I had to take a break for last couple days because life got in the way. I may have some spare time today to figure out getting the seal properly seated. It's interesting watching some of the various videos and have noticed that some of them really rap on the seals with a hammer to get them in. I may not have been using enough force in my attempts. I do have a couple ideas to try and see if I can get away without dealing with the ABS sensor mounting bracket. Worst case if I do a number on the seal, I do have a new spare as well just in case. We shall see...
 
Yeah seems the easiest way wasn't mentioned. Good part is you caught the parts that could have created problems. As far as changing the yoke or any other part, it's easy if you know what you're doing. But who needs a crash course on differential repair when all you want to do is replace a seal. Sorta like me trying to post a link.:laugh:
 
Well I made some progress. I took a deep well 15mm socket and a hammer. I lightly tapped all around the edge until I heard the tone change and now the seal is flush with the surface. I wasn't able to tap the area surrounded by the ABS sensor mounting bracket but a visual inspection appears that it's also flush now. I cleaned up a bunch of grime in that area and also cleaned up the yoke really good and did a test fit.

I also wiped down the splines on the rear end shaft to make sure nothing was on it for reassembly. The yoke slid on all the way and there is a very slight gap at rear between back side of yoke and the seal. I believe that's what I needed. Before, the backside of the yoke contacted the seal. So I stopped there as it's nice to finish with a win.

But I also stopped because I have questions before proceeding. The instructions state to put some RTV sealant on the back of the yoke and the backside of the nut to seal out any gear oil. I picked up a tube of Permatex Ultra Black RTV sealant for this. But I don't remember any of the videos showing this. I think I saw one that mentioned to put rtv sealant on the splines prior to installing the yoke but that was the closest I saw to using sealant on the yoke.

Also many mentioned to grease the splines before putting yoke on but the CSC instructions don't. Also nothing in CSC instructions mention putting grease or oil on the outside smooth part of yoke that slips into the rubber part of the seal. I'm assuming that CSC wants me to put it in dry??? I think another call to Will might be necessary...
 
Ok, I got some clarification from Will. Sealant does go on the back of the nut. As far as back of the yoke, a bead of sealant should go not on the back "face" but on the chamfered rear section by where the yoke splines are. The sealant will then get spread between the yoke splines and pinion shaft splines to seal it so that between sealant on back of nut and in the splunes, no oil can escape. The rubber part on the seal should match up with the smooth back outside of yoke and that should prevent any gear oil from leaking that way. I think I will still put a little gear oil on that just for good measure.

I also asked about the importance of the positioning of the yoke on the shaft because I didn't mark any of that prior to removal. I was told that it really doesn't matter, just put it back on and I should be good.

I also asked about the shaft seal and how far it should be installed. I mentioned I was finally able to get it flush with the face of the rear end and was told that's exactly where it should be.

I'm glad I'm finally headed in the right direction.
 
Yup, looking forward to getting this completed. Unfortunately my calendar for the weekend is a bit booked up so I'm hoping to finish up Monday afternoon. I know I'm about to jinx myself but shouldn't take more than an hour or 2 to get everything buttoned up and get in a test run... 😎
 
I had some free time this afternoon and got it all put back together. I just did everything in reverse so I didn't take photos during this. And surprisingly nothing strange happened. I did clean up all the nuts bolts and various parts that needed to go back on. I wiped down the rear end plate of dirty oil as well as I could. I filled up the gear oil after reinstalling the drain bolt. I'm going to let it sit for a day to make sure the Permatex liquid gasket do its thing. No extra parts left over and no missing tools so I tentatively call this a win. Only thing left is to take it out for a spin tomorrow and check to make sure there are no strange noises or leaks...

Just a quick tip though, make sure to wear some rubber gloves when dealing with liquid gasket stuff. LOL!

:p

Good job:clapping:
 
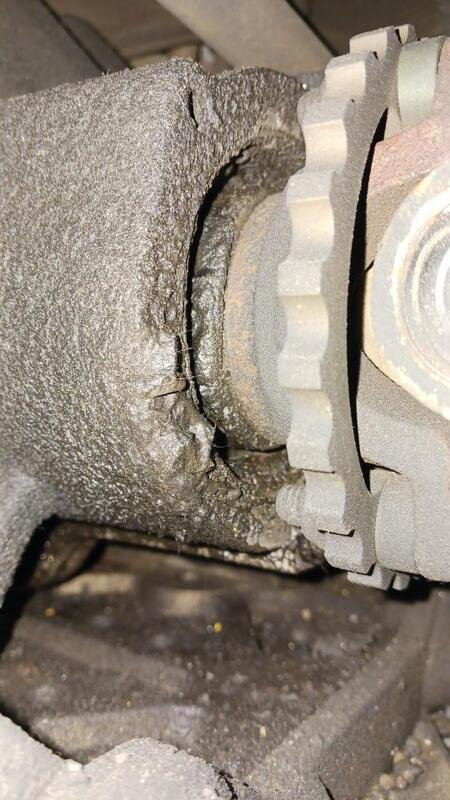
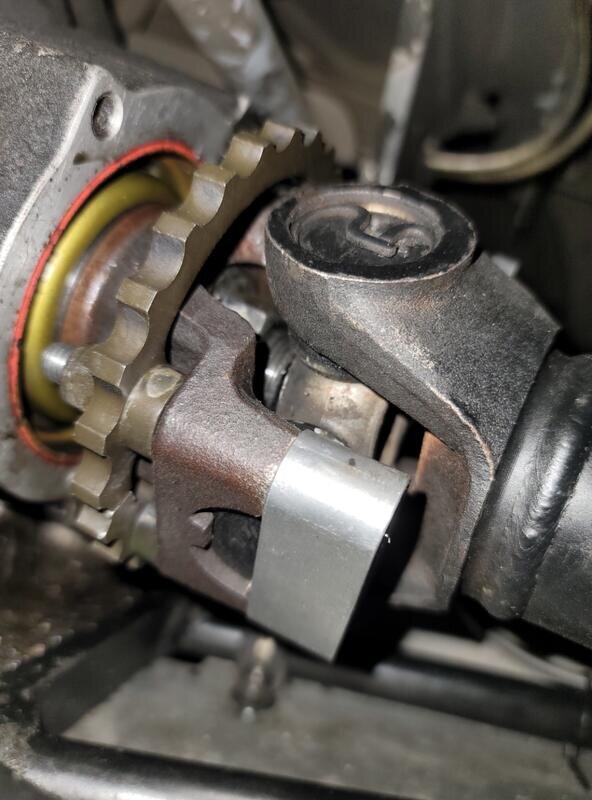
I got out to take a test drive tonight. Seems good. I had a section to get it up to 80mph and no strange vibrations. The only thing I noticed was that shifting "seems" a bit stiffer but not too hard to do. I'm about due for another oil change and maybe it's just letting me know. I tried looking at the seal but with gravel pan in place, it's a bit difficult. I was able to get my cellphone in there and snapped a few photos. First one was taken by my buddy while we were out in Custer, SD.

16013.jpg

The next one was tonight. Big improvement...

Screenshot_20220802-205544_Gallery.jpg
 

Welcome to the Trike Talk Community

Join our vibrant online community dedicated to all things Trikes! Whether you're a seasoned rider or just starting out, this is the place to share experiences, tips, and stories about your three-wheeled adventures. Explore modifications, maintenance advice, and rides, all while connecting with fellow trike enthusiasts from around the globe

Forum statistics

Threads
55,287
Messages
786,211
Members
22,758
Latest member
JStogner
Back
Top