DK Lift Kit

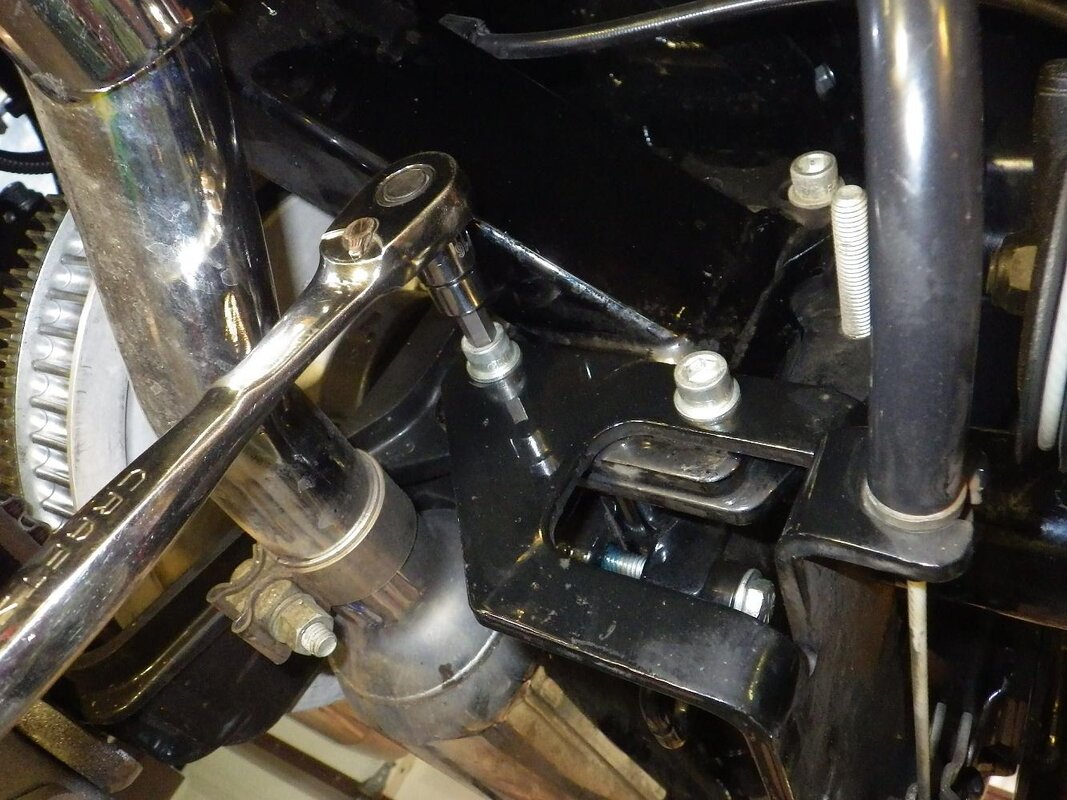
I went ahead and took off the right side shock bracket hoping when the axle dropped down it might free up the left side bolts. No such luck, so I will have to remove the parking brake bracket.

While I had the right bracket off I took a pic comparing the stock bracket (on top) to the DK bracket on the bottom.
 

Attachments

  • IMGP2547.JPG
    IMGP2547.JPG
    170.8 KB · Views: 76
SUCCESS! :pepper:

I got both new brackets installed, and to be honest installation was a LOT easier than taking the old brackets off. Maybe it was a learning curve (and all of that Loctite Harley uses) but putting the new brackets on (with new Loctite) was a piece of cake.

Even though I read the instructions step by step a number of times, and before each step, I must have missed the part about having to remove the two (5/16") allen fasteners holding the parking brake bracket
:blush:
So whoever said real Men do not need to read instructions.....must not have been a real Man.

Thanks to everyone for your helpful suggestions, and Thank you Kevin for having patience with a newbie like me. Great product!!!!
 

Attachments

  • IMGP2550.JPG
    IMGP2550.JPG
    234.6 KB · Views: 78
  • IMGP2548.JPG
    IMGP2548.JPG
    233.4 KB · Views: 80
Great perseverance there BOXX3R, glad you got-r-done. Hopefully you'll be able to do a test run tomorrow and report back, congrats, and thanks for the pics!
 
SUCCESS! :pepper:

I got both new brackets installed, and to be honest installation was a LOT easier than taking the old brackets off. Maybe it was a learning curve (and all of that Loctite Harley uses) but putting the new brackets on (with new Loctite) was a piece of cake.

Even though I read the instructions step by step a number of times, and before each step, I must have missed the part about having to remove the two (5/16") allen fasteners holding the parking brake bracket
:blush:
So whoever said real Men do not need to read instructions.....must not have been a real Man.

Thanks to everyone for your helpful suggestions, and Thank you Kevin for having patience with a newbie like me. Great product!!!!


Good job !! you have helped my confidence for my install. What year is your bike? Does it have the exhaust crossover under the bike?
 
Thanks guys. It was a challenge and an adventure, and I hope that others can learn from my mistakes.....and from my triumphs.


I was going to make an install thread, but I think this one will do just fine, and I am plum tuckered out to even ride her now. But it no longer scrapes the mufflers when I go up or down the driveway. :clapping:.

Here are the tools that I used......

a 3/4" combo Gear Wrench
a 3/4" non-ratcheting combo wrench
a 9/16" combo Gear Wrench
a 9/16" (14MM) non ratcheting combo wrench
a dead blow hammer on the 3/4" combo wrench to break the shock bolt loose
and on the 9/16" combo wrench to break the bracket bolts loose
a 1/2" drive 5/16" allen socket to remove and install the parking brake bracket
a 3/4" impact socket and 2" extension along with a Harbor Freight ratcheting breaker bar for the lug nuts.
a 9/16 impact socket and breaker bar for the upper bracket bolts
and a Harbor Freight 2-Ton floor jack with a wooden block pad
plus a flashlight and Red and Blue Loctite

Oh and my 2"x10"x18" bucket boards with eyelets, two 5 gallon buckets filled with sand, two dumb bells, a gallon of water and a gallon of some other crap to hold the front end down when jacking the rear end up, plus a Velcro strap on the front brake lever and a rubber chalk from HF for the front wheel.

- - - Updated - - -

Good job !! you have helped my confidence for my install. What year is your bike? Does it have the exhaust crossover under the bike?

It is a brand spanky new 2015. It has the 'z' pipe, but it was not an issue in this install.
 

Attachments

  • IMGP2553.JPG
    IMGP2553.JPG
    229.7 KB · Views: 78
Bore and after Pics.

Thanks guys. It was a challenge and an adventure, and I hope that others can learn from my mistakes.....and from my triumphs.


I was going to make an install thread, but I think this one will do just fine, and I am plum tuckered out to even ride her now. But it no longer scrapes the mufflers when I go up or down the driveway. :clapping:.

Here are the tools that I used......

a 3/4" combo Gear Wrench
a 3/4" non-ratcheting combo wrench
a 9/16" combo Gear Wrench
a 9/16" (14MM) non ratcheting combo wrench
a dead blow hammer on the 3/4" combo wrench to break the shock bolt loose
and on the 9/16" combo wrench to break the bracket bolts loose
a 1/2" drive 5/16" allen socket to remove and install the parking brake bracket
a 3/4" impact socket and 2" extension along with a Harbor Freight ratcheting breaker bar for the lug nuts.
a 9/16 impact socket and breaker bar for the upper bracket bolts
and a Harbor Freight 2-Ton floor jack with a wooden block pad
plus a flashlight and Red and Blue Loctite

Oh and my 2"x10"x18" bucket boards with eyelets, two 5 gallon buckets filled with sand, two dumb bells, a gallon of water and a gallon of some other crap to hold the front end down when jacking the rear end up, plus a Velcro strap on the front brake lever and a rubber chalk from HF for the front wheel.

- - - Updated - - -


It is a brand spanky new 2015. It has the 'z' pipe, but it was not an issue in this install.

did you take pictures before and after?
 
did you take pictures before and after?

No, I figured there are plenty of before and after plus comparison pictures of one with and one without the lift on the DK site, and Cat is still a filthy bug covered pig after a trip last weekend. Today I am going to clean her up as we have a ride this Sunday to a LOBSTER FEST in San Pedro.
Yum Yum
 
Well done. Nothing like the satisfaction of seeing a job through. Not to mention the money you saved. Time for the next mod?
 
Good to see you got them installed! I hope you have a nice ride to and from the lobsterfest this Sunday, and enjoy the benefits of your work.

If you are in a situation again where you need to use jack stands to hold the rear up, I recommend putting them under the forward cross-member that runs under the bottom of the trunk. It will be more stable, and will also leave more working room at by the shocks and the rotors.

Ride Free!

Kevin


Kevin can I jack the bike up one side at a time placing the jack stands on the trunk cross member without being concerned that the bike may tip over?
 
Kevin can I jack the bike up one side at a time placing the jack stands on the trunk cross member without being concerned that the bike may tip over?

Yes. I have done dozens this way. I only go up as high as getting the one side rear tire about 3-4" off the ground, put a jack stand under that same side on the front cross-member, then go do the other side.

I don't know how high you would have to go for it to tip over, but it would be much higher than that.

Kevin


Thanks I will be calling to have you ship me one to Canada.
 
freewheeler

Kevin. The DK website says that on a freewheeler once you sit on it, it will level off. So the freewheeling doesn't get the lift, just the comfort?

thanks
 
Kevin. The DK website says that on a freewheeler once you sit on it, it will level off. So the freewheeling doesn't get the lift, just the comfort?

thanks


They both get the same lift of 1.25 inches at the shock.

However, on the Tri-Glide, when it is in stock form, the rear of the bike looks much lower than the rest of the bike. When you add the Lift Kit to the Tri-Glide it brings it up and makes it look level (without anyone sitting on it).

On the Freewheeler, it does not look so bad in stock form...the rear is not so droopy.

So when you add the lift kit to the Freewheeler, it looks like the rear is just up a tiny bit more than the rest of the bike. However, once a person sits on it, it settles down to level or a bit more.

Most people will not notice the difference, but below is a picture...on the right is one in stock form, and on the left is one with the Comfort Lift installed.

FreewheelerComp.jpg


Kevin

- - - Updated - - -

Thanks I will be calling to have you ship me one to Canada.


Cool, Dawn or Kelsey will take care of you. We appreciate your business, and I believe you will be well pleased with the improvement!

Kevin
 

Welcome to the Trike Talk Community

Join our vibrant online community dedicated to all things Trikes! Whether you're a seasoned rider or just starting out, this is the place to share experiences, tips, and stories about your three-wheeled adventures. Explore modifications, maintenance advice, and rides, all while connecting with fellow trike enthusiasts from around the globe

Forum statistics

Threads
55,532
Messages
806,808
Members
24,075
Latest member
jkittoe48
Back
Top Bottom