David792
150+ Posts
These notes apply to the 2018 FLHTCUTG Tri Glide. Other year models or bike models may, and probably do vary. I confirmed the power and interconnect wire color combinations with my HD service manuals. The HD “basic black rubber” grips came with an extension for the power cable, an extension for the interconnect cable and a cable for power supply from battery or fuse box. I DID NOT need to use any of the three cables. I DID NOT need to remove the seat or fuel tank. All of my connections were made under the front fairing. The “basic black rubber” grips are wired through the handlebars so you will be fishing your wires. Very easy.
While my gauges were out I shipped them to Zee’s Custom Gauges for an LED color change. I asked “Zee” to replace my stock, orange LEDs to green with orange needles and green odometer. Be careful removing the gauges from the housings. The chrome trim ring has to be removed to get the gauge out of the housing. There is a black foam seal on that ring. One of mine stuck a bit, but was fairly easy to coax loose.
Here's some parts numbers:
56100034 black rubber heated handgrips - $200
10177 cable strap, plug in - .50 cents each
73213-07 retainer, xmas tree clip - .52 cents each
 Stock orange gauges before
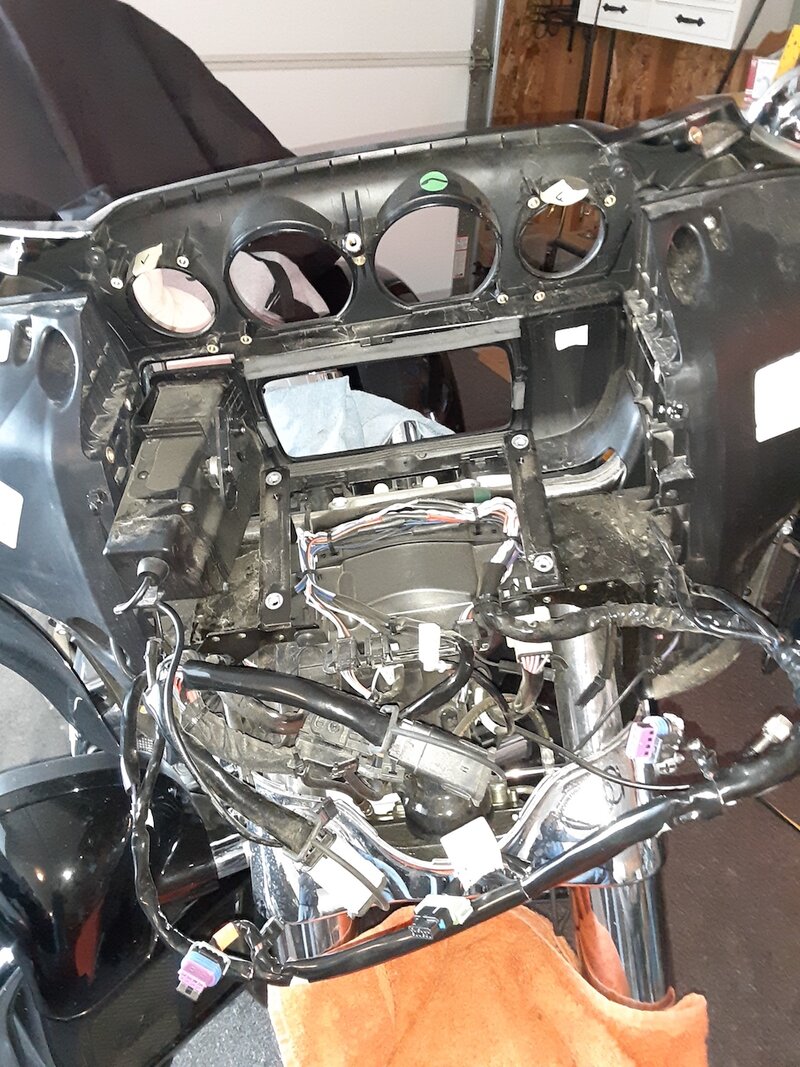 You will strip the bike until it looks like this
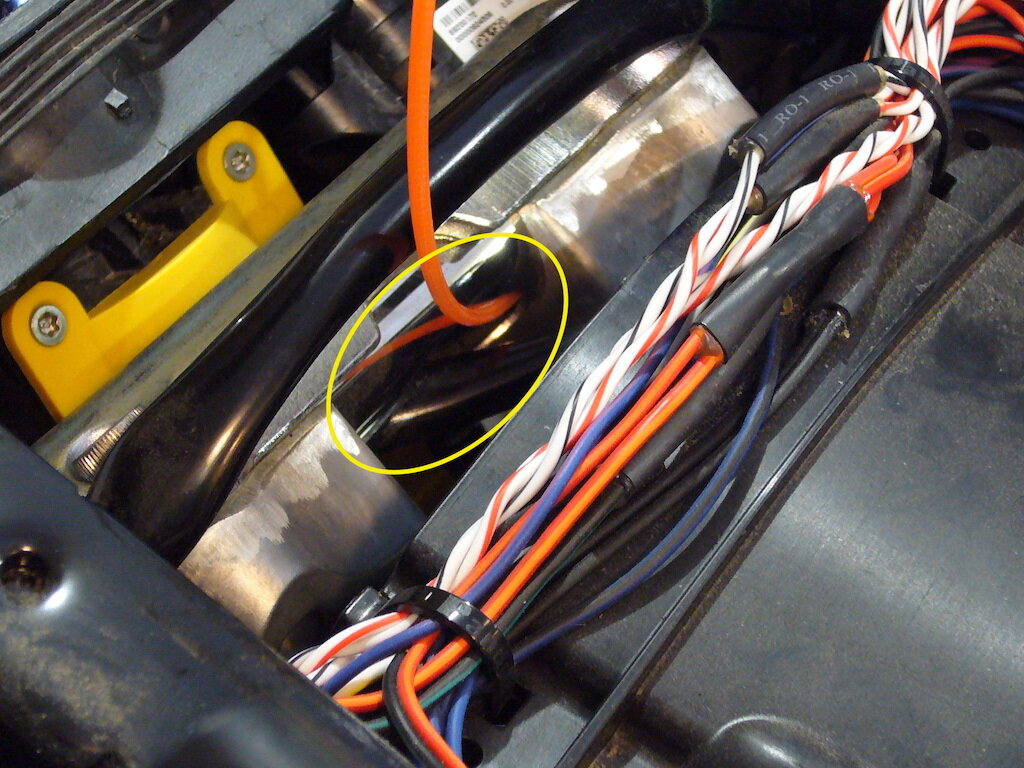 Here is the slot in the base of the bar where all the wires come through
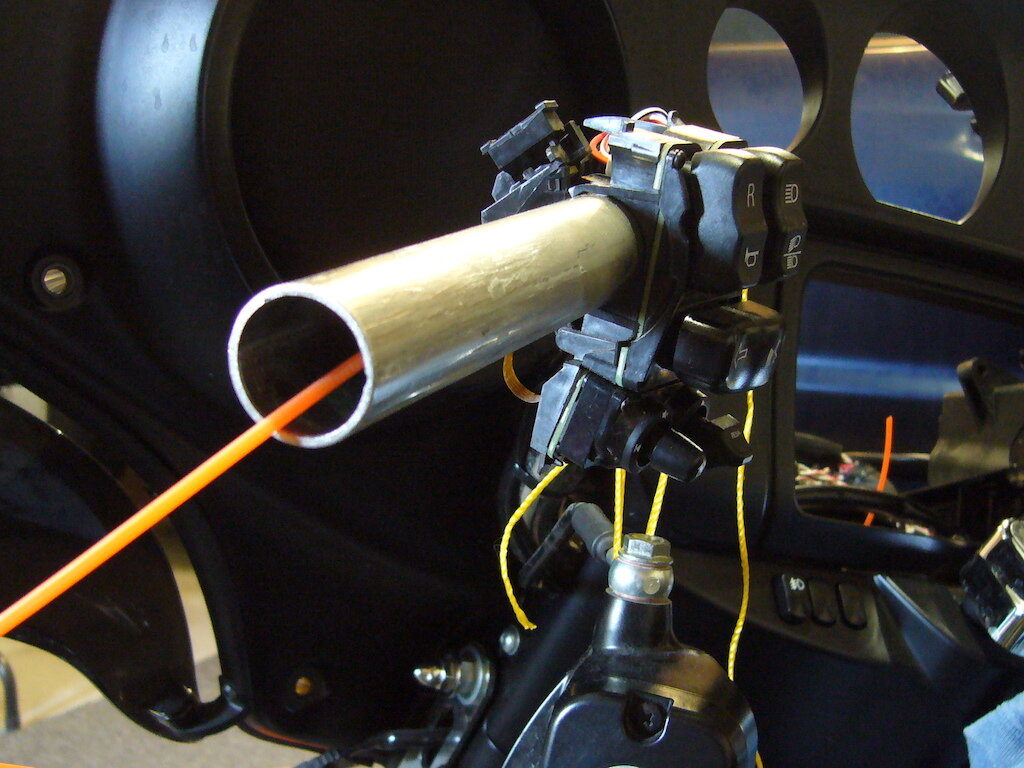 Clutch side showing "fishing" line and the clutch lever suspended with twine
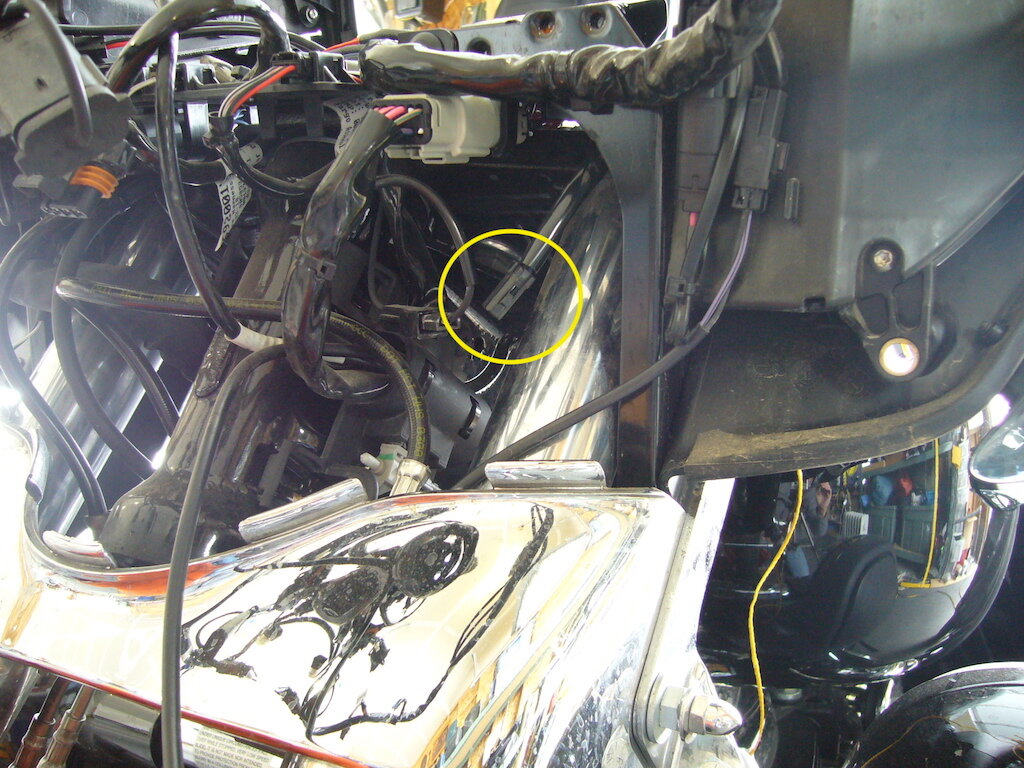 This is the POWER connection found on the clutch side
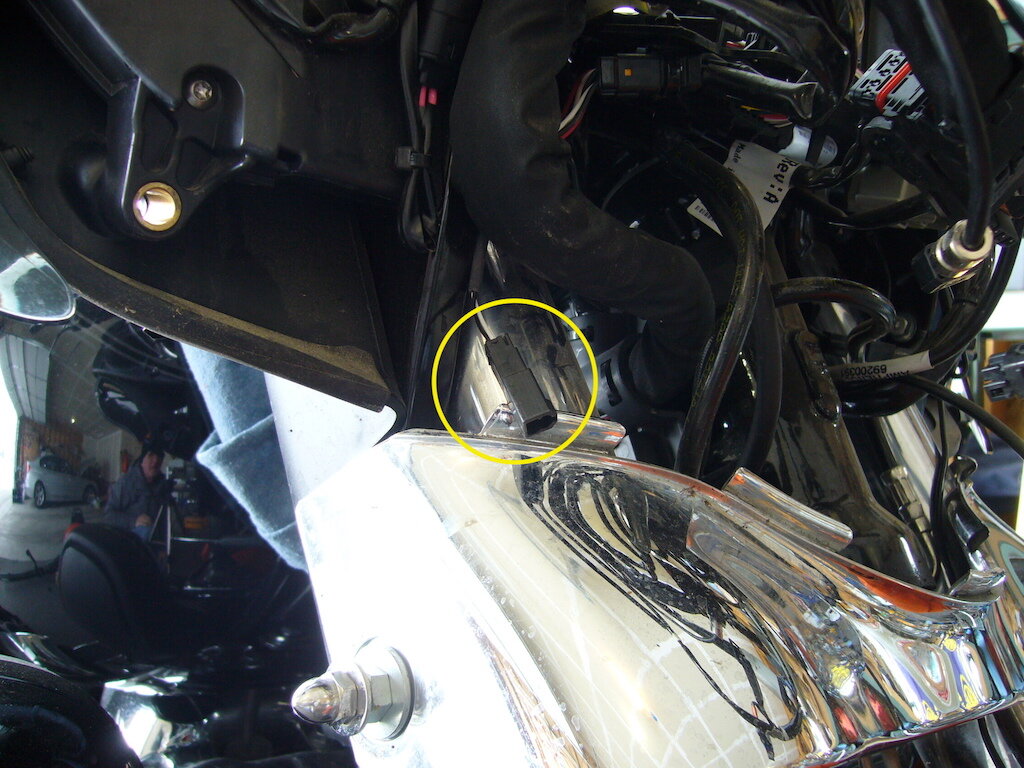 This is the INTERCONNECT found on the brake side
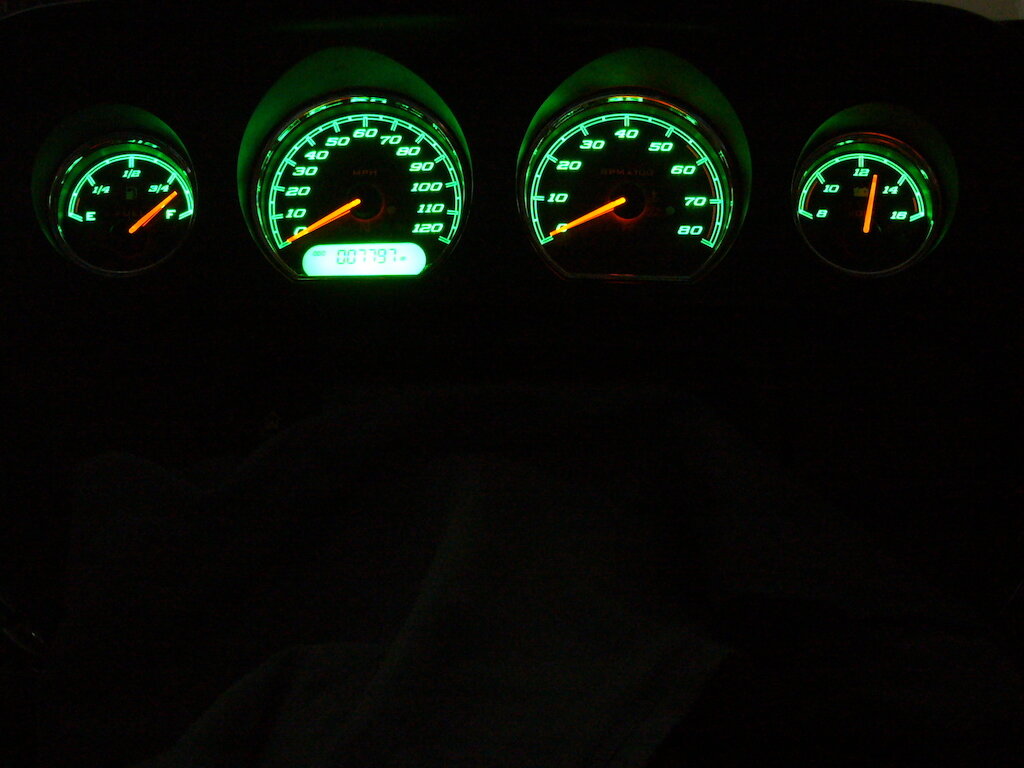 New gauge LED color scheme
- Pull the main fuse
- Remove the auxiliary lights and turn signals
- Remove the windscreen
- Remove the outer fairing
- Remove the vent
- Disconnect the three radio cables, the radio main harness and the gauge clusters
- Remove the radio top plate
- Clip some cable ties to free up the wiring harness from any required components
- Remove the gauges
- Remove the radio
- Remove the clutch lever clamp. I suspended mine with twine to prevent any possibility of kinking the hydraulic clutch line.
- Remove the left side switch housing (just remove the outer housing, the switches can stay on the bar)
- Remove the left grip. Mine was glued and I had to slice the grip in order to pull it off. Then clean any glue residue from the handle bar and file the inside of the bar to remove any burrs.
- Remove the brake lever and right side switch housing the same way you did the left side.
- Gently pull the throttle grip and remove the black plastic protective cap that allows access to the two small holes that will accept the right side heated grip wires.
- Install the right grip, insert the plug into the socket then fit the end cap.
- Fish the power and interconnect wires through the left bar. I used string trimmer cord.
- Locate the interconnect w/black and white wires (mine was on the brake lever side). Connect it with the black and white wires from the grips. (this connects the left side grip to the right side grip)
- Locate the power source from the bike (in my case a violet and a black wire on the clutch side) and connect that to the black/red wires from the grips. The left and right connectors are the same and you could hook them up wrong if you tried.
- Replace the switch housings and the brake and clutch then button everything back up and you’re done! Don’t forget to replace your big red fuse.
While my gauges were out I shipped them to Zee’s Custom Gauges for an LED color change. I asked “Zee” to replace my stock, orange LEDs to green with orange needles and green odometer. Be careful removing the gauges from the housings. The chrome trim ring has to be removed to get the gauge out of the housing. There is a black foam seal on that ring. One of mine stuck a bit, but was fairly easy to coax loose.
Here's some parts numbers:
56100034 black rubber heated handgrips - $200
10177 cable strap, plug in - .50 cents each
73213-07 retainer, xmas tree clip - .52 cents each
 Stock orange gauges before
 You will strip the bike until it looks like this
 Here is the slot in the base of the bar where all the wires come through
 Clutch side showing "fishing" line and the clutch lever suspended with twine
 This is the POWER connection found on the clutch side
 This is the INTERCONNECT found on the brake side
 New gauge LED color scheme


