Note: Changes or modifications to original equipment (bike) configuration have not been approved or tested by the factory. If you attempt or make modifications to your equipment, the responsibility is yours for any damage to your equipment, as well as any required testing and safety issues are yours alone. This post is for informational purposes only, and is for entertainment.
Hello First off, I know this is a long post but I am trying not to miss any of the steps. I did this in case there are others out there wanting to add this really supper Mod. I have done the basic leg work for you, and here are the steps as to how to Do It Yourselves (DIY).
I purchased my Honda VTX 1800 trike just four months ago, and have been dealing with wind buffeting issues. First I re-curved the windshield “DIY” (Posted), next I made lowers that attach to the front forks “DIY” (Posted).
I started wondering if there were regular “fairing lowers” for the VTX out there, well sure enough there is. But only one company makes them, so there both costly and require that you have a crash bar (motor guard) that is not made anymore. Hum! Then I came across one post that actually added Harley Fairing Lowers (HFL) to a VTX 1800, it’s an older posting, showing distant photos of a set HFL and Harley Crash Bar (HCB) installed on a VTX1800, no close-ups. The photos show that they mounted the top of the HCB around the upper side of the VTX radiator then they customized the HFL to fit (cut). They also chopped down and raised up the turn signals to clear the HFL.
The thing is, I really liked the look the HFL gave to the Honda VTX, and I am one to try to do things “DIY”, SO. Here goes:
1. I checked on cost and availability of the vented HFL including all mounting hardware ($55.00) and HCB ($43.50) both on eBay w/free shipping. “Under a hundred bucks very doable”.
It’s hard to really tell about the bends on the HCB; they looked a lot like the crash bar already on my VTX, so I ordered just the HFL first. Well the spacing between the bends is different the HCB is shorter!
2. So back to eBay, I ordered the HCB; when it showed up I could tell several things.
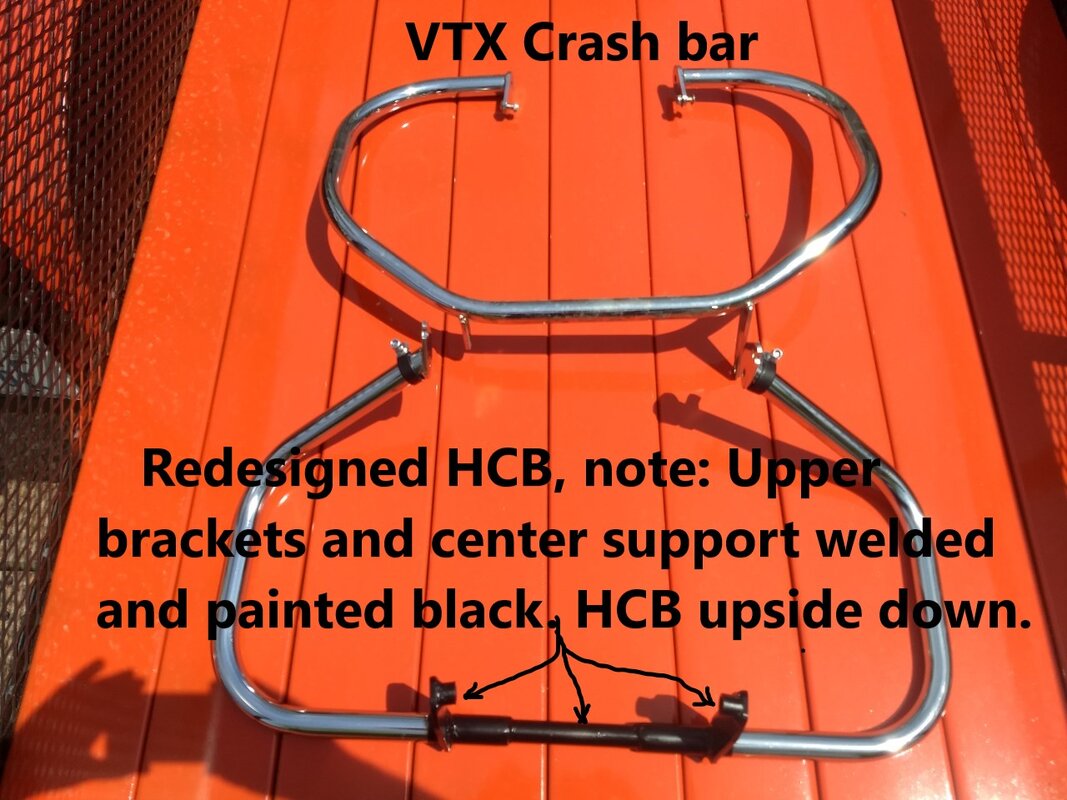
3. Diving in: I cut the mounting section out of the top of the HCB, I was not going to use it anyway. :Shrug: Now I have two halves of the HCB to work with, the right side was going to be the most challenging because of the way the exhaust pipe runs, so it needed to be dealt with first.
4. Mounted the right HFL to the right HCB, (turned the handlebars right, all the way to the stops: to start fitting it making sure I had at least ¼” space around it. First I tried putting it like I had seen in the old posting; I would have had to cut about 2” from the HFL on some parts of it to fit it. Plus it seemed like the HCB would not be very strong mounting it as two separate pieces to the VTX’s frame.
5. Then I tried moving the HCB in front of the VTX’s radiator (about 2” from where the older posting had it); finding that spot that allowed the HFL to be installed without cutting. This also let me put in an extension piece in; to connect the right and left HCB, giving the strength back to the two half’s of the HCB. (Dance)
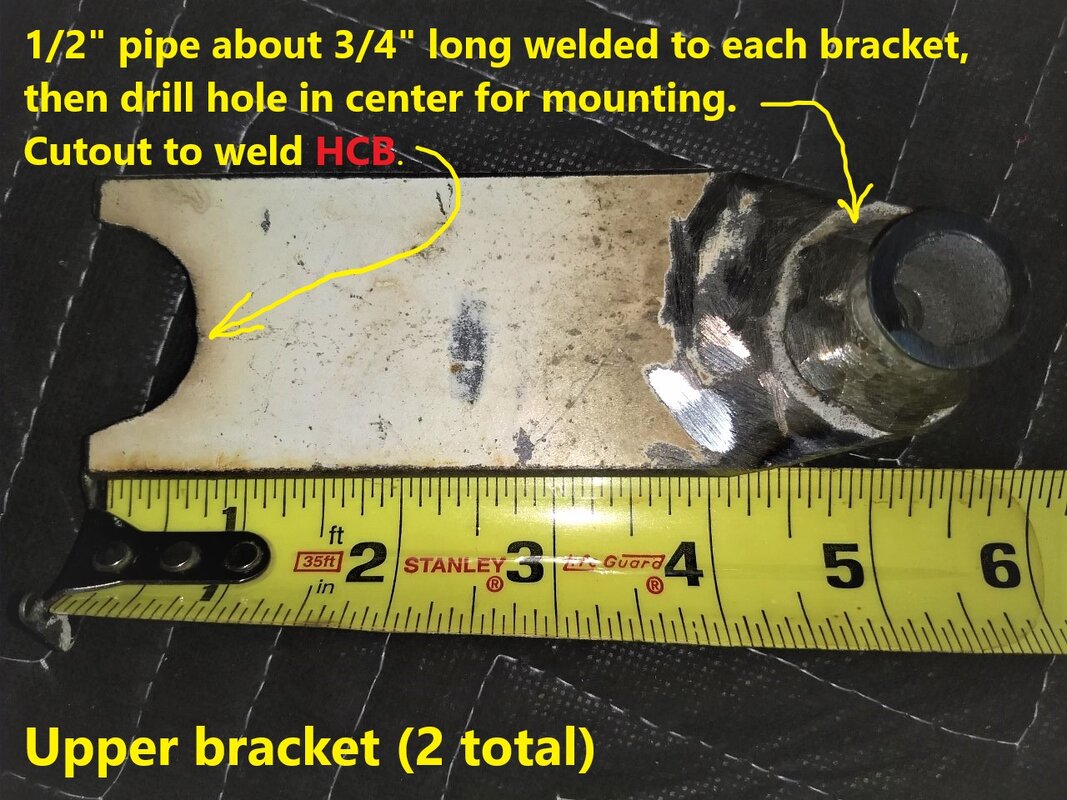
6. Next I made support pieces to mount between the upper VTX frame mount (top VTX crash bar bracket) to the top of the HCB.
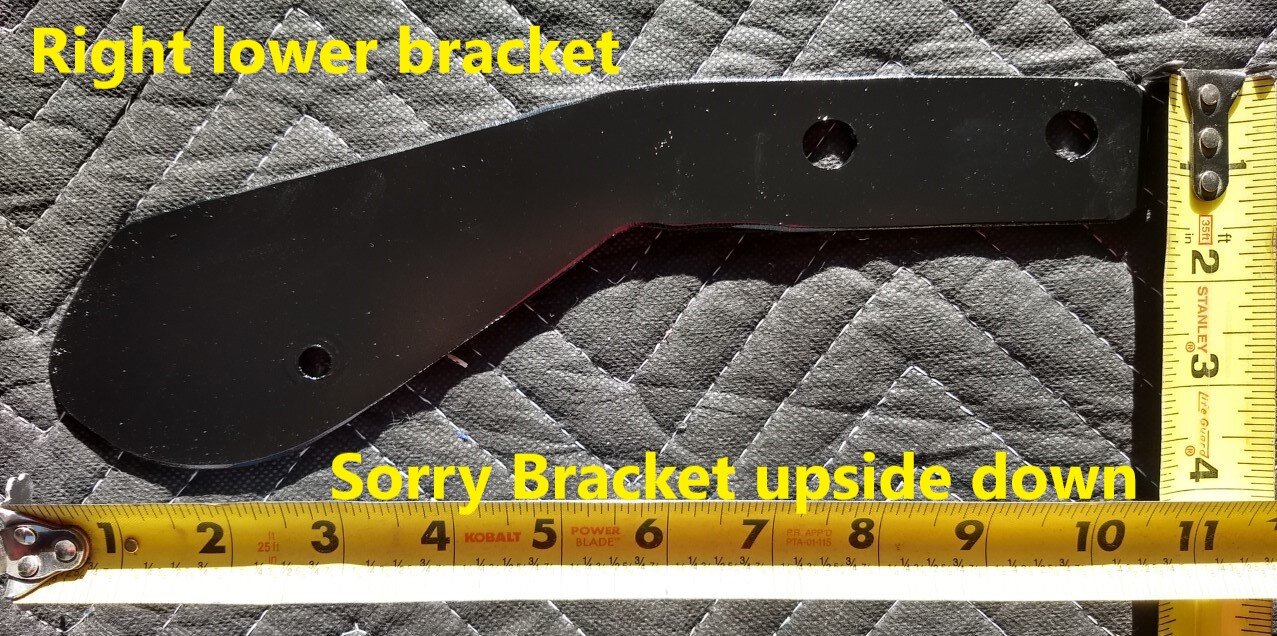
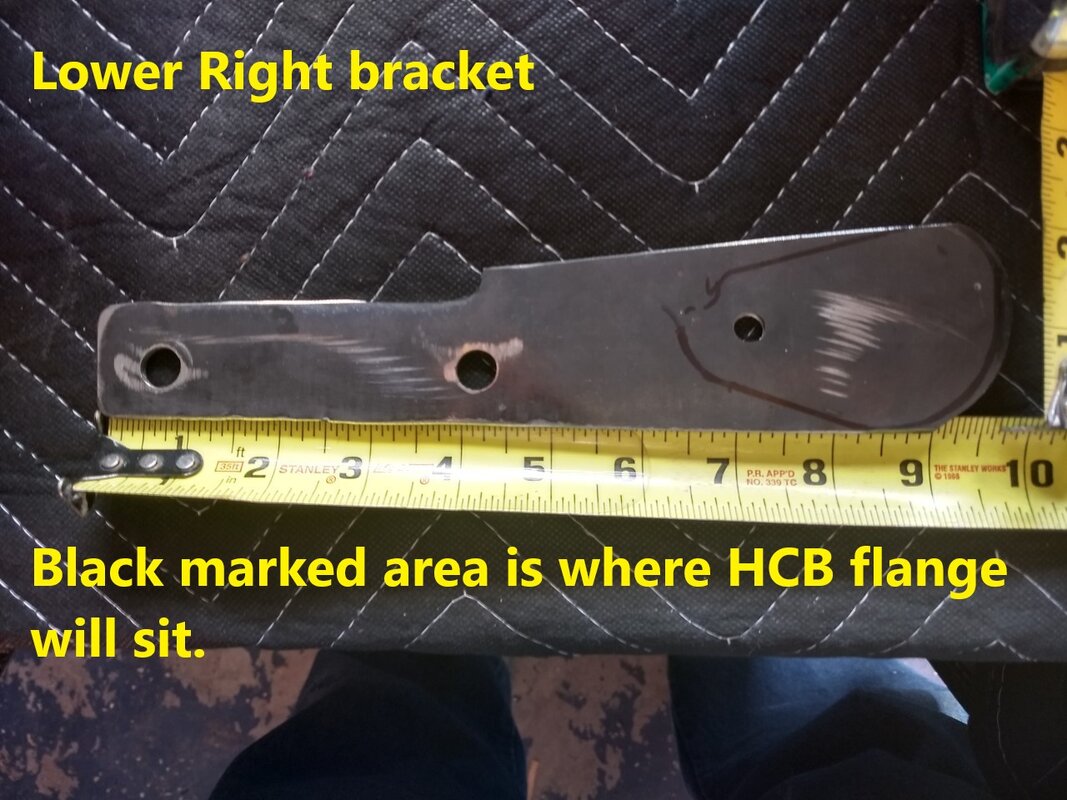
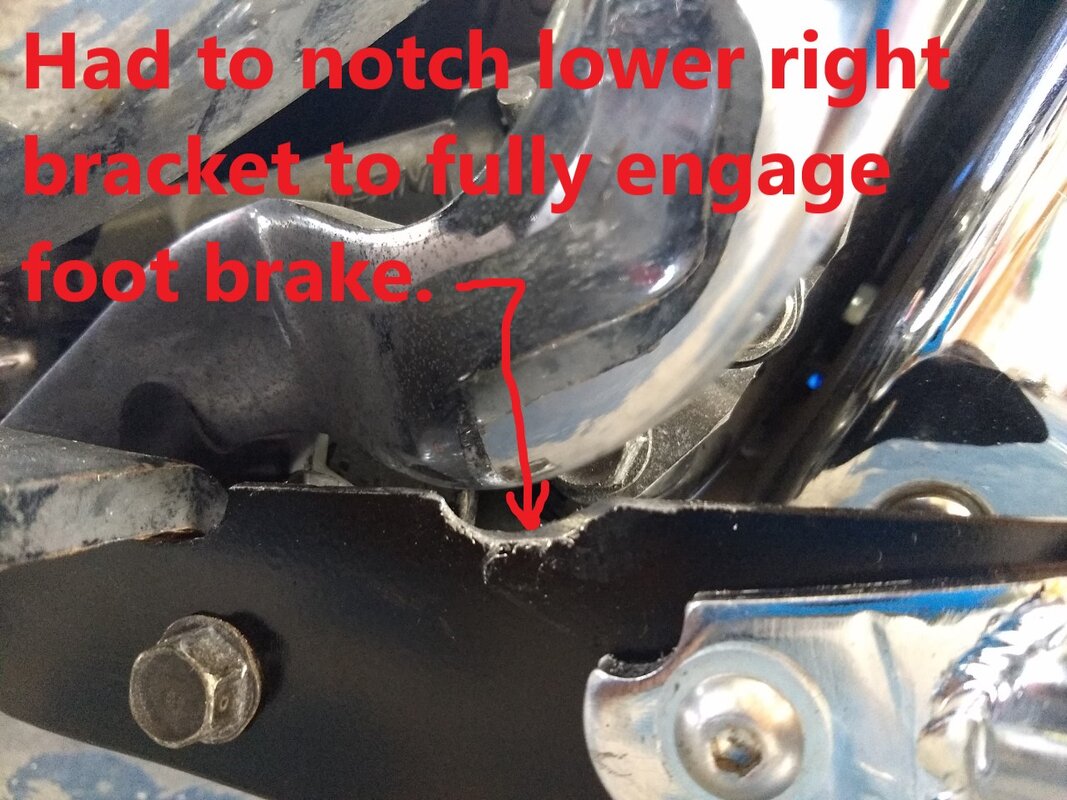
7. Then I also made support pieces to mount between the lower VTX frame mount (foot board bracket) of the HCB.
8. To connect the right and left HCB pieces I used a 20”, about 1” diameter pipe to slide into the HCB“let’s call it a spacer bar”, to strengthen and rejoin them (you could use a shorter piece, but believe in a little overkill for safety sake).
9. Next I bolted both the upper and lower frame support pieces to the VTX.
10. I held the HCB in place against the upper and lower frame support pieces with some tie wire at the top and then drilled and installed a mounting bolt into each of the lower frame support pieces.
11. Next I removed the HFL from the HCB and set aside.
12. Before welding I disconnected the VTX battery, covered as much of the VTX as possible.
13. Then Tack welded the HCB to the upper frame support pieces, as well as the 20” spacer bar joining the right and left HCB pieces.
14. Next I carefully removed the redesigned HCB from the VTX, “basically lifting up the HCB above the radiator and twisting it around the VTX frame to remove it”.
15. Taking the redesigned HCB out I finished the welds on all the joints on upper frame support pieces and around the spacer bar.
16. Next I ground down welds to clean them up “this step is for me as I’m not a great welder”!
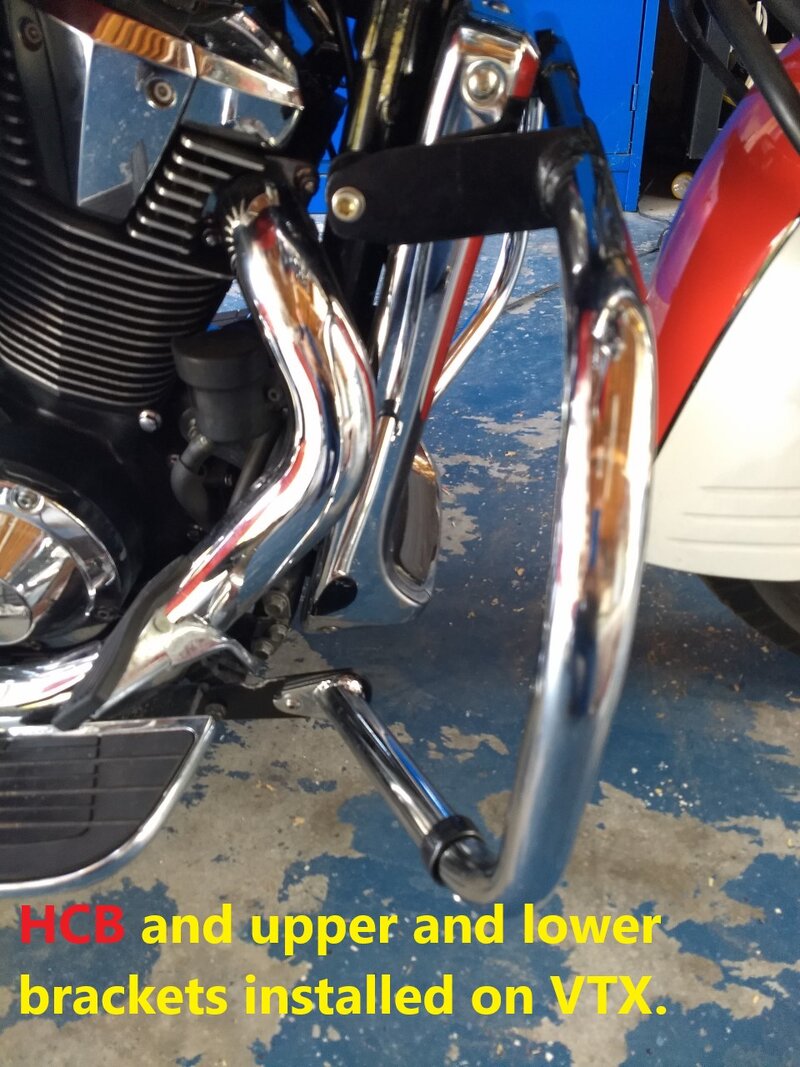
17. I painted center section of redesigned HCB and upper support pieces as well as the lower frame support pieces then installed everything back on the VTX.
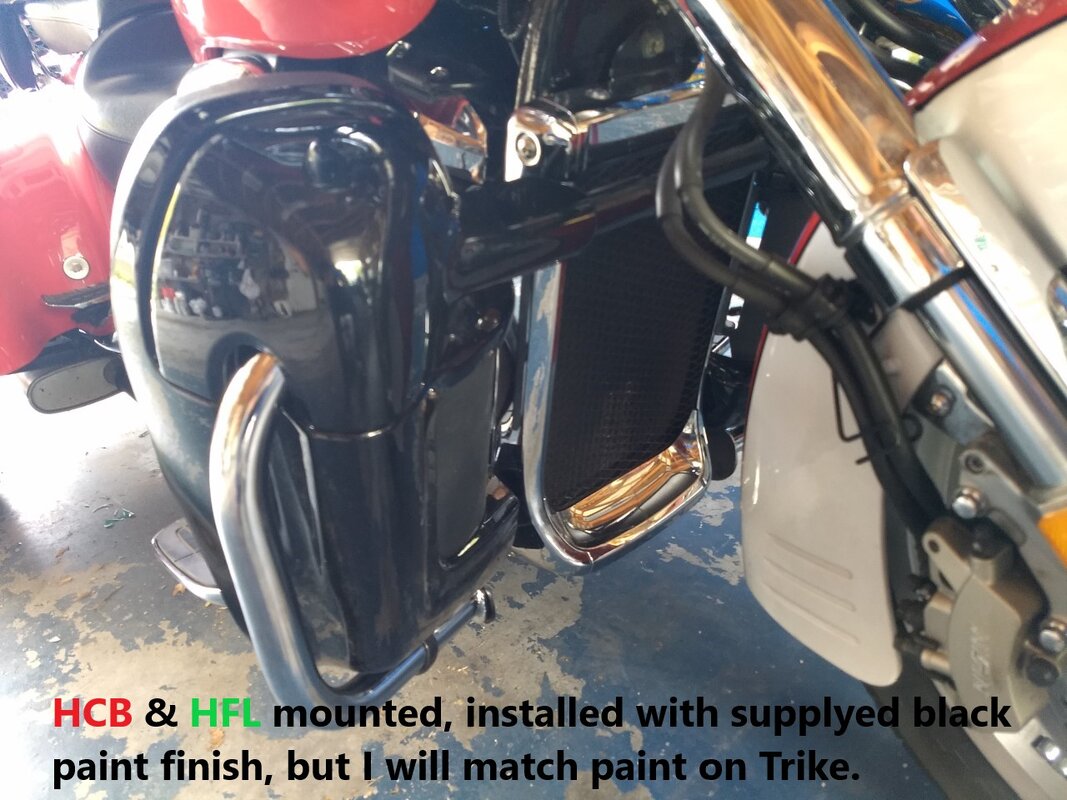
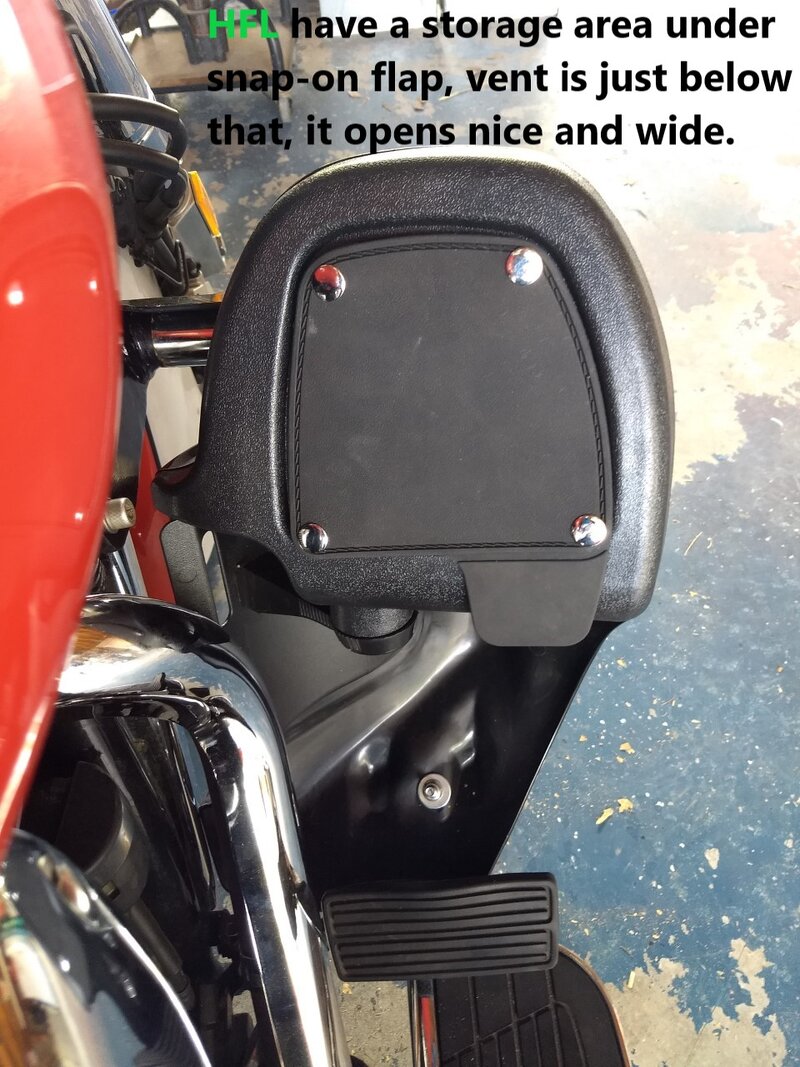
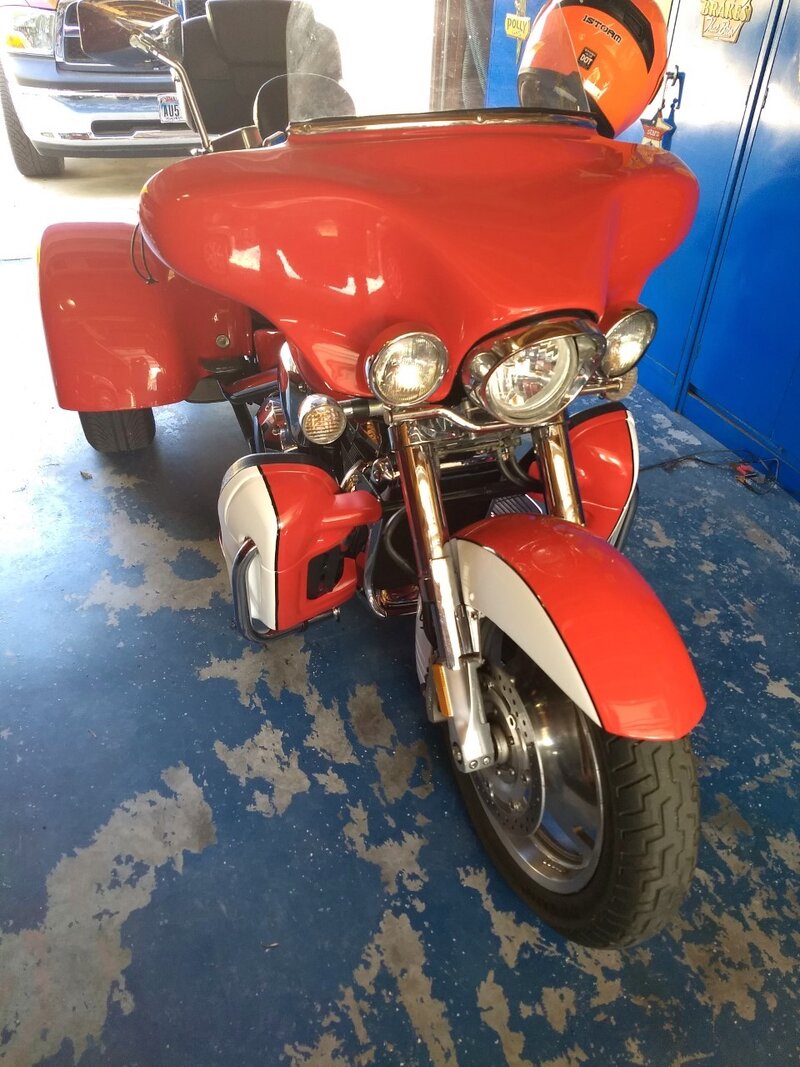
18. Next I installed the HFL on the redesigned HCB, they look great.
19. I reconnected the VTX battery, seats, and took her out for a test ride “WIDE SMILE”, oh I also removed the previously installed (lowers that attached to the front forks “DIY”) don’t need them anymore.
20. Final step is removing the HFL and painting to match the Trike.
David Hilton Ret. USN ETC/SS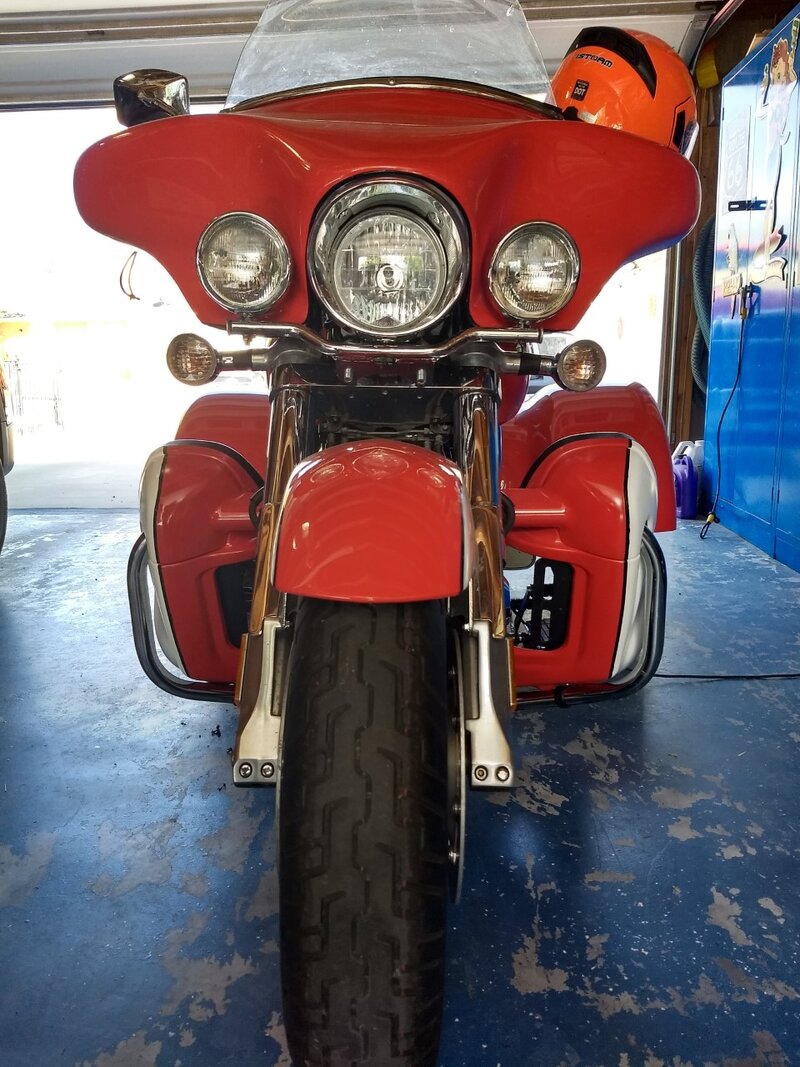
Hello First off, I know this is a long post but I am trying not to miss any of the steps. I did this in case there are others out there wanting to add this really supper Mod. I have done the basic leg work for you, and here are the steps as to how to Do It Yourselves (DIY).
I purchased my Honda VTX 1800 trike just four months ago, and have been dealing with wind buffeting issues. First I re-curved the windshield “DIY” (Posted), next I made lowers that attach to the front forks “DIY” (Posted).
I started wondering if there were regular “fairing lowers” for the VTX out there, well sure enough there is. But only one company makes them, so there both costly and require that you have a crash bar (motor guard) that is not made anymore. Hum!
The thing is, I really liked the look the HFL gave to the Honda VTX, and I am one to try to do things “DIY”, SO. Here goes:
1. I checked on cost and availability of the vented HFL including all mounting hardware ($55.00) and HCB ($43.50) both on eBay w/free shipping. “Under a hundred bucks very doable”.
It’s hard to really tell about the bends on the HCB; they looked a lot like the crash bar already on my VTX, so I ordered just the HFL first. Well the spacing between the bends is different the HCB is shorter!
2. So back to eBay, I ordered the HCB; when it showed up I could tell several things.
- It mounts upside down compared to the VTX bar, with the connecting section of the bar at the top of the engine rather than the bottom. It is narrower than the VTX bar as well, so I was going to have to cut it to make it work.
3. Diving in: I cut the mounting section out of the top of the HCB, I was not going to use it anyway. :Shrug: Now I have two halves of the HCB to work with, the right side was going to be the most challenging because of the way the exhaust pipe runs, so it needed to be dealt with first.
4. Mounted the right HFL to the right HCB, (turned the handlebars right, all the way to the stops: to start fitting it making sure I had at least ¼” space around it. First I tried putting it like I had seen in the old posting; I would have had to cut about 2” from the HFL on some parts of it to fit it. Plus it seemed like the HCB would not be very strong mounting it as two separate pieces to the VTX’s frame.
5. Then I tried moving the HCB in front of the VTX’s radiator (about 2” from where the older posting had it); finding that spot that allowed the HFL to be installed without cutting. This also let me put in an extension piece in; to connect the right and left HCB, giving the strength back to the two half’s of the HCB. (Dance)
6. Next I made support pieces to mount between the upper VTX frame mount (top VTX crash bar bracket) to the top of the HCB.
7. Then I also made support pieces to mount between the lower VTX frame mount (foot board bracket) of the HCB.
8. To connect the right and left HCB pieces I used a 20”, about 1” diameter pipe to slide into the HCB“let’s call it a spacer bar”, to strengthen and rejoin them (you could use a shorter piece, but believe in a little overkill for safety sake).
9. Next I bolted both the upper and lower frame support pieces to the VTX.
10. I held the HCB in place against the upper and lower frame support pieces with some tie wire at the top and then drilled and installed a mounting bolt into each of the lower frame support pieces.
11. Next I removed the HFL from the HCB and set aside.
12. Before welding I disconnected the VTX battery, covered as much of the VTX as possible.
13. Then Tack welded the HCB to the upper frame support pieces, as well as the 20” spacer bar joining the right and left HCB pieces.
14. Next I carefully removed the redesigned HCB from the VTX, “basically lifting up the HCB above the radiator and twisting it around the VTX frame to remove it”.
15. Taking the redesigned HCB out I finished the welds on all the joints on upper frame support pieces and around the spacer bar.
16. Next I ground down welds to clean them up “this step is for me as I’m not a great welder”!
17. I painted center section of redesigned HCB and upper support pieces as well as the lower frame support pieces then installed everything back on the VTX.
18. Next I installed the HFL on the redesigned HCB, they look great.
19. I reconnected the VTX battery, seats, and took her out for a test ride “WIDE SMILE”,
20. Final step is removing the HFL and painting to match the Trike.
David Hilton Ret. USN ETC/SS


