oil light came on, low range indicator appeared and the engine died.

Dec 14, 2016
8
1
Atlanta
oil light came on, low range indicator appeared and the engine died.

Riding yesterday and entered a round-a-about at very slow speed. As I came through the final curve for my exit spoke, the oil light came on, low range indicator appeared and the engine died. I coasted to the exit and onto the shoulder and then far enough over and onto the grass. Turned everything off - sat for a minute and then restarted. All warning lights and indicators disappeared. Drove 2 minutes on to my brothers house and checked everything. All systems normal.

Anyone else ever experience the "dashboard lighting up" and "engine shutoff" for no apparent reason? The only thing I can think of was the slope of the road plus the circular motion must have been enough to make the sensors report. Prior to my ride, the cold oil level was fine and range was 150 miles. I had ridden ~50 when this occurred. Welcome any thoughts or guidance. Should I visit my HD dealership?
 
Harley Trouble Codes

The following procedure will instruct in retrieving and clearing ECM Diagnostic Trouble Codes and TSM/TSSM codes through the Harley guage cluster as well as a list of codes.

1- Turn Ignition switchto OFF & Run/Stop switch is to Run.

2- Push odometer resetbutton in & hold.

3- Turnignition switchto Ignition and release the odometer reset button. Background lighting should illuminate, speedometer needle should sweep its full range and indicator lamps (battery, security, low fuel, check engine and cruise) should illuminate. The word "diag" should then appear.

4 - Push the odometer resetbutton once and you will seethe selection menu "PSSPt" with the first P flashing.

5 - Each letter represents an area of the diagnostics module. The module that is flashing is the one you are going to check. To move from one letter (module) to the next, you push the odometer resetbutton one time. (from P to S to SP to t and back to P, etc.)

P = ECM/ICM(Electronic Control Module)[EFI] /Ignition Control Module[Carbureted])

S = TSM/TSSM (Turn Signal/ Security Module)

SP = speedometer

T = tachometer

6 - To get the DTC within an area of diagnostics, push and hold the odometer resetbutton in for 5 seconds and release. If there are any DTC's the code will be displayed or the word "none" will appear if there are no DTC's. Push the odometer resetbutton again to view additional codes if they exist.

7 - Record the codes.

8 - If DTC's are not to be cleared, Press and release the odometer resetbutton. Part number of module will be displayed.

NOTE: To determine if a code is current or historic, clear the displayed code by pushing in and holding the odometer reset button ( longer than 5 seconds) until 'clear' comes up. Release the odometer reset button. Turn OFF the ignition switch. Run your bike and shut it down then recheck the DTC's again by repeating steps 1 to 9. If the code is current it will reappear.

9 - Press and release the odometer reset button to continue to the next module.

10 - Turn Ignition switch to OFF.

On models not equipped with a tachometer "No Rsp" will appear when the tachometer identifier is selected.

"No Rsp" (no response) will also appear if the run/off switch is in the off position when doing this procedure.

--------------------------

HFSM = Hands Free Security Module

TSM = Turn signalmodule

DTC’s are designated by a P,C,B or U

P codes indicate issues monitored by ECM

C codes indicate an issue with ABS

B codes are set by Radio, Instruments and BCM

U codes indicate a communication problems with the modules


Fault Code Abbreviation List

ABS – Anti-Lock Braking System

ACR – Automatic Compression Release

AFR – Air Fuel Ratio

AIS – Active Intake Solenoid

ATS – Air Temperature Sensor

BAS – Bank Angle Sensor

BCM – Body Control Module

CAN – Controller Area Network

CCM – Cruise Control Module

CKP – Crank Position Sensor

DLC – Datalink Connector

DTC – Diagnostic Trouble Codes

ECM – Electronic Control Module

ECT – Engine Coolant Temperature

ECU – Electronic Control Unit

EFI – Electronic Fuel Injection

EFP – Electronic Fuel Pump

ET – Engine Temperature sensor

FI – Fuel Injectors

FPR – Fuel Pressure regulator

H-DSSS – Harley-Davidson Smart Security System

HCU – Hydraulic Control Unit, ABS

[/stag_one_half][stag_one_half_last] HFSM – Hands Free Security Module

HO2S – Heated Oxygen Sensor

IAC – Idle Air Control actuator

IAT – Intake Air Temperature sensor

ICM – Ignition Control Module

IMAP – MAP + IAT in one unit

ISS – Ion Sensing System

JSS – Jiffy Stand Sensor

LHCM – Left Hand Control Module

MAP – Manifold Absolute Pressure Sensor

MHR – Right Hand Control Module

RCM – Reverse Control Module

TCA – Throttle Control Actuator

TGS – Twist Grip Sensor

TMAP – Intake Air Temperature / Manifold Absolute Pressure equipment

TPS – Throttle Position Sensor

TSM / TSSM – (Turn Signal / Turn Signal Security Module)

VE – Volume Efficiency

VIN – Vehicle identification number

VSS – Vehicle Speed ​​Sensor

WSS – Wheel Speed ​​Sensor


P0031 Front HO2S low/open

P0032 Front HO2S shorted/high

P0051 Rear HO2S low/open

P0052 Rear HO2S shorted/high

P0072 AAT sensor low

P0073 AAT sensor high/open

P0107 MAP sensor failed low/open

P0107 Map Sensor Open/Low

P0108 MAP sensor failed high/open port

P0112 IAT Voltage Low

P0113 IAT Voltage Open/High

P0117 ET Sensor Low

P0118 ET Sensor High

P0120 TPS1 Range Error

P0122 TPS1 Low

P0123 TPS2 High/Open

P0131 Front Oxygen Sensor Low / Engine Lean

P0132 Front Oxygen Sensor High / Engine Rich

P0134 Front Oxygen Sensor Inactive

P0151 Rear Oxygen Sensor Low / Engine Lean

P0152 Rear Oxygen Sensor High / Engine Rich

P0154 Rear Oxygen Sensor Inactive

P0220 TPS2 Range Error

P0222 TPS2 Low/Open

P0223 TPS2 High/Open

P0261 Front Injector Open/Low

P0262 Front Injector High

P0263 Rear Injector Open/Low

P0264 Rear Injector High

P0265 Rear injector shorted high

P0371 CKP sensor wrong number of pulses

P0373 CKP Sensor Intermittent

P0374 CKP Sensor Synch Error

P0444 Purge Solenoid Open/Low

P0445 Purge Solenoid High

P0501 VSS Sensor Low

P0502 VSS Sensor High/Open

P0503 VSS failed high

P0505 Idle speed control unstable

P0562 Battery/ECM Voltage Low

P0563 Battery/ECM Voltage High

P0572 Brake Switch Low

P0577 Cruise Control Input High

P0603 ECM EEPROM Memory Error

P0605 ECM FLASH Memory Error

P0641 5 Volt Reference 1 Out of Range

P0651 5 Volt Reference 2 Out of Range

P0691 Fan/cooling relay output low/open

P0692 Fan/cooling relay output high

P1001 System Relay Coil Open/Low

P1002 System Relay Coil High/Shorted

P1003 System relay contacts open

P1004 System Relay Contacts Closed

P1009 VTD Disabled Fuel Due to Incorrect Password

P1010 Missing Password

P1017 ET indicates overheating

P1019 ECT Difference (high temp)

P1270 TGS 2 A/D Validation Error

P1351 Front Ignition Coil Driver Open/Low

P1352 Front Ignition Coil Driver High/Shorted

P1353 Front Cylnder No Combustion

P1354 Rear Ignition Coil Driver Open/Low

P1355 Rear Ignition Coil Driver High/Shorted

P1356 Rear Cylinder No Combustion

P1357 Front Cylinder Combustion Intermittent

P1358 Rear Cylinder Combustion Intermittent

P1475 Exhaust Actuation Position Error

P1477 Exhaust Actuator Open/Low

P1478 Exhaust Actuator Shorted/High

P1501 Jiffy Stand Sensor Low

P1502 Jiffy Stand Sensor High

P1510 EFI Limited Performance Mode

P1511 EFI Power Management Mode

P1512 EFI Forced Idle Mode

P1514 ETC Air Flow Fault/Error

P1600 EFI Module Processor Internal Error / Watchdog Error

P1608 Loss of continuous battery

P1655 ACR solenoid low/open

P1656 ACR solenoid shorted high

P1691 Cooling fan left low/open

P1692 Cooling fan left shorted high

P1693 Cooling fan right low/open

P1694 Cooling fan right shorted high

P2100 EFI Motor Circuit Open

P2101 EFI Motor Circuit Range Performance (Actuation Error)

P2102 EFI Motor Circuit Low

P2103 EFI Motor Circuit High

P2105 EFI Forced engine shutdown

P2107 EFI Module Processor Internal Fault

P2119 EFI Motor Throttle Body RangePerformance

P2122 TGS1 Low/Open

P2123 TGS1 High

P2127 TGS2 Low/Open

P2128 TGS2 High

P2135 TPS Correlation Error

P2138 TGS Correlation Error (Twist grip sensor)

P2176 EFI Closed Position Not Learned

P2184 ECT sensor low

P2185 ECT sensor high

P2300 Ignition coil driver low/open (front)

P2301 Ignition coil driver shorted high (front)

P2303 Ignition coil driver low/open (rear)

P2304 Ignition coil driver shorted high (rear)

Have a look here first

IMO U want to know what ur ECM knows

It will tell U about codes and part numbers affected by the codes if any are present

Next, I would run the bike warm with a box fan and a thermometer

With a GOOD oil pressure master gauge in line near the oil filter to eliminate the { NEVER IMO oil low pressure idiot light}

HD lights and gauges are NO FING good IMO

If this is a TC oil pumps and TOO much crank run out is the first thing to check

I do NOT want to scare ya, but HD runs low pressure but HIGH volume { the engines will and do run good with what appears to be very low oil pressure} ass uming what I know to be true

THESE ARE JMO Good Luck
 
Riding yesterday and entered a round-a-about at very slow speed. As I came through the final curve for my exit spoke, the oil light came on, low range indicator appeared and the engine died. I coasted to the exit and onto the shoulder and then far enough over and onto the grass. Turned everything off - sat for a minute and then restarted. All warning lights and indicators disappeared. Drove 2 minutes on to my brothers house and checked everything. All systems normal.

Anyone else ever experience the "dashboard lighting up" and "engine shutoff" for no apparent reason? The only thing I can think of was the slope of the road plus the circular motion must have been enough to make the sensors report. Prior to my ride, the cold oil level was fine and range was 150 miles. I had ridden ~50 when this occurred. Welcome any thoughts or guidance. Should I visit my HD dealership?

Were you low on gas? Going around a left corner will move the gas to the opposite side of the fuel pick up...when low, this can cause the engine to stutter or die.

As soon as things are back level/straight, the fuel is there for the pick up.

If it's an M8, the oil could be a similar issue.

If not low on gas I would have it checked on the dying....on the oil, I would have it checked either way.

Kevin
 
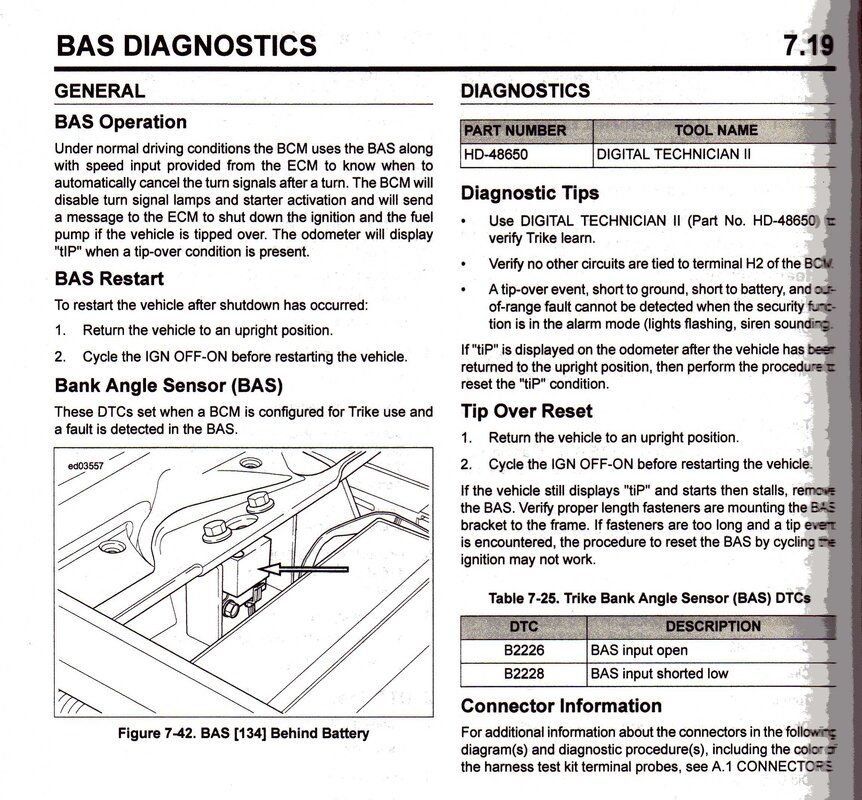
Shot in the dark here but I think there is a tip over/roll over sensor on these. If its not fastened down correctly in a turn it could possible break the circuit and shut down the motor. If i remember correctly it is clipped to the top of the battery box.
 
Look at this diagram Number 12 is the BCM, Seems to me the tip over switch is in here now. I could be wrong but the can bus electrical did change some , Dunno 4 sure but if U run the system check thru ur speedo it should {SHOULD} spit out a code OR the word could show in the odometer window. JMO
 
Failure

Same thing happened to the Wife's one year while traveling, except it didn't die.

After pulling off the hi way we stopped it then restarted it after a couple of minutes-all was normal and we have never had it happen again - figured it was a fluke or elect. spike.

She now has just turned 51 thou. miles - LOVE OUR TRIKES!

;)
 
HD15FLHTCUTG017.gif
Seems to me the BAS is now in the ECm like #10 above?
 
HD-header.png
BANK ANGLE SENSOR SWITCH KIT​

J045392008-09-19

GENERAL

Kit Number

88115-09

Models

This kit must be installed on 2009 and later FL Touring Models being fitted with a TLE or TLE-Ultra Sidecar Kit.

This kit can also be used as a replacement on those same models already equipped with a TLE or TLE-Ultra Sidecar Kit.

Early 2009 models may not have the correct battery box for the sidecar installation. The battery box must have the inscription "Sidecar Tip Sensor" molded into the right front side of the battery box.

Additional Parts Required

Early 2009 FL Touring models will require the Battery Tray Kit (66281-09A) to use the Bank Angle Sensor when installing the TLE or TLE-Ultra Sidecar Kit.

Following installation of the Bank Angle Sensor Switch, the DIGITAL TECHNICIAN[SUP]®[/SUP] II and Data Link must be used to program the security module (TSM/TSSM/HFSM) for sidecar (with gravity activated bank angle sensor) application.

icon-warning.png
WARNING

Failure to properly configure the TSM/TSSM/HFSM can cause engine to shutdown which could lead to loss of control and death or serious injury. (00581b)

If the security module is not configured and calibrated after the sidecar and bank angle sensor has been installed, the motorcycle will operate in solo mode, and the engine may shut down when the vehicle takes a sharp corner. Additionally, the turn signals may cancel prematurely when navigating rough conditions (i.e. potholes, bumps, etc.).

Kit Contents

See Figure 2 and Table 1.

INSTALLATION

NOTE

If equipped with the optional "Harley-Davidson Smart Security System", verify that the security status lamp in the speedometer face is not flashing (security system disarmed) before proceeding.

icon-warning.png
WARNING

To prevent accidental vehicle start-up, which could cause death or serious injury, remove main fuse before proceeding. (00251b)

en_US.jpg


1Battery tray
2Bank angle sensor (sidecar tip sensor) location

Figure 1. Battery Tray for Bank Angle Sensor

  1. See Figure 1. Remove the right-side cover. If the battery tray (1) does not have the inscription "Sidecar Tip Sensor" as shown in Figure 1 you must purchase and install the Battery Tray Kit (66281-09A) before installing the sidecar.
  2. Remove the left-side saddlebag according to the instructions in the Service Manual. Remove the left-side cover and disconnect the main fuse.
  3. Where you removed the right-side cover, disconnect the gray twelve-way socket housing from the security module. Plug it into the twelve-way pin housing on the bank angle sensor harness from the kit.
  4. Plug the gray twelve-way socket housing from the bank angle sensor harness into the security module.
  5. Plug the three-way socket housing from the bank angle sensor harness into the bank angle sensor switch.
  6. Install the bank angle sensor switch to the right front corner of the battery tray with the screw from the kit.
  7. Refer to the Service Manual and follow the instructions given to install the right-side cover, tucking any excess wires under the cover. Install the main fuse, left-side cover and saddlebag per the instructions in the Service Manual.

NOTE

If the Bank Angle Switch is actuated by tilting, the ignition circuit is disabled. The Bank Angle Switch may be reset by turning the ignition switch OFF for five seconds, then ON.

Whenever the sidecar is removed, the Bank Angle Switch kit should be removed and the security module should be switched back to solo vehicle operation by a Harley-Davidson dealer.

Instructions for installing or removing the Bank Angle Switch Kit, and procedures for configuring the security module are given in the Sidecar Service Manual, Part Number 99485-xx.

SERVICE PARTS

en_US.jpg


Figure 2. Service Parts, Bank Angle Sensor Switch Kit

Table 1. Service Parts Table

Item

Description (Quantity)

Part Number

1

Switch, bank angle sensor

32495-98

2

Harness, bank angle sensor

88104-09

3

Screw, self-tapping

4790

Items mentioned in text, but not included in kit:

A

Battery tray


OOPS, this may help

How did you make out with this problem??
 
IF I read your post correctly, the oil pressure light came on BEFORE the gas light and the engine died. Unless you were going around the traffic circle REALLY FAST I'd doubt it if it is the tilt sensor. Low oil pressure isn't something you want to screw with. You didn't say if you had a warranty or what year your trike is. Under warranty, get it to a dealer..... if it were mine and out of warranty I'd take it to a dealer anyway.
 

Welcome to the Trike Talk Community

Join our vibrant online community dedicated to all things Trikes! Whether you're a seasoned rider or just starting out, this is the place to share experiences, tips, and stories about your three-wheeled adventures. Explore modifications, maintenance advice, and rides, all while connecting with fellow trike enthusiasts from around the globe

Forum statistics

Threads
55,224
Messages
802,063
Members
23,796
Latest member
brash
Back
Top Bottom