Last Summer I had 30 tooth installed so...

Fearless

Gone But Not Forgotten
Dec 10, 2013
7,719
4,268
Clarion, PA
Name
Fred Foster
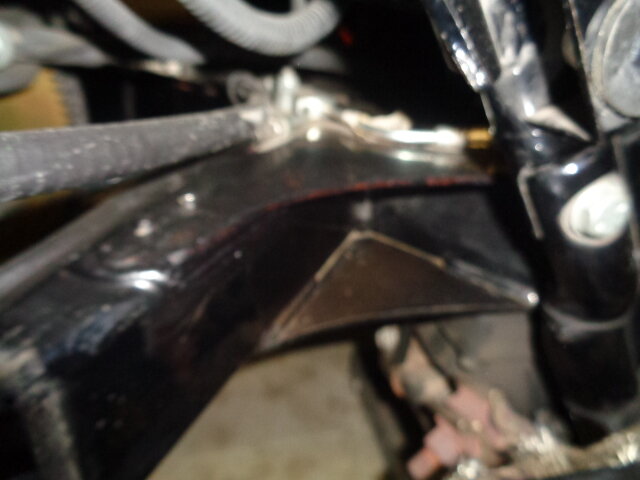
I mean the front pulley change was one great improvement for power and using 6th gear at all. But I was under Old Shiney this afternoon, and the drive pulley is riding the Differential side of the rear pulley. It is really tight and wearing the side of the belt. Either something has shifted or the re-adjustment of the belt after pulley change didn't get checked as it should have. I plan on removing the body and do a complete realignment/adjustment of the rear axle making sure nothing is loose or out of place. I am going to stop by the Harley shop and ask a few questions before I open the tool cabinets. I may even purchase a belt tensioner gage. I will be stopping at Lowes Hardware and pickup two magnetic Lasers to assist in the alignment. I plan on doing step by step pictures, I have a 09' Triglide supplement to assist in the project. this should prove to be interesting to say the least, and of course I will be compelled to clean everything that has been covered for 10 years yeppie. :Shrug:Wrench safely Fred


P.S. Did I ever tell ya I would much rather ride then wrench just sayin...:gah:
 
Who installed it? If its not been a year, maybe they will evaluate it for you.

Asking is free.
Possibly I probably should call them and let them know what I have found and see what they say. I'll do that tomorrow the dealer that did the switch for me is a stand up Harley Dealer, New Castle Harley. Thanks I'll update tomorrow. Fred
 
Called New Castle Harley talked with service manager, he said they could align the trike and gave me a price not crazy numbers. He asked me if I had a place in a garage to work of course I do. Do you have the supplement Yes... Lateral alignment is not rocket science I told him no problem I will handle it he did say if I have problems give him a call and he would help me resolve the problems. So this afternoon I removed the body from old Shiney and let the light shine on 10 years of dirt and dust wow. I did find out that the rear end is out of alignment laterally close to 3/16" and off 1/16" on the Adjustment bolts for adjusting the belt deflection. These distances may seem small but the belt is hitting the battery box occasionally from the rub marks I have pictures I will post later I feel confident that these adjustment will fix it. From the looks of the drive belt is seems fine with no loose edges I will measure width to be certain.:D More later Fred
 
Here's hoping no problems for the job Fred. We are part way to Florida for a few weeks (may stay 2 months). Let us know how it all turns out. Hi to Jeannie
 
Here's hoping no problems for the job Fred. We are part way to Florida for a few weeks (may stay 2 months). Let us know how it all turns out. Hi to Jeannie
Thanks for asking I will I do not foresee any issues. Plan on new rear brake pads what is on there is 4 years old now time for new one's. I will keep posting progress on the adjustments. You know with belts a few thousands makes a huge difference in track of the belt. Slapping the battery box was most worry some to me. travel safe Fred

P.S. Already reported to Bride the greeting....LOL
 
The real reason is the battery box marks from drive belt and belt krud on rear pulley on right side only

DSC01101.JPGDSC01109.JPGDSC01097.JPGDSC01105.JPG
 
While your in there check your pan hard rod ends.:)
I already have solid as a rock all tight I will however use a spray penetrate grease long term stuff great product also sadly very pricey. Anything that comes close to not being right will be swapped out while I am this far. Just to add this seems nuts but actually not a difficult task at all. Thanks for your advice anything you think please chime in I'm sure it would be of value. Ride safe Fred
 
DSC01088.JPGDSC01095.JPGDSC01108.JPGDSC01103.JPG

As you can see the reverse motor gets dirty over 10 years. I also found a connector that was broken and someone just inserted the pins in the other half of the connection not going to work for me, tour pack lighting. I have ordered replacements connectors as well as new brake pads. I believe I have skinned every knuckle and ripped each fingernail cleaning the frame and other parts, it will be worth it when complete. :good:travel safe Fred
 
While your in there check your pan hard rod ends.:)
I had to remove the axle end to make a lateral adjustment and guess what I found a loose Heim joint so I replaced both just under 40 thousand miles. Drive belt now runs in middle of the belt opening between the battery box and the frame. Fred

DSC01116.JPG
 
I had to remove the axle end to make a lateral adjustment and guess what I found a loose Heim joint so I replaced both just under 40 thousand miles. Drive belt now runs in middle of the belt opening between the battery box and the frame. Fred

Fred, could that have been the root cause for the belt to track as it did?
 
If memory serves me correctly isnt there rubber dampners that are mounted to the pulley area?? Trying to remember what they are called. I know they get sloppy over time and need replacing..
 
I had to remove the axle end to make a lateral adjustment and guess what I found a loose Heim joint so I replaced both just under 40 thousand miles. Drive belt now runs in middle of the belt opening between the battery box and the frame. Fred

View attachment 67653

Those were a common issue when I mentioned them..Glad you checked and repaired. Good Stuff!!
 
Fred, could that have been the root cause for the belt to track as it did?
No I don't believe so thinking back old shiney did not have the tire clearance on the right side it had on the left. It will be interesting to see if the spacing is closer on the fender clearances after moving the entire rear drive assembly to the left to get the drive belt centered. This whole process has been very interesting to me and certainly not rocket science. Anyone that can measure and read the Triglide supplement can do these adjustments. not the best picture but it is almost dead center. Now just remove each one separately and lock tite them all 16 bolts.

DSC01099.JPG

DSC01118.JPG
 
If memory serves me correctly isnt there rubber dampners that are mounted to the pulley area?? Trying to remember what they are called. I know they get sloppy over time and need replacing..
I measured the "Isolators" play and they are good I can see someday replacing them due to the heavy weight of the trike and age of them I made a note to check play each season for movment. Thank you;) Fred

DSC01105.JPGDSC01124.JPG
 
New brakes are on old pads were shot, easy swap out on brakes. The parking brake took a little thinking I had to read the book twice to get the drift must of had a senior moment oh well it's done now. Drive belt looks much better than before. Installing body Wednesday with old Friend and a new Triker an Old Road Dawg if you will old Co-worker LOL. Replaced the rubber mounts for exhaust old ones were shot

DSC01130.JPGDSC01132.JPGDSC01126.JPGDSC01133.JPGDSC01127.JPGDSC01125.JPG
 
Update alignment job.

Tonight I began to look at the swing arm rust spots close to edges and welds,most likely will move lines and cables. I have a little work to do in a few areas. I noticed one insp sticker on a part dated Sept. 2008 this tells me close to assembly date. The six wire plug that was missing I am ready to reinstall the wires but the two ends don't match quite right, plan on redoing it the way it was taken apart should work, the diagram in the supplement is not really clear about how these wires are. It seems I have an orange/white stripe on trike side and no orange/white coming out different to say the least. Any suggestions?

DSC01139.JPGDSC01140.JPGDSC01135.JPGDSC01134.JPG
 
Adjusted Drive Belt deflection needed to get a gauge to do it so I purchased one. Primed and sealed the swing arm spots where powder coat failed and also the top of shock mounts at welds where the coating blistered. There were also two areas on top of the angle iron mounts for the stiffener bars the coating failed. At Ten years old there are bound to be issues here and there. Possibly the body will go back on tomorrow, I just need to get two 12" extra heavy duty Zip ties the brand used by Electrical services those are what is used from Lehman or so they told me.

DSC01145.JPGDSC01141.JPG
 

Attachments

  • DSC01146.JPG
    DSC01146.JPG
    161.4 KB · Views: 140
If you could get Zook or one of the moderators to PM me your address, I'll send you some.
Thanks I went to lowes today and got 15 pack in the electrical dept. extra heavy duty thank you anyway. ride safe :good:Fred
 
My Luck...

I torqued the body bolts today and the ground bolt broke it was over torqued sometime before, last bolt to finish putting the body back on. finshed painting and secured brake hoses and emergency cables to OEM placement. Wheels are cleaned and clear coated ready to go. DSC01158.JPG I plan on cutting it to length degreasing and red locktite the all thread and using it... any thoughts only 12 Lb. torque on it.

DSC01157.JPG
 
What is the diameter of the bolt?

SizeRecommended Torque
Grade 2Grade 5Grade 818-8 S/SBronzeBrass
CoarseFineCoarseFineCoarseFineCoarseFineCoarseFineCoarseFine
#4*------5.2-4.8-4.3-
#6*------9.6-8.9-7.9-
#8*------19.8-18.4-16.2-
#10*------22.831.721.229.318.625.9
1/4"44.76.37.39106.37.85.77.35.16.4
5/16"89131418201111.810.310.98.99.7
3/8"151723263337202218201618
7/16"242737415258313329312627
1/2"374157648090434540423537
9/16"53598291115129576353584751
5/8"73831121281591809310486967685
3/4"125138200223282315128124104102118115
7/8"129144322355454501194193178178159158
1"188210483541682764287289265240235212
* Sizes from #4 to #10 are in lb-in.

Sizes from 1/4" up are in lb-ft.

† Fine thread figures are for 1"-14.

Grade 2, 5, and 8 values are for slightly lubricated bolt
 
Jack it is 5/16's torques to 12 lbs. Ground on the top left body bolt and the ground web goes there also. I'm sure it will work well thanks for the chart ride a few miles for us next time out. Fred
 
Finially completed!

This project started as Clean the wheels on the inside and went down hill from there. Aligned the rear end straighten up the entire assembly, now there is equal spacing from the fender and tires on both sides. Purchased a Drive belt deflection gauge tool to make sure it is adjusted correctly. Finding the wiring mess that needed a male side plug not stuffed in the other side. I had never looked down in where it was placed all taped up, 2.50 cent plug fixed it. Found a loose Heim joint replaced both of those. I found small rusty spots where powder coating failed repaired those as well. New brake pads may as well do them while it so easy to get at. Adjusted and set the parking brake Also changed the rubber mounts on the mufflers in the rear, again very easy to do with body off chassis.

What did I learn out of the escapade... Although Clean and polished paint sometimes you have to look a little deeper to really see what is really happening. The trike is 10 years old now I think I will be paying closer attention than before it still runs great looks respectable and it is paid for so I think I will keep it as long as the good Lord lets me swing a leg over it. Travel safe Fred Time to put the tools away for a week or so.

DSC01143.JPGDSC01137.JPGDSC01122.JPGDSC01124.JPGDSC01125.JPGDSC01140.JPGDSC01159.JPG
 
Nice job Fred. See ya in June,I hope. Going up to Ormond Beach on the 3rd for 4 day Snowbird gathering & meet some more forum members. Then back to Sanibel for 4-5 days & a ride to Key West. Hi to Jeanne .
 

Welcome to the Trike Talk Community

Join our vibrant online community dedicated to all things Trikes! Whether you're a seasoned rider or just starting out, this is the place to share experiences, tips, and stories about your three-wheeled adventures. Explore modifications, maintenance advice, and rides, all while connecting with fellow trike enthusiasts from around the globe

Forum statistics

Threads
55,378
Messages
804,568
Members
23,945
Latest member
Bullet Proof
Back
Top Bottom