Navigation
Install the app
How to install the app on iOS
Follow along with the video below to see how to install our site as a web app on your home screen.
Note: This feature may not be available in some browsers.
More options
You are using an out of date browser. It may not display this or other websites correctly.
You should upgrade or use an alternative browser.
You should upgrade or use an alternative browser.
How to fix this?
- Thread starter Keystone
- Start date
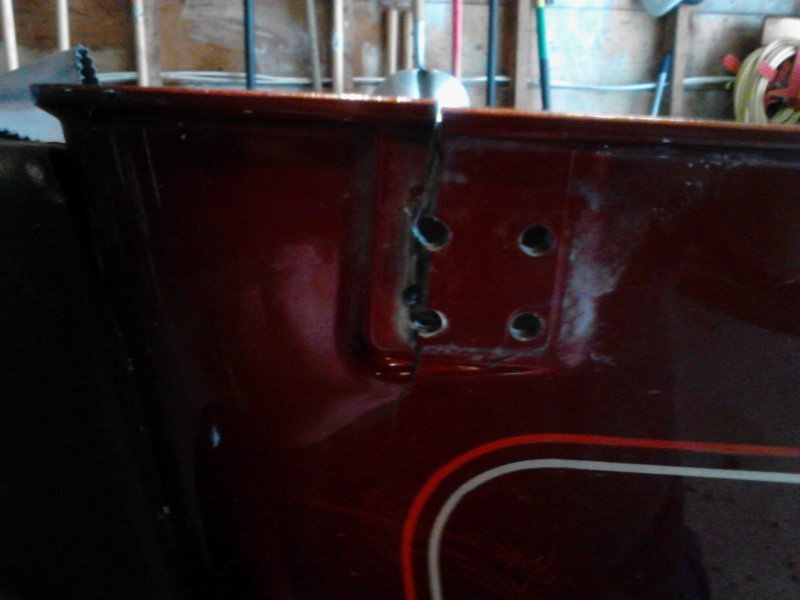
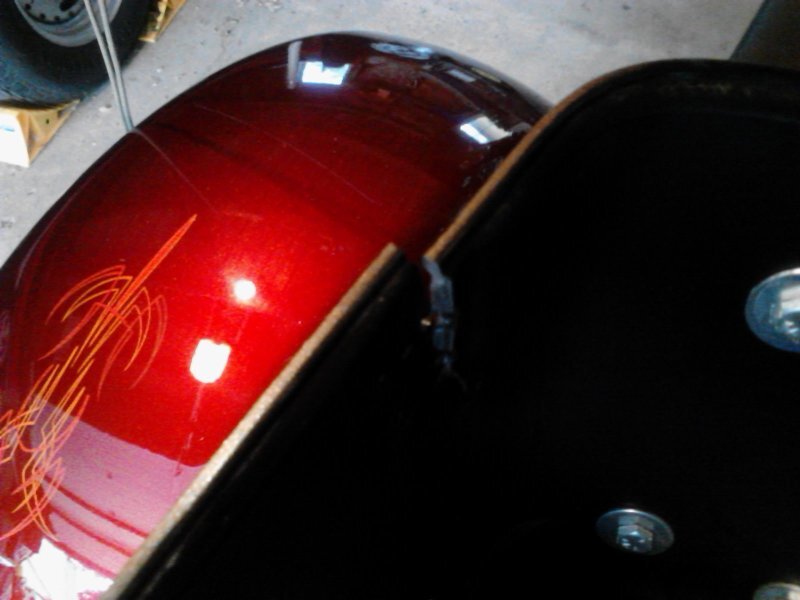
Front hinge area on my Tourpak. Both of them are tearing. Upper will not show up on picture. I tried the Acetone method with zero results. Can not really figure a way to patch either as I doubt that it would stop further damage.
View attachment 22355 View attachment 22356
Material is not exactly robust......
On my old Honda in the past I made repairs using Fiberglass when the truck areas cracked..And held up till the day I sold..In your case you made need to buy a new lower trunk
- Thread starter
- #3
On my old Honda in the past I made repairs using Fiberglass when the truck areas cracked..And held up till the day I sold..In your case you made need to buy a new lower trunk
On an older Harley they were repairable too. It's not just the lower half either. I'm going to have to replace the entire TP I believe.
Go to any automotive paint supplier and ask for what they sale to repair automotive bumpers . This is a two part epoxie that will dry stronger than the original material . It will require some sanding but inside it will not show .
JB Weld sells a plastic repair kit that is mighty tough. I broke one of the prongs off the inside of a plastic side panel for our Tglide about 6 months ago and it's held well ever since. JB Weld calls it their 'Plastic Bonder' and boy is it strong! It comes in a tube with two different compartments so it's really easy. Have everything set up in advance, then just mix the two liquids together. As they start to firm up, apply it on the inside of your tourpak. I'd cover the rivet hole with duct tape first. Also you might want to have something below the work area to support the "goop" until it dries, kinda like a table. It sets up in 15 minutes and can be sanded in 30 minutes. Listed as product #50133 on the back of the card it comes on.
Good luck, this should make you job easier. It did mine.
Phu Cat
Good luck, this should make you job easier. It did mine.
Phu Cat
My question is how does this happen? This should not be happening.. They sure don't make things like they use to..
JB Weld is the way to go.
Pegasus1300
5250+ Posts
In looking at your one clear picture it appears as if maybe your mounting screws are or at one time were loose and vibrated a lot. I would go to a hobby shop and buy some ABS plastic sheets and glue one or 2 thickness over the area. Use ABS glue you can get it at Home depot or lowes. Then redrill the holes for your screws. Be sure to seal the cracks first with the ABS glue then but the back up sheets on.
Rough up area, clean with acetone or mek. Cut f/g cloth or mat 2x larger than damaged area. Mix up 2 part quick set epoxy,wet out f/g. After it dries,redrill holes and reattach hardware. Use epoxy resin, not polyester resin.
What year is the trike and how many miles on it?
This looks like a good time to ask Harley for a courtesy replacement, if out of warranty.
This looks like a good time to ask Harley for a courtesy replacement, if out of warranty.
- Thread starter
- #11
In looking at your one clear picture it appears as if maybe your mounting screws are or at one time were loose and vibrated a lot. I would go to a hobby shop and buy some ABS plastic sheets and glue one or 2 thickness over the area. Use ABS glue you can get it at Home depot or lowes. Then redrill the holes for your screws. Be sure to seal the cracks first with the ABS glue then but the back up sheets on.
Just looks that way in the picture. When the parts are returned to their normal positions they are fine. They were drilled out (rivets) back in March of 2009 when the dealership installed the hinges.
I've tried 2 part epoxy. Not happy with those results. The two part patch will not work. That would move the hinge out which would mean it will no longer allow the lid to mate to the bottom.
Keystone, now that I've looked over your 1st picture again I've thought of a couple other things that may be of additional help to you.
The first order of business to make the repair look right at the end is to get the two edges of the cracked pieces lined up exactly. Do you have a way to clamp the cracked edges in place? Then, as suggested by Retread, locate the fiberglass cloth to be used in the initial layers of the Plastic Bonder, enough to over lap the sides several inches. Sand or wire wheel lightly thru the paint to the plastic you're going to be bonding to. Now you have a good rough surface for the Plastic Bonder to grip to and it will not let go. You'll want to spread the bonder on several inches to the side of the screw holes for reinforcement. The more reinforcement the better. I'm wondering if putting the fiberglass cloth on in one thin coat and allowing it to set up then adding a second coat over the rest of the area might work?
This sure sounds like fun, doesn't it!!! Good luck, hope it turns out well what ever you decide to do. You've got so many ideas here it's gonna be a job just deciding which one to chose.
Phu Cat
I have used this on my old Wing luggage with good results. Just make a patch with some reinforcement included over the break, then cover well. Let the sun hit it directly for 3 min, & you are done except for the finish paint.
I haven't had to use it on Harley parts YET !
http://solarez.com/products/solarez-extreme-3-5-oz-tube/
:Trike1:
I haven't had to use it on Harley parts YET !
http://solarez.com/products/solarez-extreme-3-5-oz-tube/
:Trike1:
I don't see how reinforcing on the inside would cause an alignment problem.Isn't the hinge plate on the outside? When I said 2 part epoxy,not the putty type.
I'm also going to be gone a couple weeks soon. Am interested to see how this turns out as I managed to mess up the tour pak on our '98 EG before I traded for the TG. Had the intention of repairing it but never got around to it so am interested to see how yours turns out. Had not thought of putting the fiberglass cloth in the mix and I think that's what's going to be the thing that holds this all together.
Phu Cat
Phu Cat
Go to any automotive paint supplier and ask for what they sale to repair automotive bumpers . This is a two part epoxie that will dry stronger than the original material . It will require some sanding but inside it will not show .
ThumbUp:Agree:
You can also use a fiberglass repair kit but todays epoxy's are great, a little judicial application, sanding. drilling of new holes and touch up paint should do the trick. Use a clear epoxy so you can even see the original holes.
Even if you use epoxy you can also use fiberglass repair cloth with it.
Practice on something else once to get the knack.
If you use regular fiberglass resin in a plastic, try it on a place that won't bother if it deforms it, or melts it first..


